I love zines. I’ve loved them for years and years. I’ve made many of my own and collected a lot of them. Sadly I’ve lost the couple of hundred that I had collected. So when Johnny of Pencil revolution, the blog told me he was starting a zine, I got excited. I had no idea what he had planned, but I knew it would be good. You see, Johnny can write, and it is always a joy to read a zine written by someone with a grasp of language and a true joy of their subject matter.
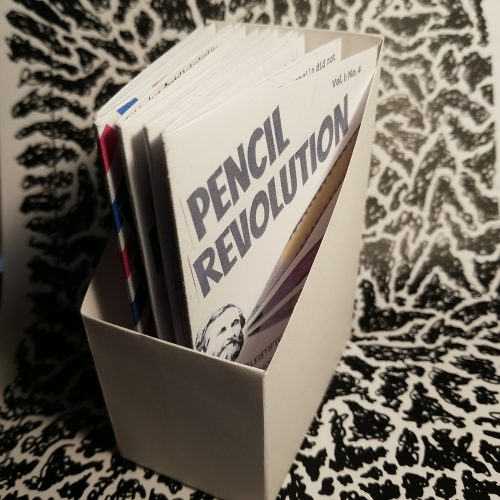
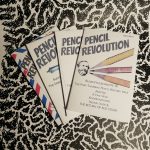
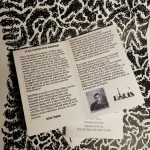
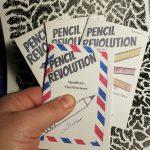
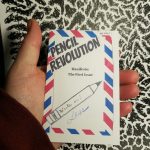
Johnny did not disappoint. His physical manifestation of Pencil Revolution is both precious and informative. He’s made a tiny little zine so packed with pencil history I’m not sure how it can be held in such a tiny package. He uses a single sheet book format that folds up into a sweet little pocket sized book. It would even fit into the pocket of a pocket sized moleskine!
The first 4 issues are all about the history of pencils. With any other writer you might find this dry or boring, but Johnny’s writing style pulls you in and holds your attention. Which I might say, can be really difficult when writing about the history of pencils. (Ahem, looking at other histories of pencils.) He’s clear, conversational, and a bit funny. If you enjoy Pencil Revolution the blog you’ll love Pencil Revolution the Zine, plus it’s inexpensive!
One of the many things I left behind when I stopped blogging as much was my link love posts. Since I’ve been doing more reading of blogs (yay for more time?) I have stuff I want to share again. Don’t expect this to be regular, nah week links will be totally irregular.
I was on Erasable having a conversation about NaNoWriMo with Johnny of Pencil Revolution and Harry of Home Work and other goodies. It was a great conversation.
Brad of a little podcast called The Pen Addict mentioned Useful Journaling, Pencil Revolution, and The Word Distro on his podcast. Awesome, everyone should read zines, especially mine, and Johnny’s and Ed’s.
I’ve been reading about bookbinding again. When did I ever stop? Alisa Golden <3 posted this single sheet binding technique that makes me think about zine possibilities… Just sayin’. Also, a snake book, a pretty common structure that I’ve seen again and again in many books. Here’s a nice art journal format.
The Comp book reviews keep pulling folx over to using the finest cheapest of stationery goods- the composition book. The Write Experience has the right experience with a classic- the Pen+Gear composition notebook all the way up in Canada.
If you’ve been reading CSS for more than the last few years, you realize this blog didn’t start out as a review site. I started out blogging about a break up and my attempts to find my footing in my new single life. It quickly morphed into an exploration of art, journaling, and bookbinding. Soon the old title of the blog no longer fit and I chose Comfortable Shoes Studio as an homage to a gag project I’d made in college. I moved my blogging to CSS and the transition was easy.
Here I started to write about my art and other projects. I was open about sales, ranted about eBay and PayPal fees increasing and all the other issues that occurred with being an artist and craftsperson online. Through all of it I was open and transparent about the business side of things and about the process of making art and art journaling.
Reviews were (are) a side effect of making art and writing. I did product reviews because I was making art and using the materials and readers had questions.
Then life got complicated. Work got complicated. I went back to school. I changed jobs, a couple of times. I made less art, but I had a lifetime of using art materials and could write reviews with much less effort than writing about making art, which I was making less and less of. As for bookbinding? I do less of that than ever because my wrists and hands ache after a binding session, the act of pulling a needle through paper and board causes pain like no other. So I just don’t do as much of it as I used to, it hurts too much, and if I’m honest, it hurts a lot to think about not being able to bind like I once did.
I’ve gone back and looked at some of my old posts, posts where I’ve “shown my work” when it comes to art, zines, and the business of art. Now that I’m in a more stable place in my life I hope to reclaim some of my writing about more than just reviews.
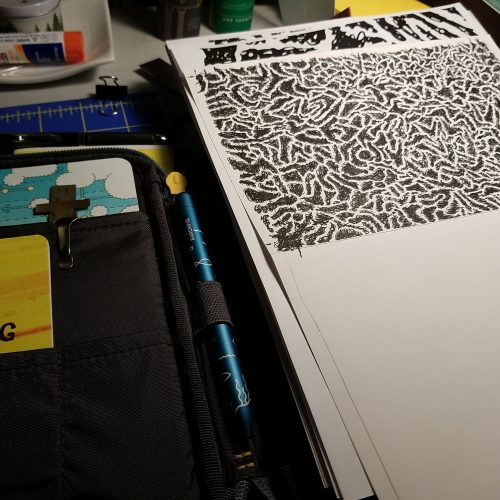
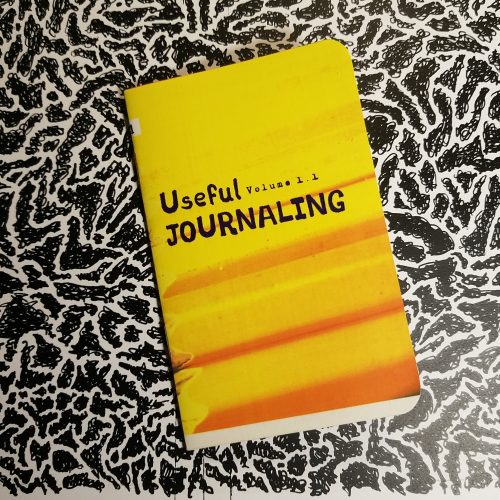
I wanted to write a bit about the creation of Useful Journaling. While it is a culmination of a lifetime of journaling, it is also about teaching myself how to paginate and do layout for printing and binding. In the past I have always done my layout with a physical original. I’d cut and trim things to a paper copy and make a first really good copy of that which I’d print from. I really like the physical aspect of making a paper original copy. There is something really nice about sitting down with a glue stick and craft knife and making that first original.
I like learning things, I saw learning how to do layout on the computer as a challenge. And wow is it. I hate and love it. I love how clean it can make the flow of words from page to page. I write all the zine in one doc and cut and paste it into Publisher* and it just flows through the document. Easy. I then add in the various elements I’d use glue and scissors for a physical copy but instead I photograph them and crop in the computer. It’s similar skills but all in the computer. It was a challenge to learn how to bring it into the computer but I know I can also make a physical original which I can scan and turn into a PDF and print from that.
Another challenge is printing. I really like the idea of a color laser printer for the cover and inserts. But WOW are they a total pain in the ass. Of course the one I was gifted is old and I needed to order new parts and do a thorough deep clean, but it hates printing on smooth cardstock. HATES it. So future issues will use coverstock, which means I can possibly add 4 more pages.
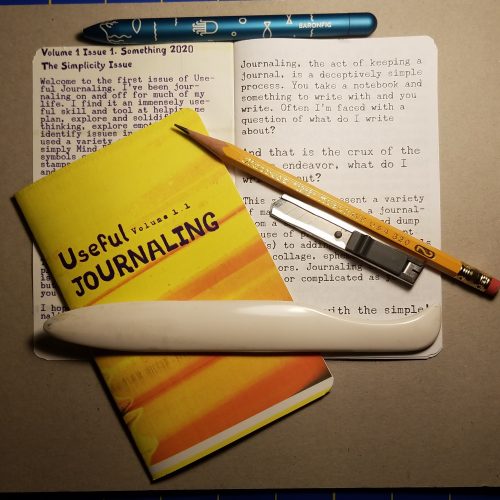
Which brings me to another thought out aspect of UJ, the size. I wanted the zine to fit into the pocket of an A5 notebook, so it had to be pocket notebook size or a quarter sheet of US letter sized paper. I also wanted it to ship for the cost of one US stamp in the US, even if I added extras (and I did) so I went with pocket notebook size. The number of pages was determined by weight, I knew if I went with 16 pages I’d stay below an ounce for that single stamp. The hard part is that I WANT to make it longer. I want to pack in the content. I also wanted to keep the font large enough that it could be easily read. I get frustrated with zine with font sizes that are too small to easily read. Anyway, I’ll be chronicling more of my art adventures here, but still be writing product reviews, just less of them. Continue reading →
I read once that the older Baronfig Squire pens accepted some gel ink refills. Imagine my surprise when mine did not. Apparently somewhere along the way things were redesigned and the Squire lost the ability to accept a standard gel ink refill. It is non-reversible, but the pen will accept the old refill once the mod is completed.
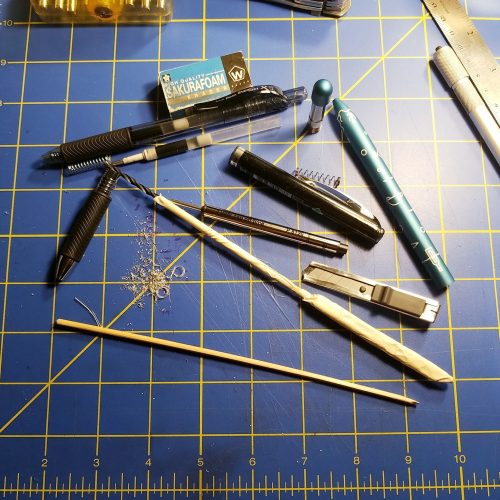
To do this mod you will need:
A Baron Fig Squire
1/8th drill bit for wood
Skewers and masking tape
Pentel Energel Pen- you need the refill and the spring
Patience
Craft knife
I went through the process of stuffing every gel ink refill I own from Pilot G2 to Pentel Energel to Zebra Sarasa into the pen, and each and every time, blocked. I poked around with a skewer, and found that there is a lip down inside the tip area that holds the narrow tube that holds the pen’s tip. It is snug to stop the refill from rattling around. Since I really like the Energel Pro for sketching doodling and general writing, I measured it against the Schmidt P8126 refill I usually use for the Squire. There was exactly 1mm difference in the diameter of the tubes, and the Energel refill’s tube was roughly 1/8th of an inch.
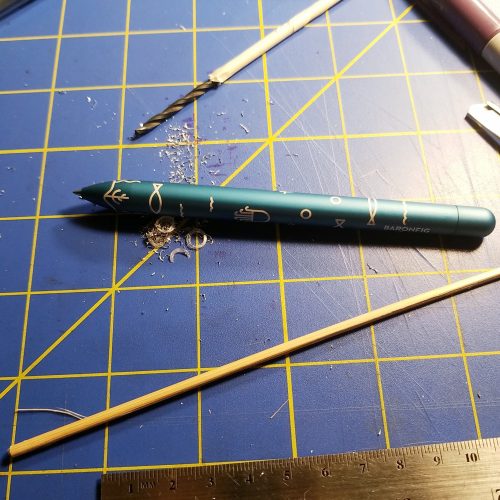
I decided to do this mod by hand, for many reasons but I did not want to take a chance of removing too much material and damaging the Squire beyond use. I’m not kidding when I say the Adrift is my favorite Squire. I grabbed a brand new 1/8th drill bit intended for wood and taped it to a wooden skewer, yes, masking taped it to a skewer. Again, this was to force me to use a light hand and prevent me from binding up the bit into the metal.
The skewer also allowed my short bit to reach deep into the pen. It is important to point out that you drill the INSIDE of the pen, NOT from the tip in. So drill inside out. While I do not recommend it, if you chose to use a drill press for this mod, you’d need an extra long bit.
I bored the inside a small amount then test fit. Then repeat that until I had bored out roughly ¼ inch or 5mm deeper. I attempted to use the Squire’s spring. It didn’t work with my Energel refill. The Energel spring did work. Even when I went back to the original refill I still needed the Energel spring. The Energel refill will need to be cut between 76 and 78mm from the base of the ink reservoir, not the tip, depending on how far you would like the tip to emerge.
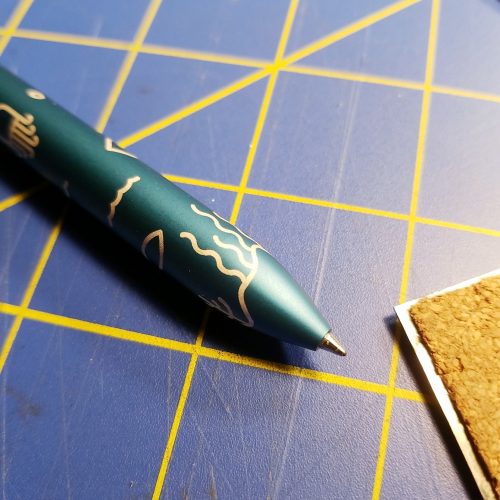
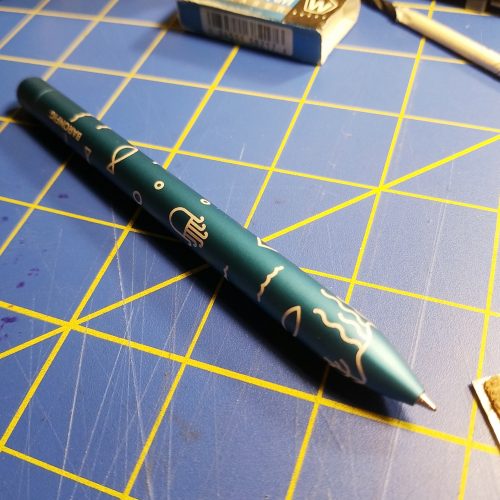
Results? It works perfectly with the Energel refill. The metal part of the Energel tip fits perfectly into the Squire and there is no rattle or more movement than you usually see with a Squire. It’s smooth in deployment, the knock works perfectly and man that gel ink is great.
You might wonder why I went with the Pentel Energel Pro over say a PaperHate Inkjoy or Uniball Signo or even the Sharpie SGel or Zebra Sarasa refill. I really like the Energel Pro for sketching but also writing. It is also the only refill available in a 12-pack. I can buy singles or 2-packs of all of the mentioned refills but I really wanted a 12-pack. When I’m sketching, drawing and even writing a lot, I drain gel ink pens. Buying a 12-pack feels the most economical and ecological. I know a lot of people will buy entire pens and just use the refill. I feel wasteful doing that, so I’m going to stick with buying refills for this pen.
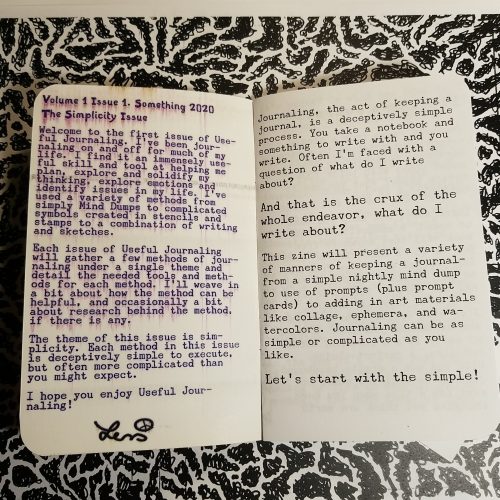
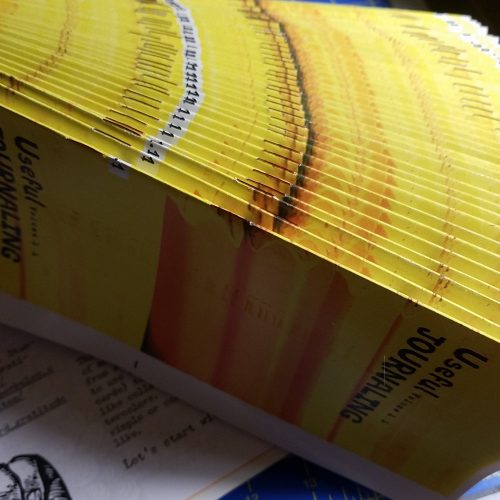
It has been awhile since I’ve made a zine. I decided it was time to take the manuscript that I wrote about journaling and work it into something. I’ve taken that old manuscript, torn it apart, lumped pieces of it into themes, and I’m putting those themed chunks and making pocket notebook sized 16 page zines. I chose to make this zine small so it would fit into the back pocket of most A5 or 6×9 inch journals.
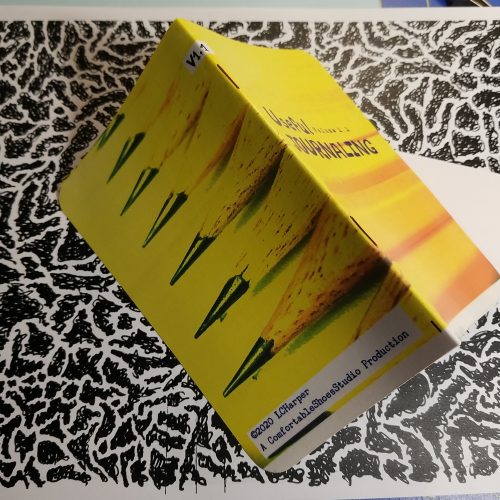
The theme of the first issue is Simplicity. Each technique explored is deceptively simple but can lead to wonderfully deep and rich content. This first issue explores an evening mind dump, gratitude, and using prompts. Future issues will explore fear of the white page, picking out materials, and more involved journaling techniques.Useful Journaling is $2.50 plus 50 cents for shipping in the US and $1 worldwide. For now it is only available via my Ko-Fi shop. Ko-fi shops are great for creators- they don’t take a cut if you are a Ko-Fi gold member (I am now) and allow the maker to post all sorts of different items for sale. PayPal still takes it’s cut (which is hefty) but this is a step in the right direction for all makers.
I love to boost friends of the blog, Johnny Gamber of Erasable and Pencil Revolution has started to putout a mini zine of Pencil Revolution! It’s all new content and images and I’m excited to get my copies in the mail soon!
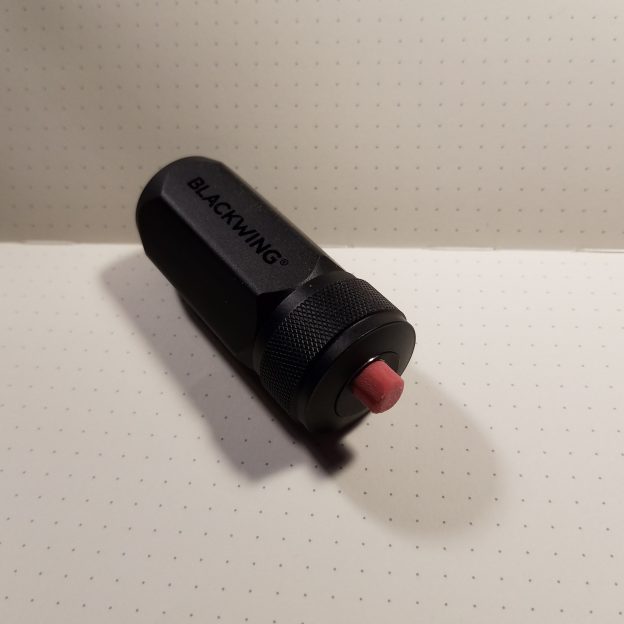
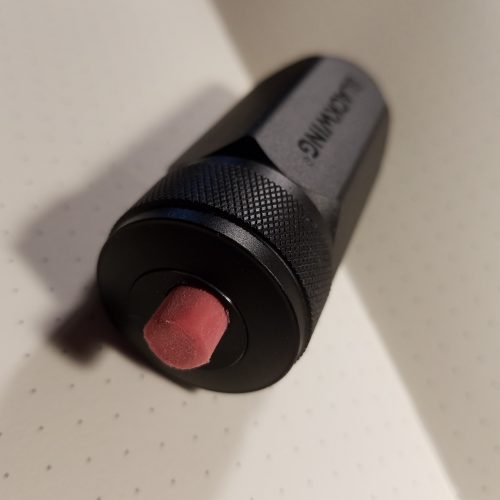
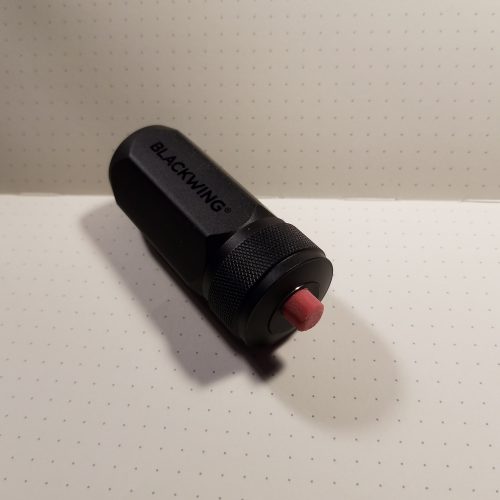
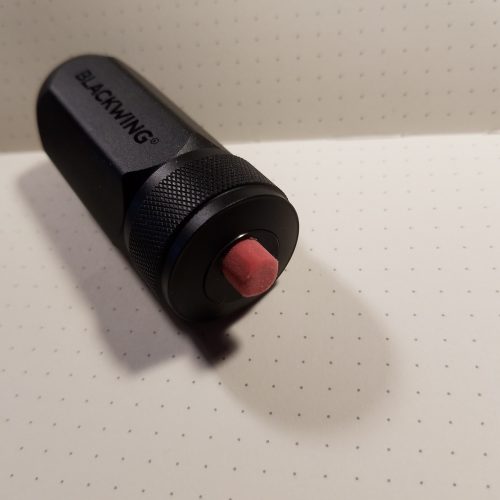
The Blackwing One Step Durable Point Sharpener does an okay job, but if you want to carry it as pocket bling, well, you have to understand that it is a lot like carting around a salt shaker full of graphite dust in your pocket.
It turned everything in that pocket a lovely shade of silver gray, and my fingers came away with a dusting, and the graphite leaked through and onto my thigh. UGH. C’mon!
I decided I needed to cork it up. I’ve cut two little plugs. One from a wine cork that feels fiddly and works well enough and one from a pink pearl. you cannot pull an eraser from any average sized pencil, a semi-jumbo or jumbo could be whittled to fit.
I sat with a craft knife and whittled the edge of eraser down and plugged the hole. Now I can carry around the BWOSDPS in my pocket and not get dusted with graphite. Sweet.
Getting better sound doesn’t have to cost a lot, but it can be incredibly expensive. I did a posting the RSVP Stationery Podcast group awhile back about tests I did with a bunch of stuff that I had on hand- headphone, mics, lav mics, and my phone. The results were interesting.
The biggest and most important thing for getting better sound is reduction of background noise. That means turning off fans, heaters, the washing machine, and dishwasher. If that can’t be done then there are a number of ways to reduce noise.
My favorite is building a tent out of cushions or pillows. You can also build a tent out of a blanket draped over a chair set up on a desk as my podcast co-host Lenore does. When I traveled to Maine and stayed in an apartment I had no idea how to reduce some of the noises, so I built a tiny tent out of the available pillows. When I record in my work office after hours, I use an assortment of pillows from around the offices. I’ve also read of folx making a tent out of couch cushions. After you build your tent you stick your mic in there and talk into it. Make sure your mouth is about 6 to 12 inches from the mic, and start talking.
If that’s not working for you, think about going into a closet. You know I’d never tell anyone to go into a closet but sometimes it’s a great way to reduce background noise, once you shove all the clothing into the back it’s going to absorb a LOT of noise.
When I decided I wanted to start recording Manuscripting Pod from my phone I recorded snippets of audio all over the house, office, and in the car. I tested it with a variety of mics too. I wanted to see where I had the least background noise, without alterations, so that I could start recording with as little work as possible. I walked around, recorded 10 seconds of audio and a bit of silence, listened, tweaked things and repeated.
To start I tested out a lot of the headphone mics I had on hand. I found that I got good clear audio with my Monster replacement cables for my over ear headphones. I also got great audio from my HTC ear buds that came with an old phone. My Samsung ear buds also sounded decent. Though I should point out that I tested a pair that was virtually unused and a beater pair I used a lot. The pair that had been coiled up again and again in my bag and had been abused sounded awful. The Monster mic was very sensitive and depending on where my head was turned picked up my breathing. If you want to get into recording super cheap, a pair of new earbud or a new cable will be the cheapest way into recording.
I found that minimizing contact noise- the sound that occurs when you move your head around and the cables rub against clothing- helped to improve sound quality. I used tiny binder clips to secure the cable and mic to my shirt. This worked wonderfully.
The next step up in audio is a decent lav or lapel mic. They range in price from a dirt cheap $12 up to hundreds of dollars. A $30 mic can perform really well. Make sure you get a dead cat muff or foam muff for it. I prefer the fuzzy dead cat muffs myself and use one on all my mics. I find that a foam muff seems to muffle my voice a bit and can still pick up wind.
The next step up is a dedicated podcasting mic. I can only speak to the mics that I own or have used and they range in price. I started out with a Zoom H1. This is a great mic if you want to record all the sound in a room, it’s omni directional, uses regular batteries but can be powered via USB and will record out and about on it’s own. It’s great for music and general audio but getting it set up to record a podcast is a PITA, in that it gets all the background noise, which means you pay for ease and portability with a lot of processing when you are done. Linked is the H1n, the new version of the old H1. If you search youtube there are a number of videos on splitting audio by using a lapel mic and headphone splitter. I’ve used a splitter with my H1 and it works great as a tiny recording studio.
The next step from this is something like the Samson Meteor, which is what my other podcast co-host used. (He now uses something much more expensive) Or something in the same range is the Blue Snowball or the Amazon ball mic.
So after you decide how and with what you are going to record, how do you edit? We use Audacity for RSVP. It’s free and works great. I use this instructional Google Doc for editing and lean toward minimal processing for the podcasts. On my phone I record and edit with the paid version of AudioLab. It lets me record, edit and splice in my intro audio for Manuscripting Pod. I wouldn’t use AudioLab for hour long podcasts, but it does well enough for stuff up to 20 minutes long.
No matter what you decide to record with, if you plan to travel with the mic, get a case. Mics are sensitive and expensive. If you toss it into your bag along with your pens, pencils, and drop it or toss it around it’s going to break. My H1 has a hard case I adapted from a tool. My AmazonBasics Yeti knock off doesn’t have a case because it doesn’t travel. My mini mic has a soft sided neoprene case that I added more foam to make it even more cushioned. The lav mics are in another soft sided case- one that was originally for a small camera. take care of the equipment and it’ll last a along time.
As part 2 of this post series, I figured I’d link to a few of the things I use to record audio and video. Your mileage may vary and you can adapt a great deal of the things you have around you for better audio and video.
My favorite lighting tool is daylight bulbs, at least 60w equivalent LEDs, preferably 100w. They light a good amount of space with a nice clean and cool light that looks good with my skin tone and gives my art true to life coloring. You might want to look at soft white bulbs as well, because you could look different under daylight bulbs. I pick up a 4-pack every time I am at the hardware store. My local wally world does not carry day light bulbs. Weird.
I use cheap clamp on aluminum reflectors also called shop lights. They are under $7 at my local wally world, but you can get a better and larger reflector at the hardware store for about $12. The $7 version at wally world are designed for a 60w incandescent bulb, they can usually handle the heat output of 60 watt LED. Think of your budget. You will need 2 of these plus the bulbs listed above. to soften the light you can use a couple of binder clips to attach a piece of vellum paper or other frosted plastic to the reflectors. This should only be done with LED- incandescent or other styles of bulbs get too hot for this.
I also have a pair of smaller desk style clip on lamps. These have a small reflector and I use them to light up my desk with a more focused light. These are great for when I’m shooting art making.
If you don’t have the cash to buy lamps, pull lamps from around your house and remove shades to see what happens.
Set up the lights and shoot selfies with lights on and off. Move lights around, tip them and lift them. Take more selfies. Seriously, selfies are going to help you figure out if you look good, washed out, greasy, or red in the face on camera.
A tripod. This might be the most essential piece of kit. You can get a cheap tripod or an expensive one. I favor cheap tripods because I can get more than one for the price of half an expensive one. If you can’t afford one, look into borrowing one or getting a broken one and duct taping legs or whatever in place. You can clamp lights onto the tripod, you want the lights slightly ahead of the camera so the camera doesn’t cash shadows. Checkout some of the videos I posted here to figure out more about lighting.
Once you have the tripod set your camera up on it and take more selfies as you move the lights, yourself and the tripod around. Test every set up.
A cell phone mount for said tripod. There are hundreds if not thousands of options here. I’ve got a stick on mount that works well enough. You can pick up a number of mounts for cheap.
Extension cords and a surge protector. You will always want more electrical outlets and you want to protect your camera, phone and other equipment from surges. I like the squid surge protector and this cone style. Also, you are going to want a few USB charging plugs and more USB cords (or lightning) than you think you need.
A set of spring clamps will be incredibly useful for containing cords, cables, and making sure that those clamp lights don’t move around. I pick up a hand full of them everytime I go to Harbor Freight.
Consider your background when you shoot video. If there are lights and they make your face go dark, shut them off. Or swap out a lower wattage bulb, sometimes a slight light in the background can help define you from your background. Also some light keeps you from looking like you are in a cave. If there is a window, pull the shade or turn so that the window does not back light you. If your background is super busy consider taking up or hanging up a blanket, sheet or curtain to minimize background distractions. If your background is busy consider getting a garment rack and using it to hold up a blanket or sheet. I find these for free all the time. The linked version is the cheapest, but for a bit more money you can get one on locking wheels.
Clearly a lot of this stuff are things you need to purchase if you don’t already have them, but you’d be surprised at how much of this stuff you can pull together from various and assorted items you already have around the house. Especially the lamps, cords, and cables. A sheet or blanket makes a great backdrop.
So all of that addresses lighting yourself for video. Next up audio.
One of the very difficult aspects of working from home is getting accustomed to using video conferencing tools or suddenly being thrust into making instructional videos for your students. It’s scary to do at first but with a little bit of help you can do it and do these things well. Lighting, audio, and video are all easy to do once you get past the initial learning curve. If you’ve been here awhile you know that for many years I made art instructional videos before i went back to school, and if you’re new you just learned something about me. So I’ve collected a few resources to help you shoot better video with better audio.
If you work for a larger organization- like a college, university or school, you may have access to cameras and mics. Ask your school’s technology office, IT Desk, or librarian where these are located.
Otherwise use some stuff you may have around- old cell phones make great web cams, and you can adapt cameras to work with your laptop with a few apps downloaded. This video from Tested has some great apps and programs linked. A big shocker is that the comments are unusually helpful with additional apps and resources. For the first time in my life I can say, “read the comments!”
While this next video suggests some pricey lighting options, it has a great section on lower end lav mics- those little lapel mics the folx on the news wear. As for lighting, you can pick up a few cheap reflectors from either of the evil massive companies (links to follow) with a few 60 watt LED daylight bulbs. Placing them around strategically will give you decent light for most of your needs.
You can also use an old cell phone combined with a lav mic to create a wireless solution for audio capturing. Plug the mic into the old phone and hit record. Syncing it with the video can be a pain, but it can be totally worth it for the improved audio.
If you follow me on twitter, you know I’m not a fan of Zoom, but many companies and schools use it. Do yourself a favor and look at how to lock down some of it’s more invasive qualities, then use this guide to get better sound. Yes, part of that is going to be getting a better mic. If you are creating any sort of content that you hope to use in the future, please invest in the $30 lav mic suggested above or the $12 below, or when available again, a podcasting mic. At the very least look at getting a new pair of earbuds or headphones that you aren’t going to bundle up and take everywhere. Don’t use your daily commuter beater headphones to record your audio content. I guarantee they will sound terrible.
Another dead simple and useful thing to create while you are doing online classes, is a teleprompter. There are many tutorials out there, but this one is kinda funny. You can use a piece of class or even plexi (yes it will work) and an app plus a smart phone or tablet. For android, you can look up the app Elegant Teleprompter.
This video looks at some of the settings on a camera that you can address to improve the quality of your video. It also suggests $12 lav mic that sounds great in his videos. The $100 price tag doesn’t account for the camera or lens. Combine some of his lighting and mic suggestions with the camera phone and your video and audio quality will jump.
I recently watched a Zoom training put out by an Ivy League school, the content was wonderful, but it was destroyed by poor production qualities. The presenter used old headphones and mic that didn’t pic up his voice well, his camera was terrible and the other presenters sat with their cameras pointed at windows or lamps. Not only could I barely hear the content, but the video was painful to look at. Additionally, the presenters had a great deal of difficulty using Zoom. I was glad that I had not paid for the presentation, because the production quality was that bad.
I suggest before starting video conferencing, walk around your space and take selfies, adjust lighting until you look good. Sit in the chair or in the location where you’ll be presenting and adjust the camera so that it is at least at eye level, or better yet slightly higher. I like 6 inches higher than my eye level. Remember, no one wants to look up your nose.
Look at your background, is it busy will it detract from your content? Consider moving things around, taking down art or photos. turn of the light behind you, draw the shade closed. Turn on a light in front of you to offset any background light. You do not want things so bright in your video that it hurts to look at your darkened face against a super bright background.
In terms of audio, test record. walk around with your phone, record audio and listen. How does it sound? Is there stuff in the background? echos? You can soften a lot of echoes and weird noises with the addition of curtains and hanging some soft things up. You can also place pillows behind and around the mic (if your using a larger podcasting mic that ins’t directional) to soften some echos. Turn off fans and AC units. Liberal use of mute will help qality when you aren’t talking.
 I went through the process of stuffing every gel ink refill I own from Pilot G2 to Pentel Energel to Zebra Sarasa into the pen, and each and every time, blocked. I poked around with a skewer, and found that there is a lip down inside the tip area that holds the narrow tube that holds the pen’s tip. It is snug to stop the refill from rattling around. Since I really like the Energel Pro for sketching doodling and general writing, I measured it against the Schmidt P8126 refill I usually use for the Squire. There was exactly 1mm difference in the diameter of the tubes, and the Energel refill’s tube was roughly 1/8th of an inch.
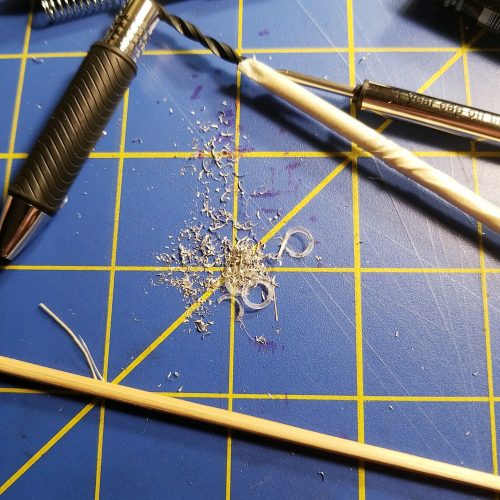
 Useful Journaling is $2.50 plus 50 cents for shipping in the US and $1 worldwide.