Category Archives: technique

Maker: Writer Processes- Using Docs

A slightly different port today. If you’ve been reading for awhile you know that I write novels (4 years winning NaNoWriMo) and I’ve been using Google Docs for this since, well, what seems like forever. I adopted it early on as a way to work on the go and on my breaks at the DayJob, as well as for my thesis in graduate school. My work style has evolved as docs has evolved. Let me go over my current method then we’ll compare how other writers’ tools work in future posts.

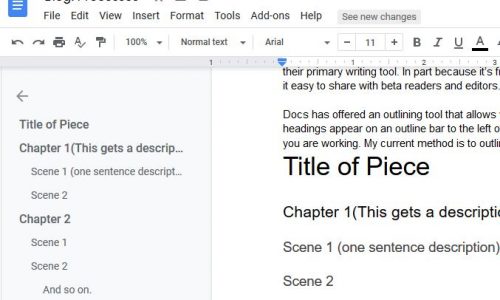
Docs is primarily a place to churn out words, and it’s great for drafting large volumes of words especially if you are collaborating with others. Several self published authors I know use docs as their primary writing tool. In part because it’s free and available on all their devices. It also makes it easy to share with beta readers and editors.

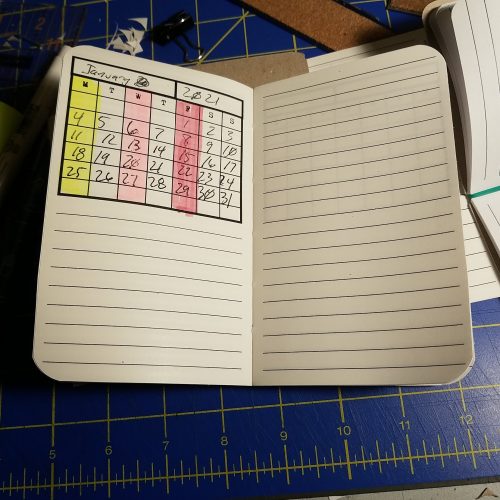
Docs has offered an outlining tool that allows you to create an outline and add headings. The headings appear on an outline bar to the left of your work area. You can toggle this on and off as you are working. My current method is to outline in a doc as so: (I apologize for this not looking like the outline style in docs, it did not translate well to WordPress.)

  • Title of Piece
  • Chapter 1(This gets a description)
  • Scene 1 (one sentence description)
  • Scene 2
  • Chapter 2
  • Scene 1
  • Scene 2
  • And so on.
Outline

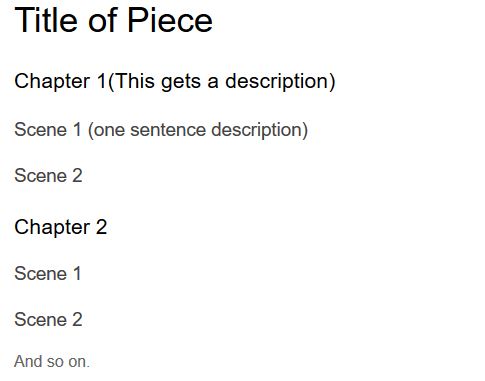
This is what it looks like in the writing area.

Outline on left bar.

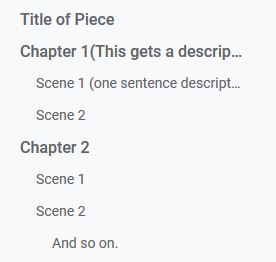
This is what the outline looks like on the left bar of the page. It looks very much like a table of contents.

All of this appears in the sidebar as soon as I designate them with a heading style. This is easily accomplished with a quick highlight and select.

The side bar lets me navigate through my document quickly and easily. Say I want to work on scene 5 in chapter 10, well I can easily find that one the side bar and navigate to it. Or if I decide to change a character’s last name in chapter 3, and she’s not mentioned again until chapter 10 I can toggle to chapter 10 and leave myself a note, “Don’t forget Jane’s last name is now Dough not Doe.” I can highlight this or use a comment on the chapter title.

How has this worked in practice? Really well. It’s simple and brainless. While I didn’t plot my 2020 NaNoWriMo novel once I started and got an idea of the characters and setting, I plugged in chapter ideas and went back into the story and added in scenes and chapters as I needed them. It was very flexible. I wrote some of the scenes out of order and then cut and pasted them into the spaces where they needed to be. This was easily accomplished by toggling through the chapter and scene headings on the outline bar.

I use a similar method for the blog. I write a long list of the items I have for review, and turn each one into a heading:

  • AmazonBasics Mechanical Pencil
  • Wing Sung 601
  • Jinhao 51A

Super easy and this lets me quickly and easily toggle through my list of items and find them when it comes time to post them to the blog, then it’s a quick copy and paste.

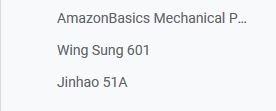
I mentioned in a recent post that docs worked better than ever before for my NaNo win. In past wins I broke my novel up into 10 to 15K docs. After that loading took forever and it wouldn’t register as I typed, then an entire paragraph would slooooowwwwly load. It was enraging. I’d stop typing waiting for the doc to catch up with me. Loading the doc when I opened it would also take forever, the larger the doc the longer it would take. I remember waiting for one doc to load and it took a full five minutes! Not this year, even at 40k words the doc loaded quickly and kept up with my typing. It wasn’t until I hit 45k that I noted longer load times and any lag in what I had typed loading.

Some positives:

  • It’s free
  • Available anywhere I take my phone or have access to a computer with wifi.
  • Works well on all my devices, now that I have docs sideloaded onto my Kindle.
  • Outlining is fast and easy.
  • Load times and lag are better than ever before.
  • Many add ons to make it work better.
  • Super easy to just open up a doc and write.

Some Negatives:

  • Moving scenes and chapters is hard if you work out of order, cut and paste can leave you with missing work, create a copy before you cut and paste stuff!
  • Significant lag times at 50K or more words, even on high speed internet.
  • Add ons can slow the app way down.
  • No concentration/typewriter mode. (One of my favorite tools in JotterPad and Dabble.)
  • No dark mode.
  • Uses Google Drive storage and does not back up elsewhere, so if google deletes your account, well, you’re SOL.

Obviously this has worked for me thus far. When I mentioned the idea of “if it ain’t broke why try to fix it?” to a friend, she suggested that I might LIKE the ease of use of a few other apps and sites. That the ability to easily drag and drop a chapter like a file is worth learning a new process. I’ve requested review access to a few pieces of writing software and apps. Thus far the learning curve isn’t that high and they are easy to use. More on that in future reviews.

State of the Art: Photo a Day

Waaaayyyyyy back in 2009 Polaroid introduced the Zink Pogo printer. A cute little printer that spits out 2×3 inch prints on sticker paper. Sweet little journaling tool. I of course immediately asked for one for the holidays. And my lovely partner managed to get a good deal on one and I loved it, for 50 prints or so. 

Other folx got hundreds and hundreds of glorious little stickers. Not me. I had a dozen or so prints before mine was a streaky mess.

It ended up in a drawer.

In the great office clean out of the Covidalypse I found the dusty little printer and thought I might dust it off. I did and it was still streaky. I headed to the internet and found loads of info on cleaning it. So I tore it apart, which was really easy and only around 8 screws or so. I was able to clean some little bits of what looked like… glitter in there, as well as some, big surprise here, dog hair. I gave the roller and print head a good swabbing down with rubbing alcohol with a q-tip, then ran several sheets of super thick cardstock through it.

This is not a pogo print but an image I considered for a pogo print.

No more streaks.

Well, mostly no more streaks. The pogo works best on low-res images. So it is helpful to take smaller pictures. I started this project off using Lightroom. Bad idea, it automatically saves in the highest res option on my phone. Also the Pogo prints in 2×3 images, so I used the basic camera on my phone and set it to 3×4 on the lowest res setting available. This particular option also saves it to the cloud so I have the option of editing it down on my laptop. Sadly the polaroid apps that are still available do NOT work with the Pogo. I can’t get any of them to pair with it, or even print to it. BUT I can snap a picture with their app, save it, and print manually, the way the pogo always worked. It takes the picture in the right 2×3 ratio.

Anyway, the goal of this little project is to snap an interesting pic once a day for at least the next 50 days and to journal around a page along with it. If I find that this is a useful journaling practice for me, I’ll continue it with another 50 pack of paper. We’ll see what happens!

An interesting aside to this is that the battery died on the Pogo and no one makes a replacement pack for it. I ripped the old battery apart, picked up a 2 pack of AA battery holders soldered the leads in place, and made my own. It’s not at all pretty but it does the job and is better than being tethered to the hideous and HUGE wall wart plug this thing has. The wall wart on this thing is inexplicably huge. I will also add that Polaroid’s CS when I asked about the battery was prompt and curt. Funny thing, since making the battery pack I have yet to take the Pogo anywhere, so I guess a useful thing is to consider if you will actually use the Pogo on the go.

Anyway, we’ll see how long I can do a photo a day.

https://dronebygg.wordpress.com/2011/05/21/how-to-repair-your-polaroid-pogo-printer/

Maker: Plans for Supporters

A unique feature that Ko-Fi offers is that I can designate certain posts for supporters only, so anyone who has supported within the last 30 days can unlock certain benefits. I’m currently figuring out how I can utilize this in the best way possible. I don’t necessarily want to create a subscription model, yet.  Though that is a future plan. What I want to do is offer certain items to supporters, at any rate of support.

As of yesterday I offered a free printable downloadable PDF of a pocket sized, undated 12-month planner for members of the RSVP podcast FB community. It has a 1-month calendar on the left page with lines and college ruling on the right hand page. I want to offer other similar printables for free to supporters of this blog. The first month I offer these bonuses I’ll offer them here so that past donors can benefit. I also hope to design some in half page size as well.

Mostly I’m looking at and exploring the systems that broke down around the Covidalypse and the stress of the hybrid work from home and office work. I’m also looking at what has worked in the past and tweaking the little things.

For the blog, the month on a page and then lines to record a variety of ideas and plans has always worked when combined with my long list of blog posts to write in my Every Thing, Every Where Journal.

Below, you will find the free printable 1-year month per page with notes area on the right hand side. It is a PDF and is intended to be printed double sided. Follow instructions for your printer for double-sided printing and these instructions for stitching a simple pamphlet stitch.

One Year Month on a Page Undated Planner Printable

State of the Art: Writing Posts and Other Stuff

I’m surprised that I’ve never written about my digital writing tools on this blog. I’ll link to the tools and apps you’ll need to recreate my set up.

First I have a low end Lenovo laptop that I use as my main machine when I’m at home and at my desk. I had for a very long time a mid-level Asus that served me well for 7 or so years. The Lenovo is not even half the machine as the Asus. Given that most of my work is writing with some minimal image processing, which I largely do on my phone, the Lenovo has enough processing power for most of my needs. I’d enjoy being able to do a multicam video set up, but that can wait until later.

When I’m out of the house or even sitting in my reading nook, I use an Amazon Kindle Fire 7 inch (formerly an 8 inch.) The 8 inch has more processing speed and power over the 7 inch and if I had it to do over again I’d buy a second 8 inch instead of the 7inch. The 7 inch is the better machine for reading, so win some and lose some. 

I pair this with a bluetooth keyboard, mine is the no longer available AmazonBasic BT Keyboard for android devices. If I ever need to replace it I’ll go for this one. I have a nice thick heavy duty case for this keyboard. I used to just throw a previous version into the laptop pocket of my backpack. I killed it.

The results of this, even with the cases, is a nice portable set up that is very lightweight and can travel anywhere.

I have spoken about my philosophy of NEVER writing on my work computer and only ever on my breaks. This helps me stick to that philosophy. Even if I don’t have my tablet with me, I can pair that keyboard with my phone and work in an ultra lightweight manner. Using your work computer leaves you open to all sorts of legal issues. A friend of mine had many issues when he worked on his novel on his work computer. His job had many down periods and it was a common occurrence, and accepted practice, for employees to work on school work and other nonwork related things when on the clock. But his bosses didn’t seem to think that working on a novel in those down times was okay. When he left the company it was very unpleasant and they made noise about coming after his novel and money made from it.

Anyway. To make the Kindle fire a good tool for writing you need to sideload the Google Play store, Drive and Docs. I also use the app JotterPad on my Kindle Fire. Sadly, JotterPad isn’t available for my laptop or I’d use it there as well. They do have an online version which does not seem like it is able to link to my account. JotterPad syncs across the cloud and saves to DropBox or Docs. They’ve integrated a lot of new features which you can learn about in app and on their website. I don’t use them YET, but might double down and more out of the minimal paid version of the app I’ve been using for years at ths point. Docs also syncs everywhere faster than anything else I’ve used.

In the years I’ve been using Docs as my main location for drafting, it has gotten leaps and bounds better. In the past my novels needed to be broken up into 10k word lumps, compiled into one final dreaft at the end for speed of loading and processing. In the past, loading took forever on any speed of the internet. Currently I’ve drafted my entire 50k nano novel into one single doc and while it takes a moment to load, it no longer takes 3 or 4 minutes, simply 30 seconds at most. Even on my older Android phone it is faster than ever before.

Anyway, once you have sideloaded the Play store you can load other drafting apps to the Fire, and use it to read. For me it has become an all in one machine I take with me everywhere. Battery life with BT is an issue, but a small portable battery pack solves that issue much of time. I have 2 that will fully charge the Kindle twice before needing to be recharged. No links to either since I have no idea of their brand or where my partner sourced them. I inherited them after she broke them and I repaired them.*

I will note that I do not have ANY social media on the Fire. I’ve disabled Alexa and eliminated pretty much everything but the reading apps, a couple of music apps, a Pomodoro timer, and the writing apps. I’m pretty weak willed when it comes to distractions and eliminating the ability to easily scroll over to FB or Insta keeps me on track. Continue reading

State of the Art: Making the Zine

The physical act of making a zine is usually a pretty easy endeavor. After you write up the contents, do your layout and print and bind. Most of the time it goes smoothly.

Not this time. I’m not sure what happened to my head when I was collating the covers and sheaf of paper that makes the single signature of the pages, but in half of the zines I bound (60!) I reversed the sheaf, so the first page was 9 and page 1 and 16 were in the middle of the book. UGH. I didn’t notice until I had stapled all of them and folded half the zines that I’d already stapled. I pulled 120 staples with a pair of needle nose pliers. I use a jig to staple so I was easily able to get most of the staples in the original holes.

Mostly this was annoying because it added about 45 minutes of work and a fair amount of aggravation that I hadn’t checked to be sure the stacks were aligned properly. Lesson learned, the next zine will get double and tripled checked before stapling.

State of the Art: Making the Zine

Making a zine is usually a pretty easy endeavor. You write up the contents, do your layout and print and bind. And most of the time it goes smoothly.

Not this time. I’m not sure what happened to my head when I was collating the covers and sheaf of paper that makes the single signature of the pages, but in half of the zines I bound (60!) I reversed the sheaf, so the first page was 9 and page 1 and 16 were in the middle of the book. UGH. I didn’t notice until I had stapled all of them and folded half the zines that I’d already stapled.

I pulled 120 staples with a pair of needle nose pliers. I use a jig to staple so I was easily able to get most of the staples in the original holes.

Mostly this was annoying because it added about 45 minutes of work and a fair amount of aggravation that I hadn’t checked to be sure the sheaf were aligned properly. Lesson learned, the next zine will get double and tripled checked before stapling.

Also, you can get the latest copy of Useful Journaling on my Ko-Fi page here.

On Making Things: Return to Roots

If you’ve been reading CSS for more than the last few years, you realize this blog didn’t start out as a review site. I started out blogging about a break up and my attempts to find my footing in my new single life. It quickly morphed into an exploration of art, journaling, and bookbinding. Soon the old title of the blog no longer fit and I chose Comfortable Shoes Studio as an homage to a gag project I’d made in college. I moved my blogging to CSS and the transition was easy.

Here I started to write about my art and other projects. I was open about sales, ranted about eBay and PayPal fees increasing and all the other issues that occurred with being an artist and craftsperson online. Through all of it I was open and transparent about the business side of things and about the process of making art and art journaling.

Reviews were (are) a side effect of making art and writing. I did product reviews because I was making art and using the materials and readers had questions.

Then life got complicated. Work got complicated. I went back to school. I changed jobs, a couple of times. I made less art, but I had a lifetime of using art materials and could write reviews with much less effort than writing about making art, which I was making less and less of. As for bookbinding? I do less of that than ever because my wrists and hands ache after a binding session, the act  of pulling a needle through paper and board causes pain like no other. So I just don’t do as much of it as I used to, it hurts too much, and if I’m honest, it hurts a lot to think about not being able to bind like I once did.

I’ve gone back and looked at some of my old posts, posts where I’ve “shown my work” when it comes to art, zines, and the business of art. Now that I’m in a more stable place in my life I hope to reclaim some of my writing about more than just reviews.

I wanted to write a bit about the creation of Useful Journaling. While it is a culmination of a lifetime of journaling, it is also about teaching myself how to paginate and do layout for printing and binding. In the past I have always done my layout with a physical original. I’d cut and trim things to a paper copy and make a first really good copy of that which I’d print from. I really like the physical aspect of making a paper original copy. There is something really nice about sitting down with a glue stick and craft knife and making that first original. 

I like learning things, I saw learning how to do layout on the computer as a challenge. And wow is it. I hate and love it. I love how clean it can make the flow of words from page to page. I write all the zine in one doc and cut and paste it into Publisher* and it just flows through the document. Easy. I then add in the various elements I’d use glue and scissors for a physical copy but instead I photograph them and crop in the computer. It’s similar skills but all in the computer. It was a challenge to learn how to bring it into the computer but I know I can also make a physical original which I can scan and turn into a PDF and print from that.

Another challenge is printing. I really like the idea of a color laser printer for the cover and inserts. But WOW are they a total pain in the ass. Of course the one I was gifted is old and I needed to order new parts and do a thorough deep clean, but it hates printing on smooth cardstock. HATES it. So future issues will use coverstock, which means I can possibly add 4 more pages.

Which brings me to another thought out aspect of UJ, the size. I wanted the zine to fit into the pocket of an A5 notebook, so it had to be pocket notebook size or a quarter sheet of US letter sized paper. I also wanted it to ship for the cost of one US stamp in the US, even if I added extras (and I did) so I went with pocket notebook size. The number of pages was determined by weight, I knew if I went with 16 pages I’d stay below an ounce for that single stamp. The hard part is that I WANT to make it longer. I want to pack in the content. I also wanted to keep the font large enough that it could be easily read. I get frustrated with zine with font sizes that are too small to easily read.

Anyway, I’ll be chronicling more of my art adventures here, but still be writing product reviews, just less of them.
Continue reading

How To: Fitting an Energel Refill into a Baronfig Squire

I read once that the older Baronfig Squire pens accepted some gel ink refills. Imagine my surprise when mine did not. Apparently somewhere along the way things were redesigned and the Squire lost the ability to accept a standard gel ink refill. It is non-reversible, but the pen will accept the old refill once the mod is completed.

To do this mod you will need:

  • A Baron Fig Squire
  • 1/8th drill bit for wood
  • Skewers and masking tape
  • Pentel Energel Pen- you need the refill and the spring
  • Patience
  • Craft knife

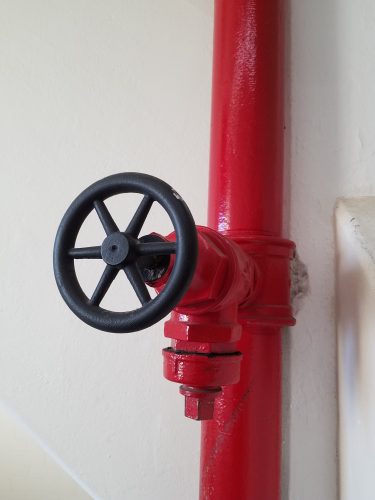
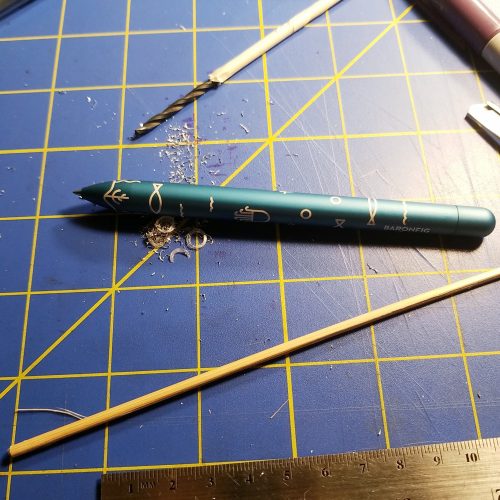
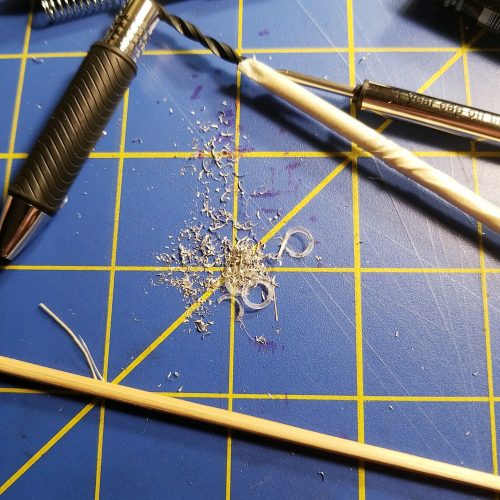
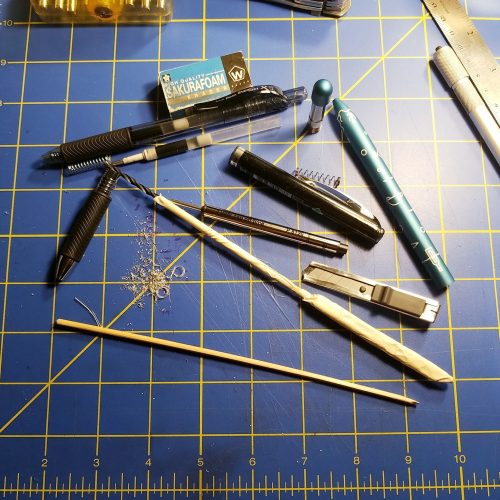
I went through the process of stuffing every gel ink refill I own from Pilot G2 to Pentel Energel to Zebra Sarasa into the pen, and each and every time, blocked. I poked around with a skewer, and found that there is a lip down inside the tip area that holds the narrow tube that holds the pen’s tip. It is snug to stop the refill from rattling around. Since I really like the Energel Pro for sketching doodling and general writing, I measured it against the Schmidt P8126 refill I usually use for the Squire. There was exactly 1mm difference in the diameter of the tubes, and the Energel refill’s tube was roughly 1/8th of an inch.

I decided to do this mod by hand, for many reasons but I did not want to take a chance of removing too much material and damaging the Squire beyond use. I’m not kidding when I say the Adrift is my favorite Squire. I grabbed a brand new 1/8th drill bit intended for wood and taped it to a wooden skewer, yes, masking taped it to a skewer. Again, this was to force me to use a light hand and prevent me from binding up the bit into the metal.

The skewer also allowed my short bit to reach deep into the pen. It is important to point out that you drill the INSIDE of the pen, NOT from the tip in. So drill inside out. While I do not recommend it, if you chose to use a drill press for this mod, you’d need an extra long bit.

I bored the inside a small amount then test fit. Then repeat that until I had bored out roughly ¼ inch or 5mm deeper. I attempted to use the Squire’s spring. It didn’t work with my Energel refill. The Energel spring did work. Even when I went back to the original refill I still needed the Energel spring. The Energel refill will need to be cut between 76 and 78mm from the base of the ink reservoir, not the tip, depending on how far you would like the tip to emerge.

Results? It works perfectly with the Energel refill. The metal part of the Energel tip fits perfectly into the Squire and there is no rattle or more movement than you usually see with a Squire. It’s smooth in deployment, the knock works perfectly and man that gel ink is great.

You might wonder why I went with the Pentel Energel Pro over say a PaperHate Inkjoy or Uniball Signo or even the Sharpie SGel or Zebra Sarasa refill. I really like the Energel Pro for sketching but also writing. It is also the only refill available in a 12-pack. I can buy singles or 2-packs of all of the mentioned refills but I really wanted a 12-pack. When I’m sketching, drawing and even writing a lot, I drain gel ink pens. Buying a 12-pack feels the most economical and ecological. I know a lot of people will buy entire pens and just use the refill. I feel wasteful doing that, so I’m going to stick with buying refills for this pen.

Making the Blackwing One Step Long (ish) Point Sharpener Better

The Blackwing One Step Durable Point Sharpener does an okay job, but if you want to carry it as pocket bling, well, you have to understand that it is a lot like carting around a salt shaker full of graphite dust in your pocket.

It turned everything in that pocket a lovely shade of silver gray, and my fingers came away with a dusting, and the graphite leaked through and onto my thigh. UGH. C’mon!

I decided I needed to cork it up. I’ve cut two little plugs. One from a wine cork that feels fiddly and works well enough and one from a pink pearl. you cannot pull an eraser from any average sized pencil, a semi-jumbo or jumbo could be whittled to fit.

I sat with a craft knife and whittled the edge of eraser down and plugged the hole. Now I can carry around the BWOSDPS in my pocket and not get dusted with graphite. Sweet.

Apsara Long Point Sharpener Hack

I’m a fan of long point sharpeners. The Apsara version is inexpensive and creates an extremely long collared point that is serviceable but too short. This hack takes a good sharpener and makes it great.

You need: post it notes, scissors or a craft knife, a screw driver, a ruler, q-tips or tissue, and of course Apsara Long Point Sharpeners

Let me know if you attempt this hack and how it turns out for you.