Making Images with Tracing

One of my favorite ways of making self portraits is with tracing. I use self portraits in my art journals as a manner of self reflection but also as a way to work on my portraiture skills. Though I doubt anyone would want me to explore them as thoroughly as I explore my own self in these images.

I started with a series of selfies. I’m not very good at them and always feel a bit goofy taking a selfie. Since our bathroom has good light I used that. Sadly I think my phone has a portrait filter that softens the image. I was looking for harsh lines and a great deal of contrast. I had to edit the image into black and white and then bring up the contrast and sharpen it a bit. I then printed a half dozen copies of it. Despite my printer’s toner being less than ideal for resisting, it does resist a bit, which leads to a very dirty resist process with oil pastels.

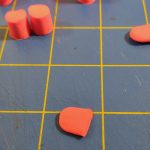
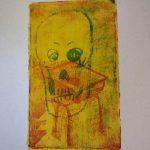
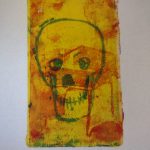
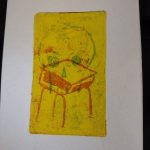
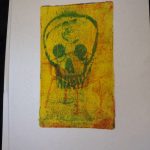
The next steps was to go over the dark areas and lines of the images with oil pastel and china marker. These resist picking up paint from the gel plate really well. The result is a rough uneven texture that looks fantastic. It’s gritty and feels like a bad photocopy. Each resist sheet can be used 2 maybe 3 times. After that the oil pastel gets clogged up and no longer resists. Save the sheet though, the paint over the oil pastel can be scraped away and makes a great collage sheet.

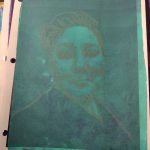
I didn’t include images of all of the resist sheets because I’d already used a few in images.

The resulting images vary from good to barely perceptible depending on the paint I used to pull the image. Some were really great and were used almost immediately. Apologies for not photographing them before processing them into images.

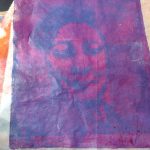
The barely perceptible.

Obviously tracing over images can be a very useful tool, especially when pared with a gel plate. The resulting images from both the resist sheets as well as the plate are great.

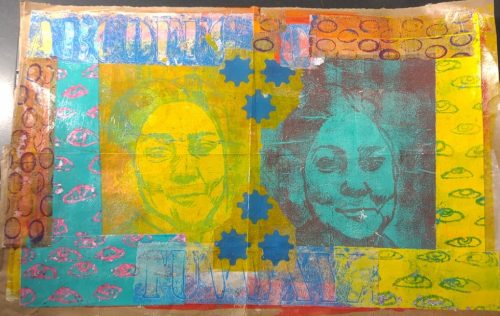
collaged self portrait using gel plate prints made using resist sheets.

collaged self portrait using gel plate prints made using resist sheets.

self portrait made with a resist sheet and collage

self portrait made with a resist sheet and collage. Resist sheet was allowed to dry and then dried acrylic paint was scraped away. additional pieces collaged over the image were used.

I’ll be offering some mixed media pieces for sale on my Ko-fi page. I’m also offering a few prints for sale there as well. Expect an update in the next week.

Continue reading

State of the Art: Open Minded Curiosity

It is important if you are an artist to have an open minded curiosity about the world, people, places, and especially your art. The minute you stop being curious is the moment you start to stagnate. My curiosity leads me down many paths. I like to learn about things unrelated to art and creativity but I also will do deep dives into specific artmaking activities.

Like gelli/gel/gelatin printing.

I’ve been watching every Yeates Makes video available. (And you should too!) Unlike many YouTubers he does everything DIY style- his own masks, stencils, and transfers. You won’t be surprised to find out that his DIY artsy aesthetic matches mine.

I’m a strong believer in the idea that commercial stencils and tid bits are there to jumpstart you. Sadly, I see a great deal of people getting locked into the use of commercial materials. I say sadly because the goal of every instructor should be to help the artists in their classes unlock and discover their creativity. * When an instructor gets bogged down and locked into the use of ONLY commercial materials through contracts and sales of said materials, well. I have some thoughts but this post isn’t about that.

It’s about the idea of systematically exploring a material.

One of the things I miss about my (some) old college classes was the idea that you should explore the materials completely.

This brings me back to gelli/gel/gelatin printing. I really want to know everything these plates will do when I use them, how far can I push them? And most importantly, what materials and tools will work with them to ensure my success when I do have an idea?

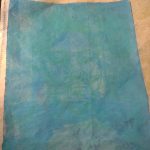
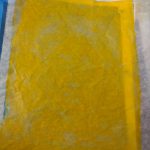
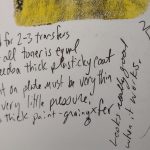
I picked up a 3×5 inch gel press awhile back, this creates a perfectly sized print on half a US letter sized sheet of paper. It’s also a perfect size for testing. It fits into my 6×9 sketchbook pretty well, and leaves room for notes. Perfect. I gave myself a few hours with the various materials and filled a few pages in my sketchbook. Below are a few pictures and my notes.


Let yourself play and explore all the materials you have around you, you never know what you’ll stumble onto that just WORKS for you and your style.

Some of these techniques were used in creating this art for my ko-fi supporter packs:

Continue reading

State of the Art: Filling a Sketchbook

This weekend I realized that I’m about 10 pages away from filling my current sketchbook. I knew I was nearing the end but I’ve had a flurry of ideas to record and noodle out, each time I’ve made sure that my sketchbook is within easy reach. With a mere 10 pages left, my first thought was, “Ohhhh now I have a reason to go to Artist & Craftsman to pick up a new one!”

I did not have access to the car in my moment of weakness, so instead of driving, I dug through my bin of notebooks and sketchbooks. These are books I picked up on a whim at a variety of places when I see them. The first book I grabbed was a traditional hardback black sketchbook with heavy mixed media paper- too “good” for my kick around idea noodling sketchbook. Then I grabbed a dot gridded journal, also not quite right. Then another hardbound sketchbook.

Finally I grabbed a different black sketchbook, and realized that I’d grabbed a black Hand•Book journal, one older than my current version. I had forgotten at one point that I’d bought the black version, and bought a green one about a year and a half ago.  Maybe less. It was before I had my interview for my new workplace. Anyway, I had forgotten that I’d bought a black one as back up for my previous journal, blue I think. So I immediately dug into the new red one and left the black one in a drawer. These have been my go to sketchbook for the last few years. The earliest I remember using one was in 2012 or 2013. I know I was using them before i went to grad school- I carried one with me everywhere through grad school.

This does come with a downside- the elastic needs to be replaced or at the very least tightened. Which is a problem I’ve never had with a Hand•Book Journal before. Their elastics have always been snug and perfect, even years later. This is the first of a half dozen or so of this brand where the elastic has been anything but perfect. (I will note that this is a pre-Speedball distribution Hand•Book.)

I do very little to prepare a sketchbook for use, I write my name, address, phone number, and email inside the front cover. For this sketchbook I’m adding some washi tape to the back pocket- the washi will stick but peel off the plastic pocket with ease. Unlike notebooks I don’t do much prep for a sketchbook, the whole point of one is the clear empty expanse of paper for ideas to blossom.

State of the Art: Blog Readers

I miss Google Reader- the OG epitome of blog readers. I used to start my day with a cup of coffee and Google Reader. It let me catch up on my news and all the blogs I used to read quickly and without following all sorts of links and bookmarks. IT was easy. Sadly Google killed it, largely because it’s hard to put advertisements onto a reader and on blogs.

I love blogs, not only because I’m a blogger myself. Blogs are a truly democratic method of communication- all you need is a free account and an easy to set up website. It really couldn’t be easier. If you want even easier, there are still many free blog platforms out there.

This post isn’t about blogging platforms, it’s about readers. Readers let you bring all your varied interests together into one spot and you can read it whenever you want. Reader allowed you to bring in as many blogs as you wanted- hundreds. The main issue I had when I migrated was that most of the reader replacements only allowed 100 feeds on a free account. At the closure I think I had close to 500 blogs on my account.

Anyway, now I use a couple of services- Feedly and The Old Reader to manage around 200 blogs. Feedly houses most of my coffee and maker interests; while The Old Reader has all the art blogs I enjoy. There are many options for a feed reader, just pick one that works for you.

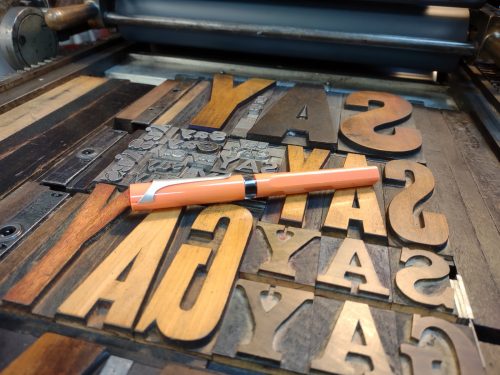
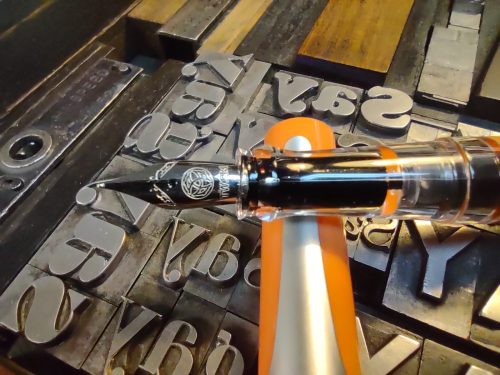
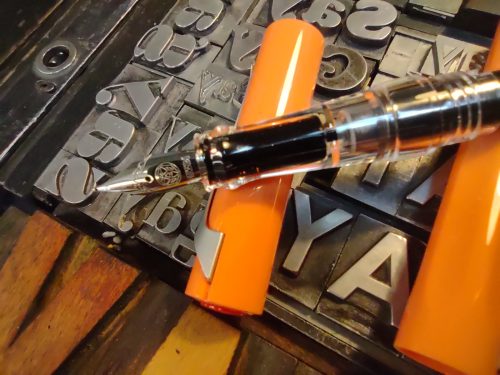
Review: TWSBI Swipe Coral

I am starting this review with this disclaimer,  this review is full of my opinions on a number of matters, which include a review of the pen in question but also the company’s behavior in recent months.

Let me start with this, I’ve historically really liked TWSBI. Their pens, like Diamond, the VAC and Micarta fit perfectly into my aesthetic. I like demonstrators and the rough look of the micarta are just perfect. I own 4 TWSBI pens, 5 now, and I like them all. They fit me. That said, the Swipe is likely to be my last TWSBI purchase for quite some time.

Through reading various blogs and listening to The Pen Addict I learned that TWSBI had written to sellers of their pens, that also sell Narwhal pens, to let them know that they feel that Narwhal had stolen/copied their piston design. My understanding is that they then let these sellers know that if they continued to sell Narwhal pens, that TWSBI would no longer allow them to sell their pens.

I dislike this on so many levels. Sellers/vendors are just trying to make ends meet. I don’t know what the margins are on pens, but I see TWSBI as a middle sized fish in the pen pond. Narwhal is a tiny fish. Sellers are going to keep selling the pens that bring in the most money- since TWSBI likely outsells Narwhal, the effect of their letter on Narwhal is going to be disaster for the smaller company. Buyers would be forced to buy Narwhal pens directly from Narwhal and whatever sellers who decide to tell TWSBI to go to hell.

Listen to and read the various post I linked to above, but the issue TWSBI is really pushing here is that Narwhal has copied their filling mechanism. But do you really have a moral leg to stand on when you have modeled your filling mechanism on Pelikan’s?

From a sales standpoint it makes sense for sellers to stick with TWSBI.

As a buyer I want to have all the options and I strongly dislike it when someone tries to limit those options. I also dislike when one company tried to put another company out of business. When companies try to put other companies out of business through strong arming vendors, get over yourself. If your product is good, it’ll stand up on it’s own. No need to pull this kind of pseudo legal chest thumping nonsense. TWSBI pens are good pens. So are Pelikan pens. As are Narwhal pens. I wrote it in my review, Narwhal isn’t breaking new ground with their pens, but they are making decent pens. And hell while Moonman/PenBBS are smashing together styles from other companies, their pens function solidly.

Rise above.

It is my sincere and honest opinion that TWSBI has delved into unethical business territory in an attempt to drive Narwhal out of business. I don’t like it at all. I will not buy another TWSBI pen until TWSBI backs off this nonsense. I also have to wonder if this is legal? I mean, good lord, imagine if Pelikan decided that if a pen store carries Lamy that that store cannot carry Pelikan? It is preposterous and ridiculous when you change the brands involved. TWSBI really has their head firmly wedged in their butt cheeks on this one.

So why review the pen at all? In part to include my little rant, but also I bought the pen with Ko-Fi fund to review.  So I want to fulfil my obligation to my readers, but I also feel I should inform you about TWSBI and their shenanigans.

To start I like the pen, mostly.

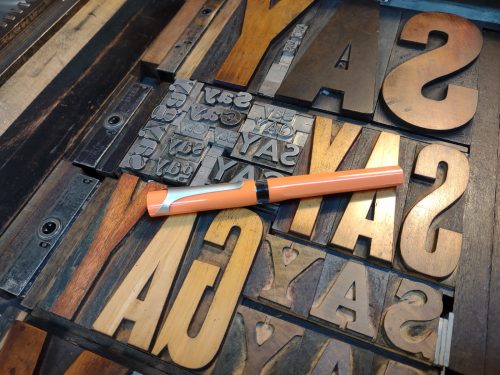
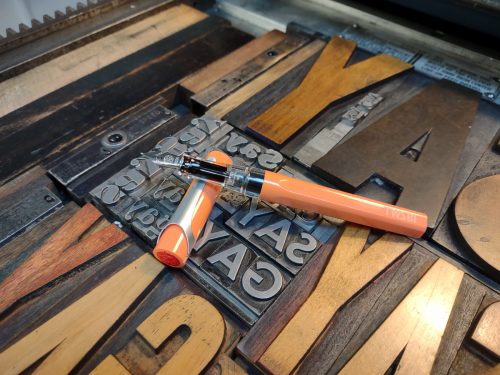
So what I like? The color is killer- coral, or salmon pink. It’s the perfect millennial pink that I love so much. If you’ve known me since high school, you’ll remember that this was the color of my prom dress. Think pink with a hint of orange.

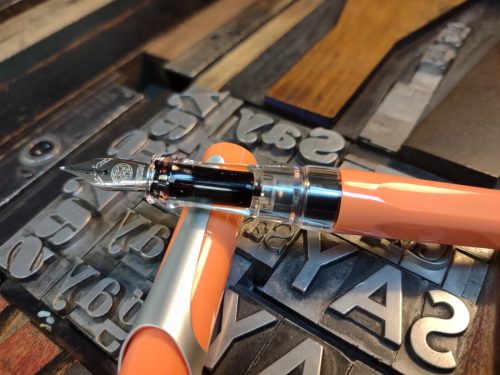
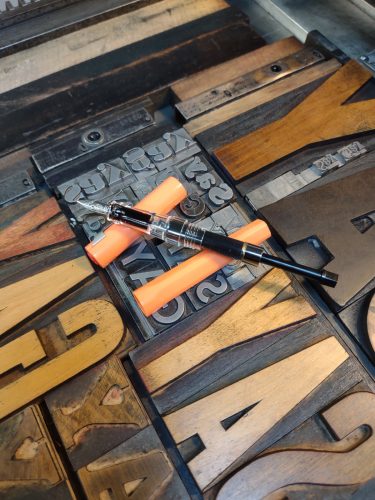
The ink window is nice, especially with the spring inside. I like the way the ink sloshes around the spring. When the pen is uncapped, the grip section is also clear, allowing you to see the ink in the feed.

Despite the hard clear plastic of the grip, it feels nice in hand and I don’t find that my hand slips when I’m writing and sketching for long periods of time. The light weight is super comfortable and enjoyable.

The nib is a typical TWSBI- hard as a nail with a smooth feel as I write and sketch. It isn’t buttery smooth or glassy, but just nice. I like it on all of the papers I’ve used it on so far. The feed is right in the middle- not wet nor is it dry. It lays down enough ink that I’m happy with the darkness of the line.

The clip is the major downside of this pen. It feels a bit cheap, and is very tight. I tend to carry my pens in the chest pocket of my flannel shirts, and this pen sits very high when clipped in place. When I clip it to the placket of a shirt it hangs out way to far. I cannot tell if it is painted or a textured finish, but I carried a painted wooden box at work, and it left gray marks allover the painted finish where the clip rubbed. Yet, I do not see any damage to the clip.

Filling the pen with the spring loaded converter works well enough. I did find that I have to dip the pen multiple times to get a good fill. This means depressing the partially filled spring loaded cart down partially and then redipping the pen. It was a bit messy but effective. Included in the packaging is a regular twist style converter and a cartridge with a spring to hold it in place. Nifty.

The mold lines are cleverly hidden in the edges of the facets of the pen body. Those on the cap and grips are visible and textured enough that I notice them, through use I’ve worn them a bit smooth. (Also a note to self, pick up hand lotion for the studio. I should not be able to smooth rough mold marks with my finger tips!)

Overall I am quite impressed with the Swipe. At the under $30 price point it’s a solid and fun colored pen. I enjoy the color, feel, and even the twitchy spring loaded fill system. I love the bright fun coral pink color. It’s bright and cheerful. Continue reading

State of the Art: Creating a Place to Work

One of the key items in my art making and creative arsenal are my headphones. With these I can create a place to work, make art and be creative, just about anywhere. By extension music helps too.

I’ve used headphones as a way to tune out and tune in since I was in elementary school. Back then I slipped the foam cushions of my Sony Walkman over my ears and tuned out of the world and into my art or homework and later in high school to work. Soon I was using foam covered earbuds and trying to hid the black cords around my ears, through my hair and into a hoodie to wear them in study hall.

My parents had rules on when my brothers and I could wear them.

As I got older I used headphones to tune out a variety of things- the noise of my roommates, construction, late night noises in the neighborhood, the people on the train and other various things. Over time I moved to in ear buds (IEB) and I found they worked better to help me tune out and tune in, and it really kept the noise of the subway out of my head.

At the DayJob I needed to buckle down and get a LOT of paperwork done, some of which I had let build up, so I popped my IEB in and sat in the gallery with my laptop and churned through the work. In the few hours I had I churned through pages and thousands of words of work. The combination of noise cancelation through the DIY plug tips and the music I chose (The Tidal 420 Playlist for giggles) let me tune out of the stuff that was happening around me, while I focused on the music.

Of course when you use true wireless BT IEB it can lead to confusion- one coworker laughed as I pulled a bud out, apologized, then said hello back.

For me, there is something really helpful about being able to isolate myself from the noise around me. I tend to look up when I hear a noise and then get distracted. It takes me a minute or two to get back to what I was focusing on. Headphones means I can ignore all the little inconsequential noises around me, and just focus on the task ahead of me.

It seems dramatic to call this bliss, but as an easily distracted person, being able to focus on just one thing is fantastic. That combined with the controls being on my ears just makes setting up a place to work easy.

In some places, like my home studio, I use a speaker system. That works well enough there since it is a private location, in a more public location, like my DayJob studio, I use a speaker when I’m not feeling distractable, otherwise it’s headphones.

I have to admit, I never really thought much about my use of headphones until recently. I’d been feeling very distracted and popped my IEB in, did my work, then realized I’d been doing this for YEARS of my life, and that I’d unconsciously been making a place to be creative.

It works for me. Do you use headphones or music to make a creative space for yourself?

Continue reading

State of the Art: Product Labels

I can’t believe I’ve never posted here about my various product labels that I create. I was pretty sure I had posted about them but not even the g00gles can find those posts. I have posted about them on insta, so maybe I’m just confused.

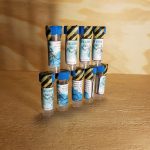
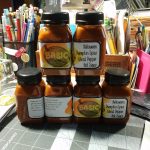
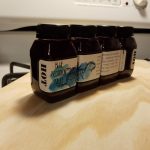
When I make or cook certain things I make goofy labels for them. The labels are crudely rendered in Microsoft Publisher with clip art, various fonts, and thick outlines. The expectation is that they are imperfect and short lived- the label would wash off and be composted. I printed them on plain paper and adorned them with watercolors for a splash of color. I also printed some for coffee on plain paper sticker paper. These labels were expected to be torn through and disposed of when the coffee was finished.

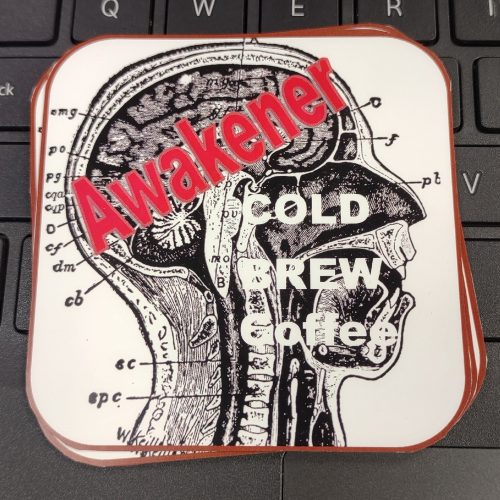
I utilize black and white clip art from this site and others. Please read their faq. I like to start with images that fit my aesthetic- brains, skulls, skeletons, etc… I like things that look like etchings. Sometimes I make my own drawing and scan it in.

I drop the image into Publisher, resize it to the correct size for the label, add in a border ingredients and a name. My blueberry scorpion hot sauce was called “Blue Scorpion.” It had an old fashioned etching of a scorpion and sky blue watercolor splashed on it. While my pumpkin spiced ghost pepper sauce was called… “Basic Bitch.*” This had an etching of a large pumpkin, with the word bitch in tiny font hidden in a gray area. It had a splash of gold and orange to color it.

The cold brew coffee labels I made were a departure on a number of levels- I printed them in full glorious color on vinyl! The choice was made because I refill my cold brew bottles over and over again. So the sticker needs to hold up for a few washings. I added color only because I was able to do so. Had I not had access to a color laser printer I would have added color with acrylic paint or paint markers.

Before anyone comments, yes there is a misspelling in the decaf label. We just won’t talk about it okay?

Continue reading

DIY Foam Tip for True Wireless IEM or Ear Buds

I want to start this off by stating that I’m not an audiophile, I just want my true wireless in ear buds to stay in my ears, which they just don’t with the typical silicone tips that are packaged with most entry level buds.

My search for tips that stay in my ears began when the collar of my winter coat brushed my new BT earbud and it tumbled out of my ear and onto the train tracks. Luckily the train was still 10 minutes away and I was able to retrieve half my investment.* I’d heard of foam tips before but hadn’t ever needed them for my corded earbuds. Everything I read suggested that the foam tips would solve my problems.

Because I didn’t know what size would fit my ears, I ordered a mixed pack of small medium and large tips from Comply. Be sure to check the Comply website for the right size tip to order for your in ear buds- I ordered the wrong size and the tip would slide off the stem and stay in my ear.  The cost plus shipping for 3 sets was just a hair over $20, you can get them on the ‘zon for about $15.  After that I purchased a package of JLab Cloud- you get 4 sets, 1 small, 2 medium, and 1 large.  The cost for those was around $7 (price fluctuates).

My right ear is sized small and my left medium, so each mixed pack nets me 2 usable sets with Comply. With the Cloud, I can wear medium in both ears. But the small fits well. I like the JLab Cloud– they are super soft and feel great, but they don’t fit my back up pair of Skullcandy Sesh (purchased via Woot for under $15.)

Foam tips stay put and my expensive buds stay put, my cheap Sesh stay in my ear. Also, the noise canceling effect means that my wife can watch TV and I can listen to music while I read.

A major downside of foam tips is that they degrade and after 3 months or so they get mushy and floppy, they still stay put but they are a pain in the rear to put in. You have to have fast hands to get them in place before they expand.

Even more annoying is that every brand of bud needs a different Comply tip or they won’t fit into their case, then they won’t charge. Annoying.  My search for a cheaper option lead me to the JLab Clouds. At $7 for 3 usable pairs is a better deal for my more expensive JBL buds, but they don’t fit my Sesh well.

I knew I could get a perfect fit from Comply foam, but I have a hard time spending more on tips than I spent on the buds. I could order a mixed pack and get 2 usable pairs, or I can order a pack each of small and medium- which would cost around $40.

Yikes.

So DIY options?

Most that I searched for were for IEM like Klipsch with very narrow posts for the tips or to make large silicone custom tips that lock into the ear. I have a couple of sets of heat moldable material (link to a DIY silicone version) that I use with corded buds, but I’d be into the problem of removing the tips every time I needed to charge. I’ve also grown very fond of the noise cancelling effect of the foam tips. It’s great for when I use the lawn mower or snow blower.

I found a number of DIY options using ear plugs. Which totally made sense- ear plugs are made of the same soft squishy foam as the tips. I also considered craft foam. Which did not work at all.

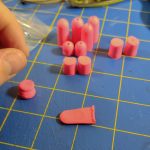
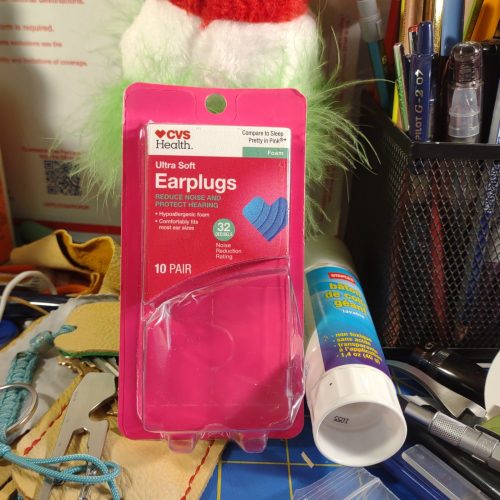
My reading of the above linked articles and more led me to picking up the softest ear plugs with the highest sound blocking rating that I could find… at the local CVS. I found a 10-pack of super soft plugs that reduce noise by 32 decibels, in hot pink. They had a variety of other colors but they all looked rather medical, other than another version that didn’t reduce noise by nearly as much. I like the hot neon pink though. Package of pink earplugs
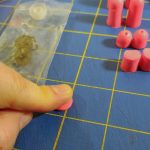
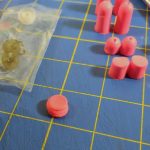
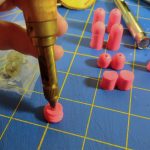
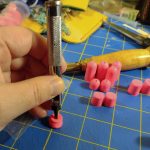
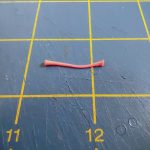
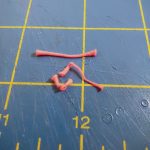
I decided to poke the holes first then cut to size. I used 2 different hole punches- a Japanese screw punch with a 2mm and a 3mm bit and a hammered leather punch with a 3 mm bit. Because of how they cut and the properties of the foam, the holes were smaller than the bit themselves. With the punch the middle section and end of the hole are substantially smaller than the first part, which helps hold the tips to the buds very tightly.
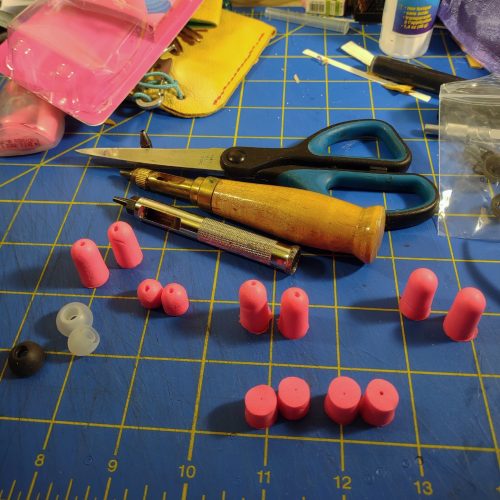
I was worried that the plugs would slip off the buds without recycling the interior of a Cloud or Comply tip, but the hole is so small and the fit so tight they don’t. Keep in mind that the memory foam is expanding in all directions- so the compressed foam is trying to compress back into that tiny hole and compressing around the stem for the tip. I’ve been using a set for a week now and not had a problem with them slipping.

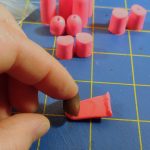
After you punch the hole through the height you need to let them expand, this works better if they are warm, so hold them in your hand. After they have expanded to their full height you are going to lay them down and flatten them along the height. Measure a silicone tip, add a millimeter or 2 and then cut the plug with a sharp pair of scissors. EDIT: The step of adding a couple of mm to the length of the tip is really important. Without that length they are too loose to stay put.

Now be patient and let them expand again, then flatten them like you are punching the hole again. While the plug is flattened pancake style, stretch and pull the donut shaped plug over the stem where the tips usually sit.  Pull the plug down past the end of the stem, the stem should poke out a bit. Let the tip expand, when it is fully expanded, wiggle it around until it’s sitting where you want it. It should not expand too far past the tip of the plug.

Every brand of IE buds will need a little different work. The Skullcandy Sesh were much easier to DIY- the way the plug fit over the stem was easy, and it fits into the case perfectly, so the buds charge without interference. My JBL Tune125TWS needed a bit more tweaking- I had to trim out the tiny hole over the stem so the foam wouldn’t interfere with the sound. I also used the interior of a dead Comply foam for these buds and they worked well. I would suggest, leaving a bit of old foam on the core to keep them put inside the plug.
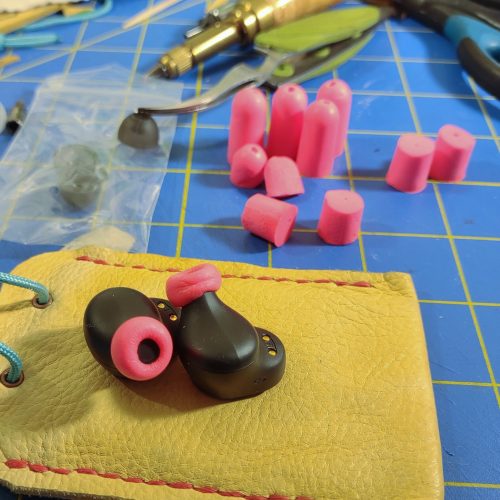
The ultimate goal here was to create a cheaper alternative to Comply foam tips that fit into the case of my various BT IE buds. This has been accomplished and they look pretty decent and fit in my ears just as securely as the Comply, if not more so. They sounds pretty decent too. Like I wrote in the intro, I’m not an audiophile, but I like it if my buds sound good and don’t need to be cranked up to be heard.

The cost? A little elbow grease and $0.25 per pair. Not gonna lie, I’m pretty excited.

Many of the instructions offered other suggestions for poking the holes- from mechanical pencils to the metal tips off gel pens. Anything will work so long as it is at least a millimeter smaller than the stem on the in ear bud.

I did reuse the interior tubes from a couple of Comply tips, they were a bear to fit into the ear plug material, but once in there, they seem to hold well enough. I get the Comply tips with the added acoustic grate that keeps dirt out of the IE buds. I’m not sure this extra step is worth the effort and work. Continue reading

Keeping a Notebook PERFECTLY

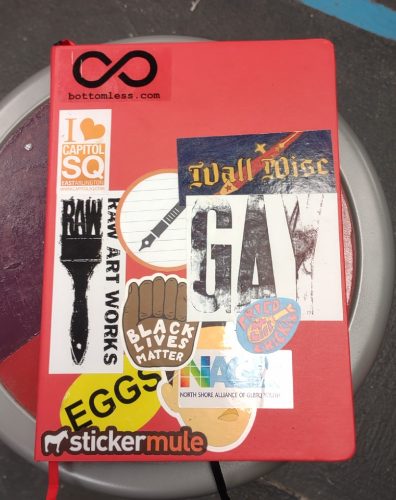
There is no way to keep a notebook that is perfect for every person. There is only the perfect way for each person. That is to say, keeping a notebook is highly personalized. My method of a pocket notebook and 3×5 cards alongside a sketchbook (currently also functioning as my ETEW Journal) and a separate work sketchbook would not work for most people. Hell most creative people merge home and work into one planner and notebook- especially if they freelance. That doesn’t work for me because I need to create a division between work and life- I need work- life balance.cover of a red talens sketchbook covered in stickers

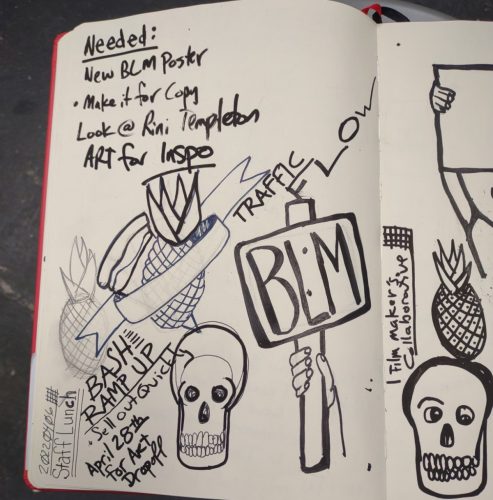
What do these different notebooks look like? (I’ll be using notebook and sketchbook pretty interchangeably from here.) My work sketchbook is an A4 (8×10) red Talens sketchbook covered in stickers. Eventually it will have doodles too. I use a larger sketchbook at work because I use it in classes to teach kids about sketching. We also work larger than I do at home, so my sketches are correspondingly larger. I purchased this sketchbook because it was inexpensive and also the bright red cover could be easily found on any table in my studio.inner page from sketchbook filled with skull, pineapple and other doodles. Also meeting notes.

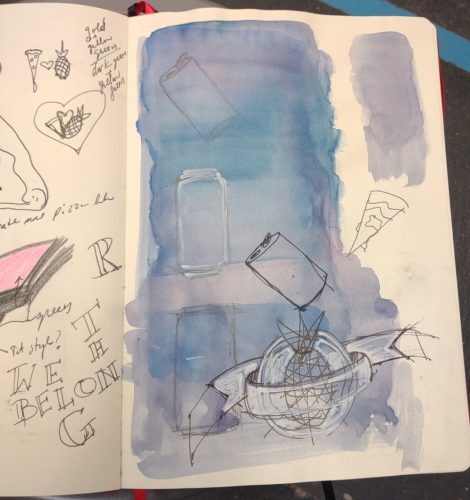
The work sketchbook is a place where I capture meeting and course notes.  I doodle and jot down notes and I try to keep each meeting to a single page, but sometimes I use 2 pages. Occasionally I work on a page shared with another meeting , especially if the previous meeting didn’t need a lot of notes.sketchbook page showing a watercolor demo and sketches of soda cans and pineapple on pizza

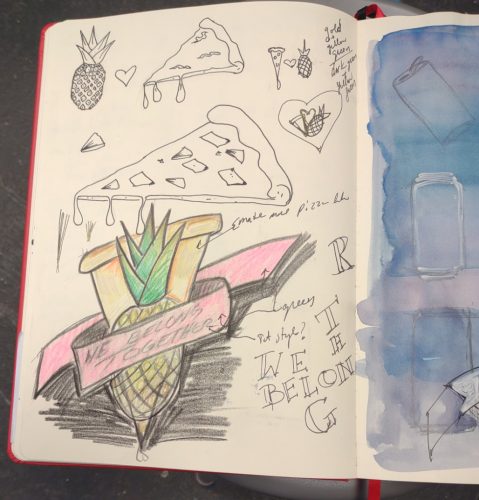
I’ll be the first person to say that my meeting and other types of notes won’t make sense to most folx. I tend to draw the speakers and doodle important words and points in funky lettering. I see the goal of taking notes as a way of jogging my memory. For work we have a notetaker for each meeting, a quick look at the notes will get me the info I need. For trainings I take notes that are a little more detailed but are mostly to jog my memory. I save a copy of any printables to the cloud or my computer and call it good. Generally I believe that info can be pretty easily looked up if I search, but I have to jog the memory of that instruction first.more sketches of pineapple on pizza

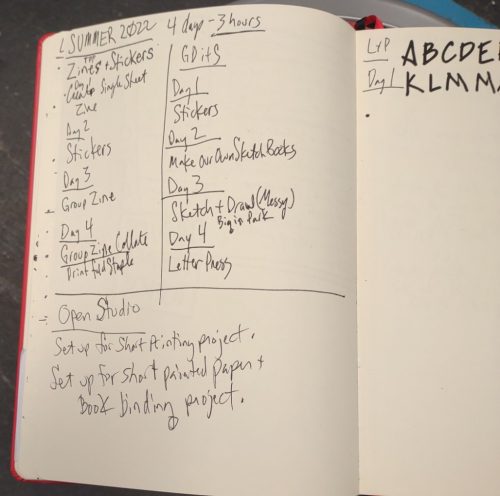
My home sketchbook is a B4 (6×9 ish) Hand Book sketchbook. They’ve changed the name of them several times over the years. Speedball seems to have either purchased or is handling distribution of them now. Which is a good thing, for me, they have been my go to commercially made sketchbook for a few years, and better distro is great. The paper is perfect for a wide range of materials.A planning page with lists of possible projects for my summer groups

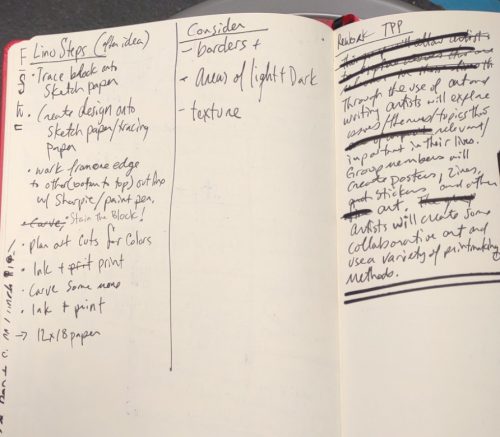
The pocket notebook is where I gather on the go ideas- things I hear on podcasts, in conversations, phone numbers from students for their parents, notes from books I’m reading and so on. It’s a good capture system. Sometimes these ideas get pulled into my Every Thing Every Where journal or sketchbook, or here as a blog post.steps for carving lino, things to consider and a reworked statement for a group

The above is what works for me now. Over the years I’ve used different systems, most documented here and there in this blog. I still like to read about the systems of others. The Take Note Podcast Blog (that’s a mouth full) has had a number of great posts about keeping a notebook where they gather information about authors and creative folx who keep a notebook.

The Perfect…

I’ve spent much of my life looking for the perfect pen, pencil, brush, sketchbook, and journal. I read reviews of the items I’m seeking and things I’m not. If a new  article starts with “The Best…” I read it. Part of this is that I want all the information before I make a purchase, but also I want the information. *

If there is one thing I’ve learned it’s that the most perfect and best tool for any job is the one I have on hand and ready to go.

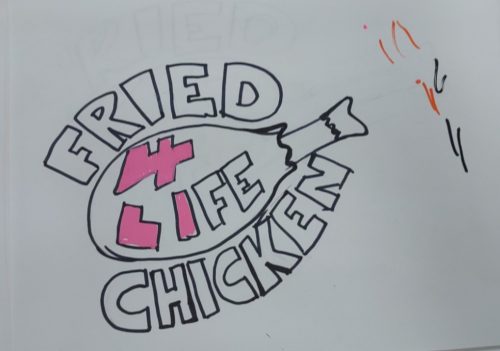
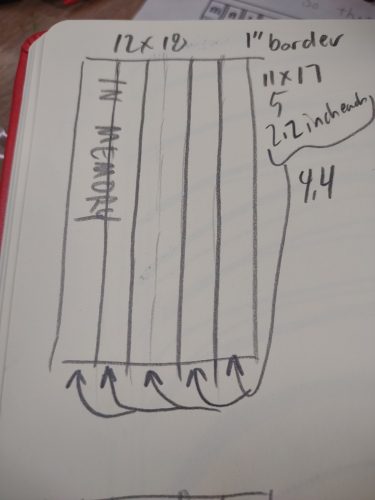
Case in point, when I sat down and started to doodle the fried chicken sticker (see this post) I used the pencil I had in my pocket (Blackwing 93) and the paper I had on hand (Staples recycled 20lb copy paper.) When I sketch out my Trans remembrance poster turned sticker, I used the same Blackwing 93 in my Talens sketchbook. When I wrote up ideas for a new group I used the Uniball Air I had in my pocket in my sketchbook. When I wrote down ideas for a series of found prints, I used my pocket notebook and Parker Jotter.

Much of these choices have to do with the fact that these were the tools that I have on hand, not because they were special or perfect. Though, one might suggest the Blackwing 93 (or other versions of the firm BW) is a near perfect pencil. I think that the Parker Jotter is a perfect pen for pocket carry. The all chrome and steel version makes for a good gift for a starting out pen collector.

I’ve been known to grab an AmazonBasics No.2 pencil and sketch with it. I have slowly started to switch out the pencils in my studio with Pen + Gear pencils.

If I wed myself to a particular pen or pencil or paper I’ll feel limited or unable to work. But if I use what is on hand, I’ll get something done, or started. I spend a lot of time seeking out the best, but I also let myself use what is around me. The ideas need to be collected and explored, I can do that with anything.

Yes, I make sure I have something decent on hand, but I’ll use anything if it’s there and perfect isn’t around.

* I recently read an article that said this is a trait of formerly gifted kids who strive for perfectionism. If I hadn’t rage quit the article I’d tell the author to go to hell. /sarcasm.