Thanks to Johnny Gamber of Pencil Revolution I got the heads up on the Erasable Podcast facebook group that Staples had the Wopex pencils in neon colors. I had to get a few packs. I ordered them and had them delivered to the store, I had to head to that mall anyway for another errand so the trip wouldn’t take me out of my way. 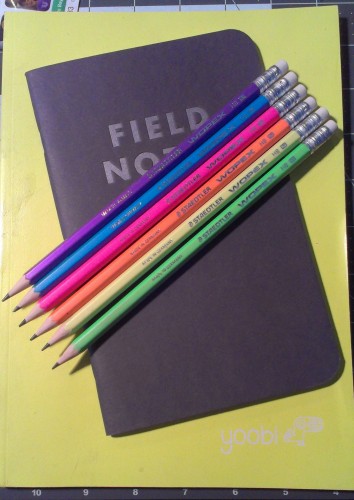 Anyway, Staples ships them to store (and to your house) in an unpadded plastic bag. The packaging of these Wopex is a loose plastic bag with a card insert. Not very sturdy and it allows the pencils to roll around and bang around. One of my packaged had broken tips, but nothing I’d return them for, others have not been so lucky. My advice is to have them shipped to store. The body of many of the pencils was also dirty from the broken tips. This cleaned off pretty easily.
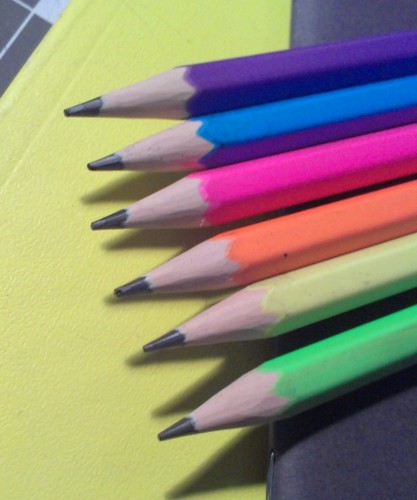 When they say these pencils are neon colored, they are right, it’s like someone poured a bottle of highlighter ink over the body of the pencil. Intense. The colors are also fantastic. They all remind me of highlighter packaged I picked up in my undergrad. the only difference is that the green and purple pencils will get used. The colors are spectacular. Like the “regular” US version of Wopex, the ferrule and eraser are great. Likewise, the pencil sharpens and writes like a regular Wopex.
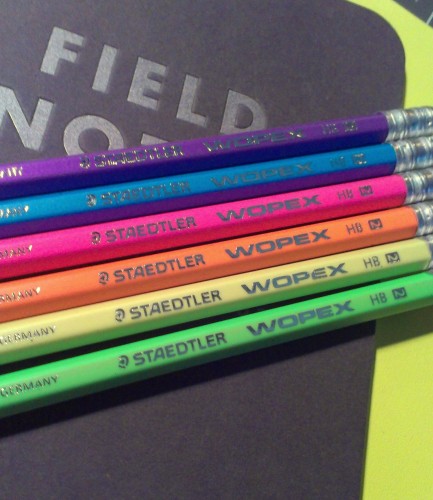 The big difference between these and the regular green Wopex is the feel of the outer coating, it’s grippy, slightly rubbery in a different way. I quite like it. It also lacks the black printing for individual sales. So you get a nice silver imprint on one side and nothing on the reverse.
 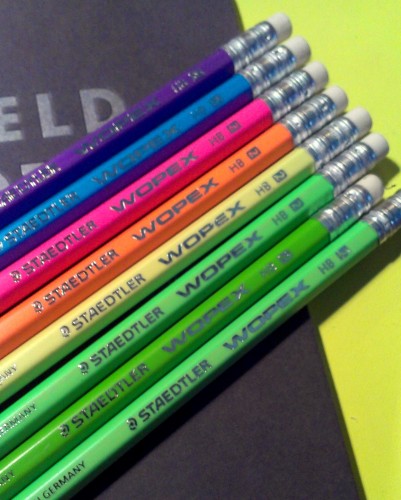 Anyway, these are just as nice as the typical US green Wopex, just in bright neon colors!*
Author Archives: leslie
Review: Rhodia Pencil
My high school’s arch rival’s school colors were orange and black. I later taught at the rival high school and on spirit day I wore my letter jacket… from my old school. Good fun. If that school could have a pencil mascot it would be the Rhodia pencil.* This triangular pencil boasts a snazzy bright, nearly fluorescent, orange body with a sharply painted black ferrule. It’s fitted well to the pencil. The eraser, also black, is round, and is secured to the ferrule with 6 divots pressed into the ferrule. It’s overkill and finishes the otherwise beautiful pencil off roughly. But it can’t all be perfect.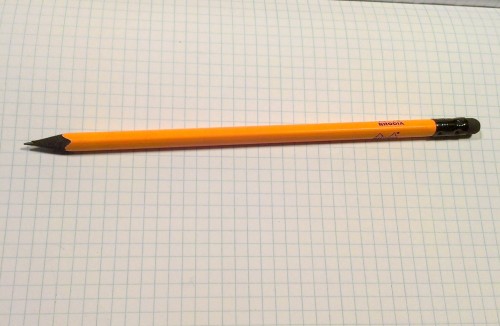
Inside the pencil is wood that is dyed black. From what I can find, it is not made of cedar. According to PencilRevolution, it’s linden wood. Whatever it is made of, it sharpens with ease and quickly in my KUM Ellipse sharpener.
The core is dark enough . I favor darker cores (leads) as my use is primarily drawing and sketching. I prefer a dark core for it’s range of darkness and lightness. I can get light shades from a dark core, but not dark shades from a light core. So darker is better in my book. Additionally, a nice dark core allows for easier writing. Anyway, the core is dark enough, and hard enough that it holds the point well enough. I didn’t find myself sharpening my pencil after every word or minute of drawing. The core is scratchy. It doesn’t glide over the paper like a Palomino. It gives a lot of feedback sort of like writing on rough paper but finer. Some people might like this but I am not a huge fan of the feeling.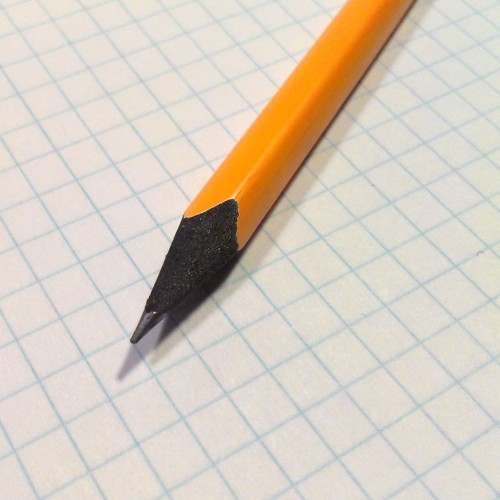 In fact the grittiness of the pencil makes it well suited for rougher papers, like that which is in my Staples 100% Recycled School Year Planner. It also performed well in a Staples Composition Notebook
With both the included eraser and a stick eraser the pencil erased cleanly from paper. Leaving behind a slight trace of the word removed. The included eraser is gritty but not gritty enough to damage paper with general erasing, though, I suspect repeated erasures would leave a hole in more delicate papers.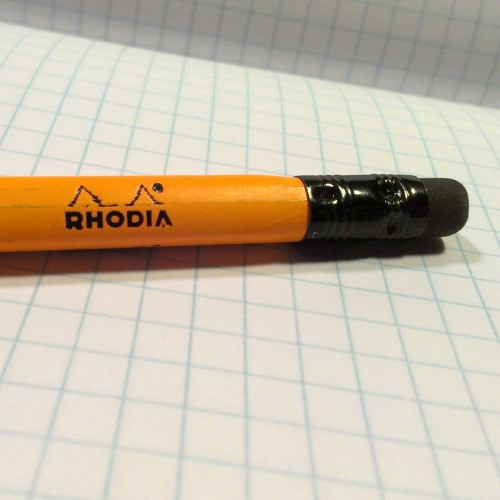 The triangular shape of the pencil was comfortable to hold and doesn’t roll off my table or desk.
This is a very good looking pencil that is gritty in performance. If you favor smooth pencils like the Palomino Blackwing series, you might not like this pencil much. But, it is a good pencil to try out. It’s available from Jetpens as a single only (great for an add-on item to get your order to $25 for free shipping.) but is available in other places by the dozen or at Bob Slate in Cambridge, MA.
Shelterwood Stress Test Part 4
It’s been well over a month since I last wrote about my Shelterwood. All along it’s been residing in my back pocket. I’ve switched out from jeans to shorts, and I’m now working in my garden more and not riding the train.
The Shelterwood has survived: a sweltering hot face melting trip on the MBTA Green and Red lines to South Station, a walk in 60% humidity to the bus terminal and a 5 hour bus ride to Bangor, Maine, a 2 hour car ride up to Machias, Maine. It’s also survived my gardening. During time in the garden dirty gloves get shoved in my back pocket, spools of twine get shoved in there, knives are slid in and out of the pocket, and generally anything in my back right pocket gets abused. While this Shelterwood did survive it is much worse in wear than it has been before.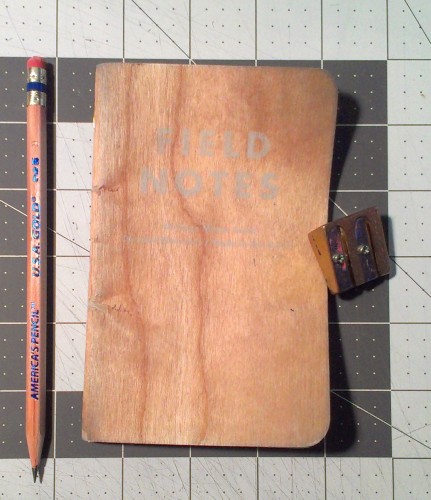
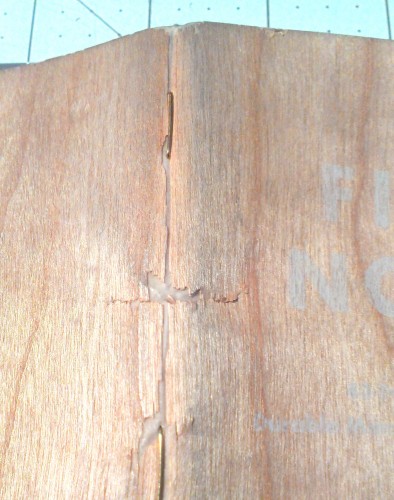
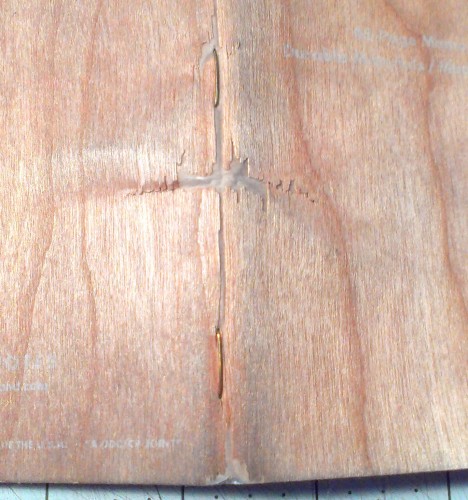
The cracks along the front and back are larger and the chips and flaking around these cracks and creases have increased. The splintering on the spine and at the edges is increased. The corners are showing wear. The front cover is set in a permanent curl that is the shape of my right cheek. (You needed to know that.)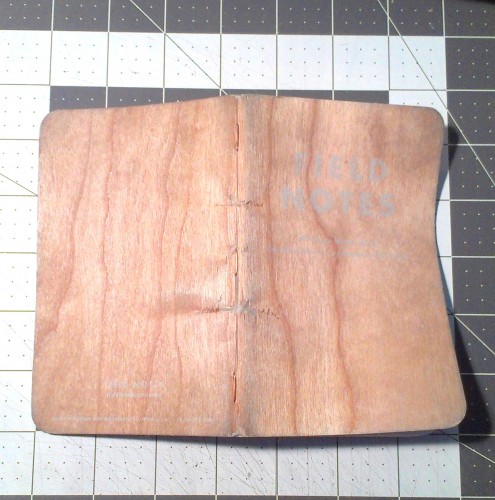
With all of that new damage, one thing has remained stable, the staples and paper are not loose. Not a single page has become detached or damaged. Other than some indigo transfer from my jeans on the corners, the paper is fine.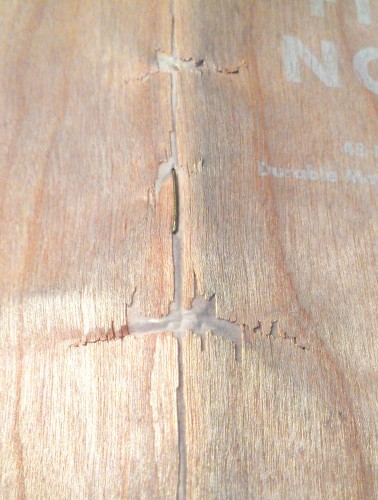
Now it would not be fair, just or whatever else if I didn’t mention something interesting that happened during my trip to Maine. While there I gave my Dad his father’s day gift: a vintage John Deere bullet pencil and a pack of Shelterwood. He ripped them open, remarked on the wood covering and really dug them. I took a look at his pack and was pretty dismayed to notice that one of the books was splintering and wood peeling off the cover already. My Dad didn’t care, he was going to use these the way they were intended, in fact he grabbed the damaged one the next day, shoved it into his front t-shirt pocket along with a bunch of farm stuff and a pencil, and went to work on the farm. In a few days it’ll be covered in dirt, grease, fertilizer, and other farm grime; the way these beauties were meant to be used.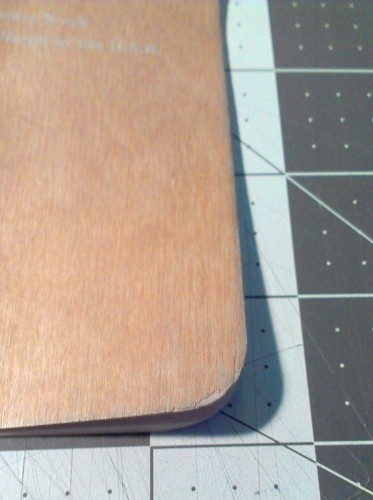
Uninspired
I’ve been trying really hard to not turn this blog into a straight up review blog. I need to share a few of my opinions on other “things.” Right? Yeah. Sadly, I’ve been less inspired to write than I have been in the past. Maybe it’s the 20 page papers I’ve been writing in grad school or the loss of our dog, but writing isn’t somethign I’m doing. I’m thinking about posts and ideas, even writing them in my Field Notes as I consider them, but they aren’t making the leap from the analog to digital world. I’ve always gone with the roll of my moods with this blog. I’m working on a few good posts about some ideas I’ve got, I’ve got pencil reviews queued up for months and I’m adding a few paper reviews as well as other assorted stuff.
Now that I’ve transitioned from Typepad my other stuff blog is no longer around, so I might need to figure out a new location for that info. Or maybe I’ll roll my garden and dog stuff into this blog. Speaking of which, we decided to adopt another dog. Wickett our previous dog missed Ruby a lot, so we decided to get him a buddy. We found a lovely mixed Chuhuahua Italian Grayhound mutt who has a wonderful personality and is gentle, lively, and smart. Within 5 minutes of meeting us he was sitting in our laps.
As for my garden? I got started late, but it is starting to finally come together and look great.
Cost of Entry
If I were new to the pen, pencil, and paper addiction and reading the top blogs right now I’d be convinced that entering into this addiction might be very very expensive. As much as I love to read about pricey pens, I know that many are out of my reach. It seems to be a rare occurrence for an affordable pen to be flogged. A notable exception is the Pilot Metropolitan, a pen that I like very much but wasn’t overly enamored with, but still recommend for people looking for a starter pen.
Another thing that makes pencil-dom more affordable is that pencils and paper pair up more easily. I have a stack of journals and notebooks I’ve put aside because they didn’t work well with my fountain pens. Many of these are doing great with my pencils but were horrible with fountain pens. Take for instance the Martha Stewart and Avery pocket notebooks. God awful with even a dry writing fountain pen but great with a pencil. In fact with a pencil they shine. the paper doesn’t chew up the pencil, but is toothy enough to get a lot of graphite on the page without crazy smudging. I still wouldn’t recommend it as a primary pocket notebook because it’s got those nasty perforated pages, but for quick notes or short letters, it’s great.
Every time I pick up a pencil it writes. Occasionally a point will break off and I’ll have to sharpen it, but generally speaking, I get graphite on the page. That isn’t always the case with a fountain pen. Sometimes the ink will need coaxing out of the nib, sometimes it needs water to be added, or I nee dot refill it , or flush it, or something. If I’ve used a pen consistently it will write without issue, but man if you let that sucker sit for a month you are in for some work.
Of course there are exceptions to that rule. I’ve got 2 Platinum Preppy pens sitting on my desk. I haven’t touched either one in over a month. One is loaded with red ink and another with black. Both of them wrote without a skip or issue. My TWSBI 540 or Lamy Safari can’t say the same thing.
One of the reasons I’ve been reviewing pencils this summer is that for the most part, pencils are affordable. even the most expensive pencil I’ve reviewed/ purchased was $2.50. Compared to my most expensive pen at $75 that’s a bargain. Getting into pencils can be done with just a few dollars. A decent writing experience can be found for $2.50 for a dozen pencils (USA Gold Naturals) and an exceptional experience can be had for $20 a dozen (Palomino Blackwings, pick any one of the 3). I’m not suggesting that pencils are better than pens, simply that they have a lower expense for greatness.
Wanted: Technique Today Ideas
I’ve done a TON of Technique Today posts and I’ve gotten to the point where I think of something and then realize, I’ve done it already. I’m looking for ideas for Technique Today. Leave me a comment about a Technique you’re interested in and would like to know more about. I’ll do the research, separate the bunk for the gold and post ’em.
If you have trouble leaving me a comment here on the blog, hit me up on Twitter or Facebook!
Review: Mitsu-Bishi Hi-Uni Pencils
In my last JetPens purchase I ordered a pair of Mitsu-bishi Hi- Uni pencils. I picked out the HB and B grade. I refer to these as the adult, in the non-dirty manner of speaking, pencils. Their smooth burgundy paint, gold foil imprints, and slick black plastic and gold caps simply look like the kind of pencil adults might use. These aren’t kiddy styled pencils. The plastic caps remind me of old Venus drawing pencils that had smooth white plastic caps. It just screams “serious art creation happening here!” The combined package of color and crispness makes these look like nice pencils. Those looks are not deceiving, these are nice pencils.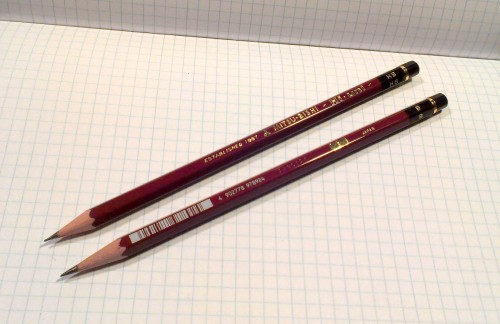

I popped the HB into my KUM Ellipse sharpener and was quickly down to the business of writing and sketching. The cedar sharpens well. The core is smooth in the sharpener, and shaves off a nice point. This pencil is smooth and dark. As HB cores go, this one is as smooth as a Palomino HB but holds the point well. I was able to write and draw without sharpening the pencil every minute or word. The experience of writing was nice and smooth. I did not find a single hint of grit or scratchiness. This pencil simply puts down graphite.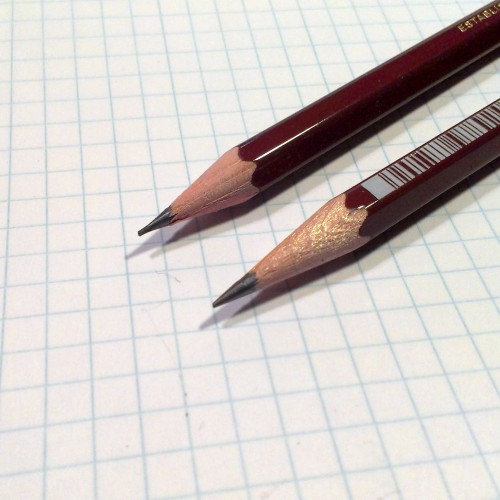 I sharpened the B pencil in my KUM long point. Again no issues here. The core was well centered and sharpened to a perfect point. The B grade was slightly darker than the HB but just as smooth. It needed slightly more sharpening than the HB but that is expected for a B pencil.
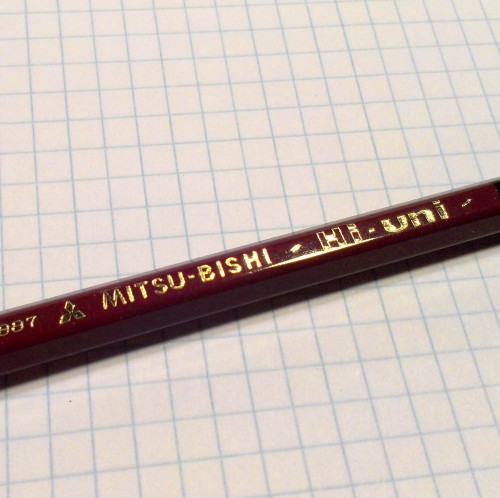 While I’d use the HB for class-notes the B is less well suited to note-taking given it’s need for more frequent sharpening. Either pencil erases cleanly from paper through the use of a block or click eraser. In use, these pencils certainly obtain high marks. They look fantastic and perform flawlessly. The one BUT I have is that they are a little on the expensive side. JetPens sells these as singles for $2.35. A dozen costs $28*. To put that into perspective, they are pricier than the Palomino Blackwing, which are as good for sketching, though not available in 5B to 10B or 2B to 10H. For a full range of use, the Hi- Uni wins out. It’s price is a tad off putting.
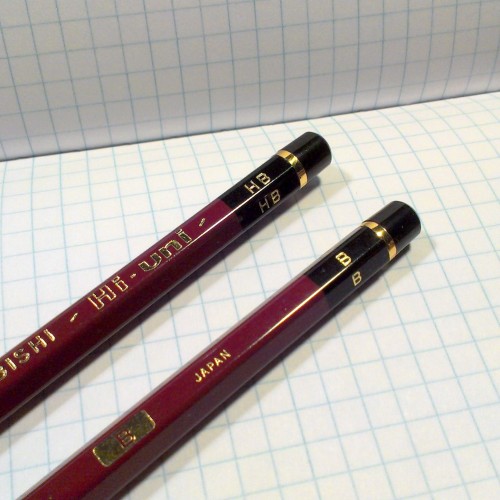 Again, if you are looking for a little something to get your JetPens order over the $25 mark for free shipping, a single pencil is a great way to do it. You won’t regret the purchase, it’s a damn fine pencil.
Review: Mitsu-Bishi NanoDia B Pencil
The shining star of my recent Jetpens purchase is the MitsuBishi (UniBall) Nano Dia pencil with a B core, in green and white. They are available in 2B as well and in the following shades green, pink and blue. The white finish of the pencil is pearlized. It’s very similar to the pearlized finish of the Palomino Blackwing Pearl. Howeve,r the NanoDia has green triangles printed over the creamy white finish. They are semi transparent and barely noticeable. There are 2 accents of a darker bright green. One is a diamond shape and the last is a band at the ferrule end of the pencil. Together the colors work well and make for a very nice looking pencil. The green reminds me of the Staedtler Wopex coloring.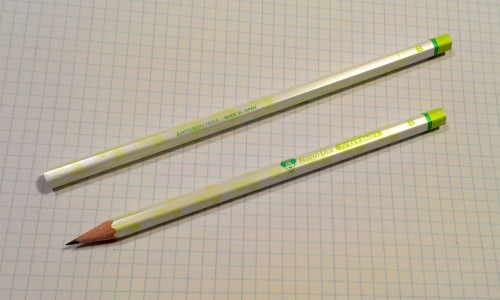
The ferrule end of the pencil is not finished. The core and the wood of the pencil are visible. the core is well centered. The pencil sharpened to a nice point in my Kum Ellipse sharpener. Because my allergies are interfering I cannot tell if this is cedar or not, however it LOOKS like cedar and sharpened well.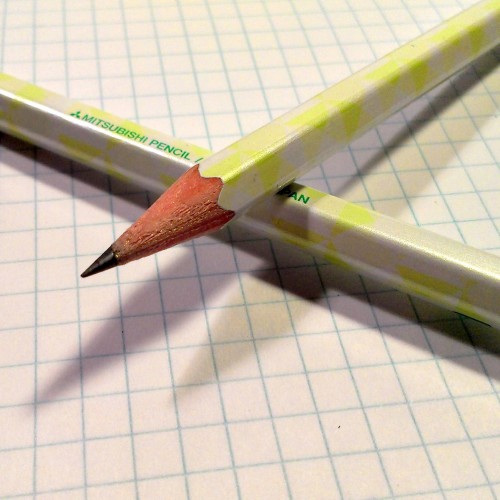
 The pencil is graded as a B, and it writes like a B pencil. It’s darker than most HB pencils and is softer and smoother. However, it held it’s point well and didn’t need to be sharpened after every word or scribble. It erased cleanly with both block and stick erasers. It is be well suited to sketching or note taking. If I were to compare this to a Blackwing, I’d say it’s VERY similar to the Blackwing Pearl in darkness and softness of the core.
 Also, it is affordable priced, arriving in a 3-pack for $3. This is again, an option to boost your JetPens purchase to being over $25 to get you to free shipping. Don’t like green? You can get it in bright blue or pink. All colors are available in B or 2B. The green is a great spring color.
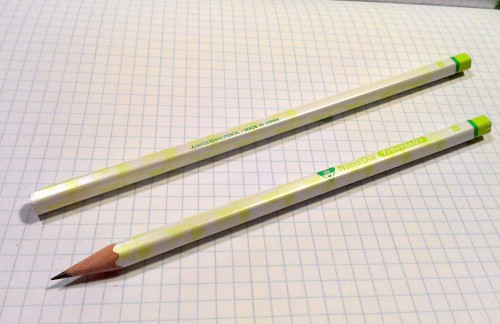 Final word? A good looking and affordable pencil that will make you happy. I’ll be reaching for this one more than any of the others I ordered in this Jetpens package. I would say if you want the Blackwing experience with a lower cost, the B NanoDia will give you that experience. I’d rate this at a very similar level as the Blackwing Pearl.
If you don’t like wood cased pencils, Uni offers the lead for mechanical pencils. It’s as nice as what is in the wood pencils but offered in more of a range of hard and soft. I have a couple of packs and I’ve been happy with them.
Review: General’s Sav-a-Point
I’ve been wanting to get a package of pencil point protectors for awhile. I’ve had a pair of Sun Star “sect” point protectors for awhile, and they are okay, if ugly. I put the General’s Sav-a-Point 12 pack of point protectors in my Amazon wishlist a month ago. The protectors come with a General’s All-Art Red plastic sharpener, which is generally useless. I had issues getting a decent point on most of my pencils. Though it did okay with colored pencils.
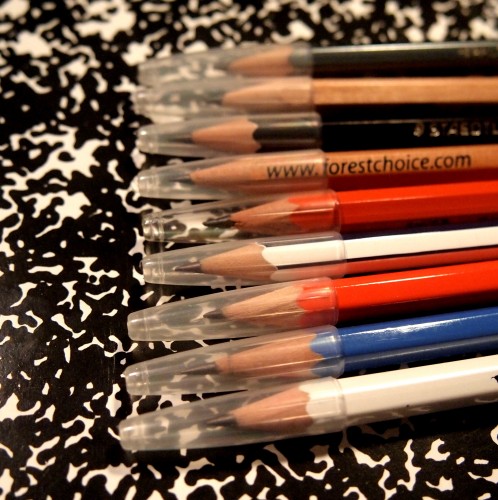
The caps fit snugly onto all of my pencils, even the thinner Staedtler pencils. Points didn’t protrude from the cap and the caps have not fallen off in a few weeks of use. They really protect the points of the pencils from breaking or stabbing me as I carry them. 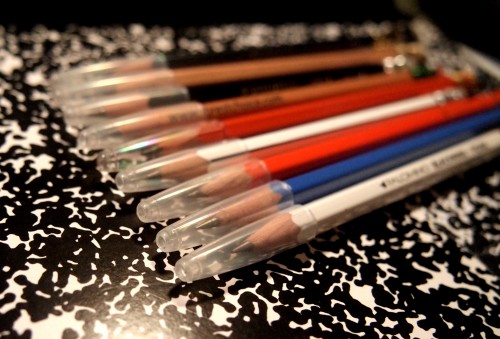
The caps aren’t pretty. They are an inelegant solution to a common pencil problem. The job they do is fantastic, they are just not all that attractive. One of these days I’ll find some of the sexy metal caps.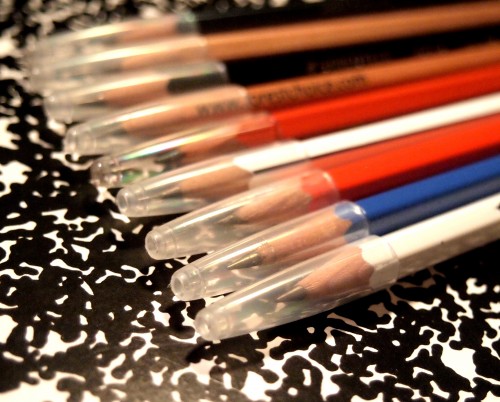
Technique Today: Mandalas
This week I'm looking up videos about one of my favorite topics, mandalas. Mandalas are great tools for relaxation, mediations, and adding a touch of focus and calm to a journaling practice. You can get out a compass and make precise circles or make shapes that are loose. It's your choice.
If you have issues viewing the videos here on my blog please click the title of the video on the upper left of the video and it will open up in YouTube for your viewing pleasure.
