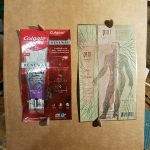
Most folx know that I’m devoted to recycling. I started to explore recycled items as part of my printmaking process with the use of heavy card packages- like cereal, frozen pizza, and seltzer can boxes. As I was flattening the boxes in our bathroom recycling bin, I realized that most of the boxes had a plastic coating, and thus could be used much like aseptic packaging. We’re talking things like facial toner and toothpaste boxes.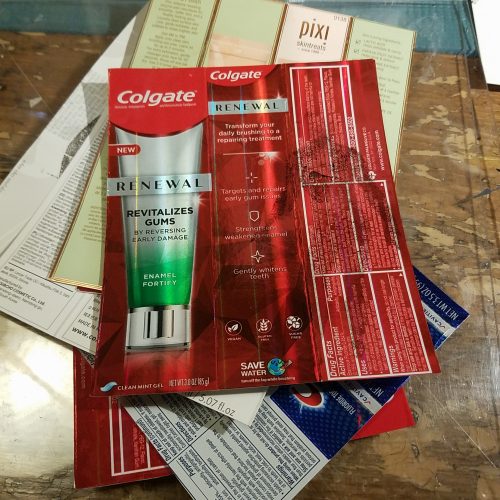
To start I opened up the boxes and trimmed off any torn or wrinkled areas. I couldn’t decide if I wanted to leave the flaps on the boxes or cut them off, but using the mini press constrains my efforts, so for these, I trimmed them off. They just wouldn’t fit on my paper or press. After that I wiped then down with Simple Green. Finally I ran them through the press to flatten and smooth them.
Some people like to trim off the folds and just use the parts of the boxes that are smooth and flat. I chose to leave the folds to get a larger space for creating images. I ended up with plates roughly 4 x 6 inches.
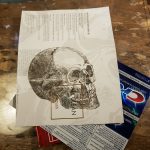
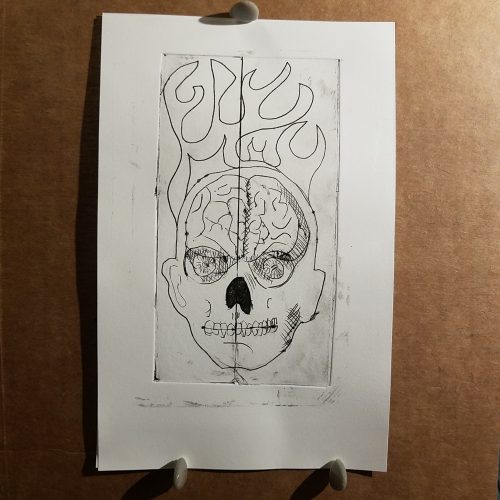
I’ve been wanting to use toner transfer for awhile so I printed some skulls and brains. I used my chartpack blending marker. It smells like hell and uses xylene but it’s the one thing that I have found that works flawlessly for the toner in my Brother B&W laser printer. I made the mistake of trying to run the whole thing through my mini press between my plates and it hazed the clear acrylic top plate, so that’s fun.

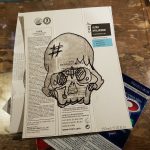
Anyway, no need for the pressure of the press, the marker does the work on its own. I ended up with pretty good transfers on most of the packages. I combined these transfers with some freehand sketching with a sharpie. The sharpie doesn’t seem to transfer from this packaging to the final prints. It does with other plates.
Finally I scratched and scored into the card with an Exacto and a needle. I also used a ball embossing tool. All worked pretty well. For larger dark areas I cut into the plastic and card with the Exacto and peeled away areas of the plastic and card. Most of this packaging has the plastic layer, plus a super smooth very sealed layer of card, then the pulpy fiber layer of card. Finally the plates were sealed with a top coat of water based varnish. Normally I seal the edges and back of the cards, but wanted to get printing. This was a mistake. The edges of the cards hold a lot of ink and can make for a VERY mess printing experience.
Inking was done intaglio style. I used a brush to lay down ink and push it into my lines. I ended up using a silicone scraper to push more ink in and scrape off the surface ink. After that the surface ink was wiped away leaving behind a bit of plate tone to make a more interesting print.
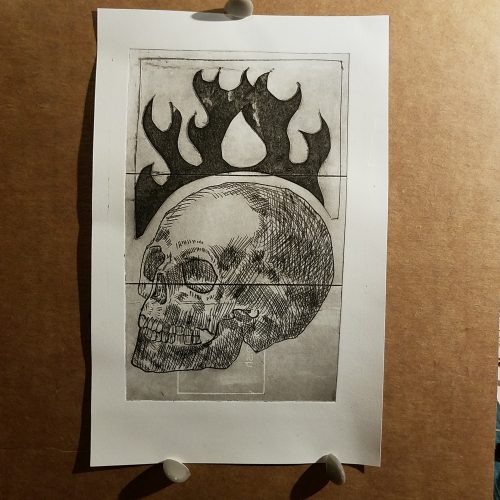
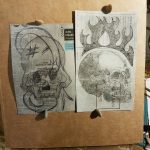
I really dig the dark flames at the top. They were cut and peeled. You can also see where the package imprint wiped cleaner than the surrounding area. If I’d been thinking I’d have carved and peeled this away too.
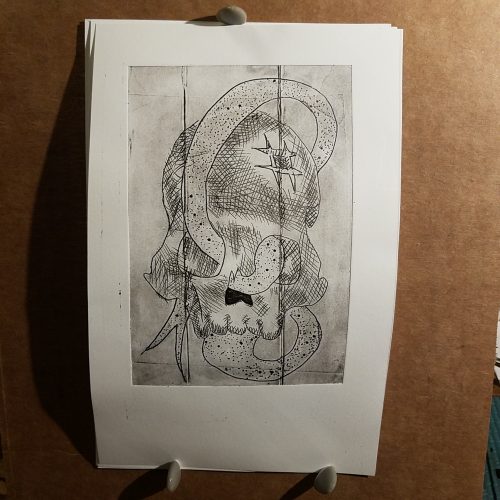
I’m not pleased with this one, the tongue doesn’t slide through the sockets properly and is distorted. I probably won’t print this one again.
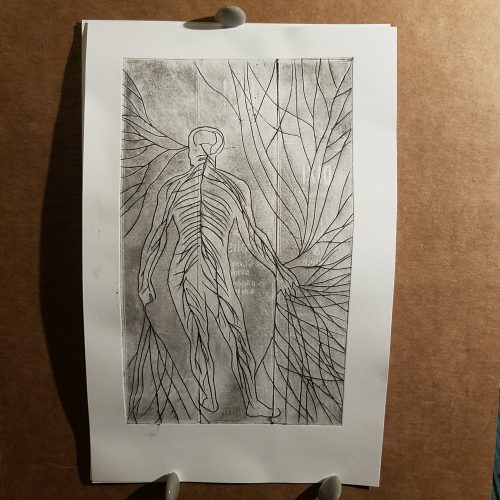
This one is fun, I’ve always liked the image of nerves running through the body. I just embellished. You can see the embossed details of the package.
meh. I won’t be printing more.
As you can see from the pictures these little plates make really interesting images and print surprisingly well. With the exception of the Pixi box. That coating seemed to get a bit sticky with the ink. It might do better with Akua or other watersoluble inks. But it did not like the Speedball Supergraphic Black ink.
It was a lot of fun making these plates and printing them. It’s very freeing to use trash to make art.
I included an affiliate link to Amazon for the Chartpack markers. Jerry’s Artarama, Blick, and Artist & Craftsman has them cheaper, but you have to pay for shipping. Unless you have a local store.
The press and ink and my time were paid for through Ko-Fi support. Check out my page for a way you can support this blog and get art in the mail!!!