Author Archives: leslie

Reflection: Organizing Chaos

Organizing chaos might be my new band name. I’ve spent a great deal of time over the last 2 weeks in a print shops that was “put to sleep” at the very start of the pandemic. You really can’t do letterpress via zoom.

Then over the pandemic the space was unused, and like all basement rooms, things filtered in “for now” but ended up staying forever. There there are supplies that I just don’t know what they are exactly. I’m sure if I searched I’d find an answer, but some stuff is unlabeled. If there is one thing I’ve learned, I will label everything I open. I’m thinking about purchasing a massive box of zipper bags just for that purpose, or hell paper bags. I have no idea what the soft rubber sheets* with glue on one side are, but they are cool, and we’ll try to print it!

I found excess project pieces in odd sizes and an entire package of untouched Baltic birch from Mclean’s. If you know, you KNOW that made me SO happy. I also found an assortment of monoprint plates and plastic drypoint plates. Plus loads of inks for monoprinting.

I keep writing “I found,” as if I discovered these supplies on a wild adventure, and in a way I suppose it has been. In part it is a discovery of all the history of all the folx who have run this print shop. While I’m not officially running the shop I am turning it into a space of therapy. Continue reading

Reflection: Falling Back into Pocket Notebooks

When I first started my new job I had won a Instagram giveaway from  Maruman USA for a pair of their lovely Septcouleur notebooks. I still need to review them but I’ll start with the fact that they are lovely. I immediately decided the mustard colored book was my new work notebook. And it’s worked perfectly. It’s perfect for notes in meetings and trainings. It’s also not so big that it feels weird carting it around the building.golden hour image of a Pen Addict by Word Notebooks pocket notebook, well used

So I do a lot of moving around the building. I’m on the 4th floor for part of the week, the basement another part (the print shop lives there) and then the first floor for meetings and a group, then the second floor then the 3rd then… Suffice it to say I’m in and out of studios and floors of the building all day all week.

Another Pocket Notebook

Like I said I’m going up stairs and downstairs a lot. I was really glad that I stuffed a notebook into my back pocket at the start of the job. I intended to fill the Pen Addict X Word Notebooks pocket notebook* for sketches and doodles while I was commuting via the train.

It didn’t take long for me to start making notes about groups, make to do lists, and needs for groups in the pocket notebook. I’m not down to a flow with the system yet, but pocket notebooks are 100% making a post-pandemic comeback in my routine.

I started to make some of my own hand stitched notebooks. These aren’t available for sale, though, I’ll be making some of my own out of my own art at some point, remember all those brains I carved? Yeah on notebook covers. Those pictured are for staff at my new work- I found some dead and overprints, killer. I had to make a hand sewn version of the Dead Prints by that big company- but WOW these are so different and sooooo cool!

Continue reading

State of the Art: Reviving a Printshop

I’m a lucky perrson. I’m getting to take part in reviving a slumbered printshop. In the shop we’ve got a large etching press, 2 working Vandercook presses (An SP20, be jealous), a small 5×7 card press, 2 baby presses, 8 cases (or more) of lead type, and a case of wooden type. That doesn’t include the various plates made for the presses to produce job specific posters and cards.

The kind of difficult thing about this revival is that the shop was not slumbered properly. The person who had been running the shop had left the company and the printers who had been there to oversee the production had retired. Further, the printshop was left open so folx could grab materials they could use… But also, so it could be used as storage. And I think all of us know what happens in a basement room for storage when people get busy- stuff gets stashed and forgotten.

So there’s a large amount of stuff stashed, but also dead prints, make ready’s,  test prints, and prints that just didn’t make the cut stashed ALL OVER THE PLACE. Not to mention the supplies that are stashed that belong in other studios.

The part that I love about this is that all the stuff left behind shows the history of the place but also gives us great materials to have our students make sketchbooks and pocket notebooks.

I’m ridiculously excited at the prospect of having access to all of this machinery but also to make it available to the other art therapists and all our clients. Continue reading

Published: The Pen Post No 2

Jonny has published issue number 2 of The Pen Post. I gushed about it over here.

It feels a little odd to gush about it again, especially since I wrote an article for this issue. I write about my love affair with cheap pens.

You can grab a copy for yourself over on etsy, here.

I am still in love with the form of this zine- the half fold like an old school newspaper makes me super happy.

State of the Art: Gel Window Clings

You might be wondering why I have a post about gel window clings. Well if you’ve read my blog or visited my instagram, you know I’m interested in printing with trash and weird stuff. I had a moment of genius where I realized that gel window clings are made of similar if not the same stuff as gelli plates.package of gel window clings

You know the things I’m talking about- those dollar store holiday themed window decorations that pop up in offices and classrooms every holiday season. Those gummy decorations that for halloween are shaped like skulls, stars, cats, jack-o-lanterns and other Halloween themed icons. I believe I’ve also seen them for other holidays in offices and other places. It took some searching- they were no longer carried by my local dollar stores or even the pop up Spirit of Halloween near me. Instead I found a set in CVS. Mine cost $4. They have gone up in price. They are also available on Amazon.

Once you have your gel window clings you’ll notice a few things- they are MUCH thinner than even mini and small gelli plates and they are MUCH softer and squishier. This is fine, you’ll need a gentle touch when printing.

I attached mine to an acrylic stamping block, but they can easily adhere to any smooth non-porous surface like plexiglass.gel cling on an acrylic block

Once attached I rolled them up like any gelli plate- dab a bit of paint on, then roll the paint out. I also rolled into onto a slab then rolled it onto the gel cling. Both worked equally as well. star shaped clings on a block

A thin even coat is key to getting a good print. I found that placing the block and gel cling then flipping the paper over and using my hand worked best. After I determined they would print well. I cut my sticker paper to sized and dropped the paper onto the plate, in the usual gelli printing manner. printed stars

I printed white skully images onto sticker paper to make skully stickers. I also did some black cats and loads of stars.

Overall this process was a lot of fun, and really interesting. The prints came out great and makes me wonder about other themed gel clings- I founds summer, ocean, letter, dinosaur, fall, thanksgiving, and christmas sets. The letters pose an interesting option for hiding additional meaning in a print or for creating a printing poetry.

Continue reading

State of the Art: More Gelatin Printmaking

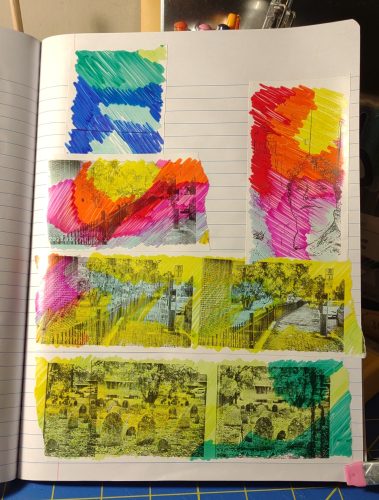
Fall is upon us, the days are shorter and mornings crisp, which means it’s time for pumpkin spice and more gelatin or gelli printmaking! For ease of writing I’m going to refer to this printing method as gelatin printing throughout this post. I’ve put the supplies I need for a printing session into a small (ish tote) so I can set it up to print away while watching TV. Though often I find myself not watching the TV and just focusing on making prints.

I set a goal to get 10 or so good base prints to work on in additional sessions or methods. 

So this brings up the idea of what IS a GOOD gelatin print, or base print? And are they the same thing?

The short answer is that no they aren’t always the same thing and the long answer is, it varies depending on what you want to use the prints for. So gelatin printing is a form of monoprinting and can absolutely be used to create wonderful images on its own, but if you want to do that, you’ll likely need to use Akua inks for their longer open time or amend acrylic paints for a longer open time with airbrush medium or something to extend their open time. Though I’ve seen a few YouTube videos of artists using layers of acrylic paint to create amazing landscapes with a gelatin/gelli plate.

For me, I have 2 types of gelatin prints- those I want to make more art on with other tools and those that I want as a finished piece on its own.

In both I look for layers of color through stencils and paint manipulation to create texture. YOu can see that in the images below. Each has several layers of stencils built up through the gelatin plate that creates depth and interest.

For sheets that I plan to turn into their own individual pieces of art, I look for specific colors I can use as the background. Colors that pop with texture and layered meaning. In most cases I look for specific colors that I can use to make the final image pop.

For sheets that I plan on using as a backdrop with other media, I look for the same things- layers of color that create interest. I really like to have color opposites over analogous colors. I’m particularly fond of yellow, magenta and orange together with teals and blues over the top. I like these layers behind deeply black and opaque white ink.

I think a GOOD gelatin print session is one where I am able to get a bunch of different colors on a bunch of sheets that create visual interest. A good print is as individual as the printer.

Continue reading

State of the Art: Gelatin Printmaking, Gelli Prints

I’ve been planning on making more gelatin plates for, well, years. Gelli plates have always seemed very expensive, and they are, they always seemed slightly out of my range. Whereas making my own gelatin plates is cheaper, but fraught with mold issues. Given that my studio is in a basement, well, I worried about my infrequent use, and losing them when I really wanted to make some art.

I finally cashed in on a Michael’s coupon and bought myself an 8×10 Gelli plate. Plus some fresh paint and a new pen. I mean, I don’t think I can pass an open stock pen display and NOT buy a pen.2 color gelli print with distorted hex pattern

Anyway, I set up a folding table and got to printing. I used my old cardstock stencils and some new stencils I made out of hot glue. I’m not sure about the hot glue stencils yet, but I’ll say that they are very interesting. I’ll be playing around with them some more that’s for sure. Mostly I just wanted to get some color onto paper, and some layered texture onto the pages.many layered gelli print with squares and net pattern

Anyway, after a fun session of printing and playing with my plate I stacked up the prints. I decided to attempt a drum leaf binding. It’s not my favorite binding for gelatin prints, I prefer a concertina book- where the pages are glued to the accordion and the spine is thicker than the fore edge- this allows for more room for collage. The drum leaf is great for writing, and as such I’ll likely use the new journal for just that. many layered gelli print, numbers squares and other patternsdrum leaf spine damaged by impatience

Drum leaf isn’t my favorite because, well, I’m impatient. I rushed through this book  and the spine looks wonky. That will be covered by a piece of print used for the spine but it’s annoying to say the least. In the end the book is saved through my understanding and knowledge of book making. But I also need to remind myself to let glue dry, ala Laura Kampf.

Continue reading

State of the Art: Art Journaling, Again

Art journaling is something I return to again and again. It’s the best form of expression I know and soothes my mind in even the worst situations. Yet, these last few years when I could have used it the most, I wasn’t using an art journal in its most effective way. I was using a sketchbook and drawing but I wasn’t art journaling in the form that I find most effective. That is to say, with stencils and paint and drawing. 

I’m happy to report that I’ve been art journaling again. I’ve been focusing on short sessions, instead of my old marathons. Though I’ve done some marathon gelatin printing sessions, those are forming the base layers of my art journals. I’m adding symbols and more layers of collage and drawing.

Here’s an example:

I made a few foam tray blocks (I’ll have to detail this classic printmaking method later) and stamped them onto my page with black water soluble block printing ink. The ink stays wet for a long time and even after drying remains soluble with water. I sealed these with a low odor sealant to keep them in place as I worked. foam block printed brains

Then I attempted to transfer a color photocopy of a selfie I took. It transferred poorly to this surface- the combination of gesso and gloss gel didn’t like the toner. You can see this ghost under all the other additions to the page. I pulled another image- a skull with a hole cut in it, and attempted another transfer, another bust, though this one left an image that could be reworked with ink. the 8 is also a foam print but het skull is a transfer

After that I layered in a skull from a sheet I keep on hand. I like to draw skulls and they have no particular dark meaning to me, but I understand that the combination of skulls tends to lend a dark look to this page. Though I see skulls and bones as a metaphor for underlying strength. Anyway, I carefully cut out the skull and glued it in.

I considered drawing on the rays from the skull’s eyes, but instead went with another collage style. In this case, I used another gelatin printed sheet, this time, on sticker paper. Pro-tip: Pick up some sheets of sticker paper and gelatin print on them. This creates some awesome badass sticker sheets for collage. It’s super easy to cut out stripes to use like washi tape. I was quickly able to cut and assemble the rays from the sticker sheet.

After applying the sticker paper, I added in some orange colored pencil. This was to push the rays up and off the page and make them pop. It worked, mostly.skulls for days

Overall, I like this page. As with all art journal pages, the process is the most important aspect of the page, but it’s nice that I was able to create an interesting visual page.

State of the Art: Transition

Transition is never easy. And wow, am I doing a lot of it these days. 

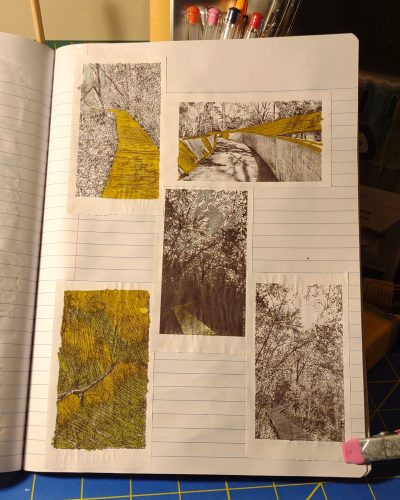
In the time between my old job closing, then the temp job, and finally the new job, I started the trash printmaking projects. In part because I NEEDED art in some way, and also as a distraction from the stress of transition. In the two months of that position I churned out some fantastic drypoint and collagraphic plates. All using a craft press! Great stuff.

In the end I got the job that I wanted. I won’t go into details of the position, but I met a friend and told her about it and she said, “That’s the stuff you were born to do.”

I think she’s right.

As I transition into this new job, in a new city, and back to riding the train, I’m finding that my art process is changing too. I’m back to working in my sketchbook and I’m carrying a pocket notebook again. Little ideas are doodled out and ideas jotted down. But I’m having a difficult time finding time to be online.

I’m working on my schedule to ensure that I continue to make art in my off time, but hey, here’s an awesome thing- the job includes making art as part of my daily work.

In the time between leaving and starting again, I visited a friend’s studio, a thing we’re planning on doing regularly. We worked on Gelli plates and used stencils and die cuts to make prints. I tapped into my stash of rescued cardstock and printed a lot of pieces. One of the things about gelatin printmaking that I like is the ability to layer so many thin layers of acrylic on top of one another.

I brought my layered textured images home and promptly turned a large amount of them into a new art journal. I’m hoping to get a gelatin printing station set up in my studio. I consistently find it more satisfying than painting. The ability to layer colors and get a shape to pop is interesting to me. The look of all the super thin layers of paint over one another is satisfying. Anyway, I’m thinking of buying some gelatin and making my own plate, but that has to wait for things to settle down. For now, I’m happy to just have a position where art is part of my everyday.

Review: U.S.A. Gold Pencil

The U.S.A. Gold pencil has changed ownership so much I’ve lost track of ownership, luckily for me RoseArt has their name discreetly slapped on the back of the packages. For awhile I couldn’t find them on shelves at my various big box stores. This year I found this pack of 20 pencils at Staples for $3.99. Pretty pricey if you ask me.

The packaging is as maximalist as they come. A plastic (UGH) bubble glued to a piece of card with some die cutting. The front of this hanger package features a red, white, blue, gold, AND green design. The package is hard to read and the U.S.A. Gold logo is lost in the mishmash of crap on the packaging. There’s a bit of a flag motif, except one stripe is red and the other is blue. Oh, yes, don’t forget the handful of stars.

Jeebus crisco, why not just add a crying eagle, RoseArt?

The flip side of the package? Moar flags and stars.

There are some changes to the 2021 version of this pencil, and frankly… Most kinda are crap.

The pencils look pretty similar to the older version- possibly cedar, gold ferrule with a blue band, jaunty little pink eraser and a slim feeling in the hand.

The changes are a glossier coating, gotta get in that no name microban antimicrobial nonsense to capitalize on covid fears. Never mind the antibacterial properties of wood are well documented, and cedar itself is rot and fungal resistant (though it absolutely will rot.) The claims emblazoned on the USA Gold packaging doesn’t say or even suggest that the pencils will kill covid viruses, but one must assume that harried parents rushing through Some Box Store with a passel of cranky kinds might just toss a package of these into the cart, without investigating the claims, or believing the product will help little Johnny in the fight against covid. Do you really want little Johnny sampling some of that sweet no name microban knockoff as he chews his pencil?So Glossy
Enough on that.

The true crime here is that RoseArt dropped the stellar blue foil imprint, thus further ruining the look of the pencils. We now have a glossy pencil with a GOLD FOIL imprint. GAH.

Hideous.

The cores are dark and smoother than the original Write Dudes pencil. Still I cannot recommend this pencil to you. For so many reasons. The awful maximalist packaging, the glossy “antimicrobial” finish, the GOLD foil imprint, it’s all just so wrong. They ruined a really decent pencil.

In a hilarious twist, RoseArt forgot to update the website for this product… So the website mentioned on their own packaging leads to a dead page. LOL.

Continue reading