I answered a few questions about my reasons for leaving youtube 10 years ago. The video should be live now that you see this.
🙂
I answered a few questions about my reasons for leaving youtube 10 years ago. The video should be live now that you see this.
🙂
I scuff up and decorate another chapstick tube with an eggplant drawing.
My camera has a little freak out and I like it.
004 CA
Make Stuff my new youtube video series is starting. I’m trying to turn the camera on when I make stuff. In this video I take apart a tripod and use the legs to make a selfie stick and a couple of mono pods. I may make a few other things, we’ll see. (I think I have another broken tripod hidden away.)
New Make it Mine video up.
I’ve written and rewritten this post a hundred times.
Quite a long time ago I deleted twitter and facebook off my phone. I’ve slowly weaned myself off Facebook, without many regrets. I use marketplace to buy bikes and bike parts but mostly, I don’t interact. I do have this blog and my new iteration of this blog cross post to Facebook, to my comfortable shoes studio page. But I also fail to interact there.
I never liked the twitter app, so it wasn’t a hardship to delete it and just use Tweetdeck on Chrome on my phone. But now Eloon has bought it and is quickly ruining it.
quote from cnn:
“By Friday morning, Twitter employees from departments including ethical AI, marketing and communication, search, public policy, wellness and other teams had tweeted about having been let go. Members of the curation team, which help elevate reliable information on the platform, including about elections, were also laid off, according to employee posts.”
Anyway. I used to love twitter, BUT I strongly believe that a social network is only as strong as it treats it’s minority members. I’ve left numerous groups because the person running it didn’t stop bullying or harassment behaviors, both toward myself and others.
So I’m also giving up on twitter, but if you follow me there I will continue to cross post about my posts here, on instagram, youtube and also my Micro Rant blog here.
Part of my Comfortable Shoes Studio Philosophy has always been to do something as long as I can and it makes sense for me. I’ve been mulling it over, but maintaining the RSVP website is no longer sustainable- as much as I want to continue with the seasons of the show, it just doesn’t fit with my life right now. That is to say, I do not have time and to continue with it would mean burning my candle at both ends for something that doesn’t work for me. I’d rather pour that time and energy into Comfortable Shoes Studio and YouTube. So even if I go back to RSVP, it will be under the Comfortable Shoes Studio heading. As such, the website will continue until it runs out (2 more years) and then it will be held under the CSS website (it’s already here.) As such, I’ve already let go of the Useful Journaling blog, as I wasn’t updating it anyway, and it makes more sense to just put any posts that I might’ve put there, here.
The whole point of all of this is to bring ALL of my varied interested- video, podcasts, and art back under the Comfortable Shoes Studio umbrella.
I’ve harped on the idea, loud and long that everyone would OWN their ideas on their own online home. For me that home has always been Comfortable Shoes Studio.
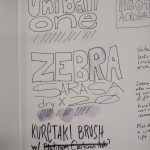
My current plan for Youtube is to do a series of vlogs where I explore life and philosophy. I’m going to work on being in front of the camera again. I know this part will make a LOT of you happy, I’m planning some art instructional-ish videos, right now I’m working on a series about customizing commercial stuff, in this case a sketchbook.
In this video I sand the label off a ChapStick tube. In part because I didn’t want to rep the company every time I used it but also to prepare it for making art on.
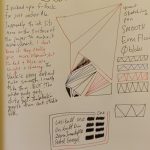
In this video I fill out the first page of my new work sketchbook and decorate the front cover with Posca paint pens.
I really thought I’d written a review of the Talens Art Creations sketchbook quite a while ago, but a search showed me I was wrong. It’s too bad because this sketchbook is a sleeper hit.
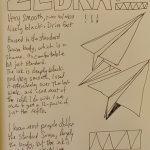
The Talens Art Creations sketchbooks (TACS) are available in a variety of sizes- from a cute lil’ pocket sized, up to the large roughly 8.5×11.5 inch book I’m using currently. Each book has 80 sheets or 160 pages of 90lb cream colored sketch paper. Each book is hard bound in a pleather cover in a variety of nice colors. I use a red one for work and picked up a white one for home. There is a ribbon place marker and an elastic to keep it closed. Everything is coordinated and looks good together. The spine is lay flat style and it really does lay flat and will also fold over on itself without harming the binding. The binding is well stitched and glued and in nearly a year of use my work TACS is still in great shape.
I did add a pocket to the back of both of my copies of this sketchbook, and since I use one for meeting notes and work sketches this is necessary, less so for my home copy. I also added a second ribbon place marker. One I use for information I’m working on and the other is for the current page I’m filling.
The paper is crisp and thick enough that I can use a variety of sketching materials on it, up to and including light washes of watercolor. The cream color does warm up everything and watercolors are not as crisply colored as they’d be on bright white paper but I don’t expect them to be perfect. 
I really like gel ink and paint markers on this paper. The smooth surface allows these materials to glide over the surface. The lack of texture means the pens don’t skip. Black ink sits on the surface and looks good. 
This paper is no slouch with pencil, conte crayon, chalk, and even colored pencils. There’s enough tooth that the materials don’t smudge much and are nice and dark. I really like a whole variety of Blackwing pencils on this paper.
My typical wet washy use of watercolors doesn’t work well on this paper. I did attempt a few wet washy pages and one tore out at the stitching. That said this is useful if you are planning on doing layered art journaling- knowing that you can remove pages with moisture is a good tip. The paper does accept collage pretty well, though I wouldn’t load it up with a ton, the spine is stitched with thin thread and it won’t hold up to pounds of extra stuff glued in.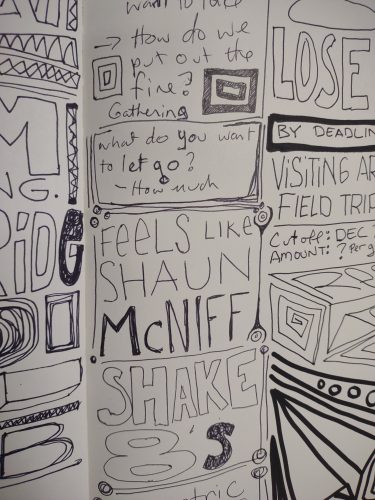
I’ve used the red version for about a year and it’s stood up to being used in my lap during meetings, being tossed into bins, slid across tables, dropped down a flight or 2 of stairs, and being used as a coffee coaster. The elastic is still tight and the binding feels solid. I’ve used it in professional meetings and in groups with kids where I show them about sketching and planning out prints and other projects. It’s been used 5 days a week in a busy print studio.
I get mine at Artists & Craftsman locally. They do not list them on their website, but the size I use is around $16. Amazon has them for this price, but Blick has them around $19. At a mere 160 pages, this isn’t cheap, but the price is good for a sketchbook that can handle the massive variety of materials I throw at it without falling apart. Honestly I like these enough I keep buying them, they are worth the price for the ability to just handle most of the materials I use.
I’m always on the lookout for low priced sketchbooks. While I like to have my young artists make their own, there is a certain amount of seriousness and implied meaning to gifting a young artist with a big ole sketchbook of their own. When I saw the hardcover Mondo Llama sketchbooks on display at Target’s Back to School Sale for $6, I was skeptical but hopeful. I picked up one on my own dime after touching the pages and feeling a smooth but toothy surface.
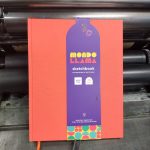
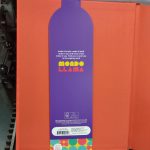
The hardcover is covered in textured paper and available in a light teal blue and salmon color. The texture is nice and makes the covers ready to be personalized. The covers if not personalized will attract dirt and water will leave swell marks. The packaging is a simple band around the front cover.
Inside the book are 112 sheets or 224 pages of smooth bright white sketch paper. Each page is perforated, which isn’t my favorite. I cannot find any information about the weight of the paper but it feels like 24lb ish. It is significantly lighter weight than my 2 favorites- the Talens Art Creations and the HandBook Travelogue series. The sheets tear out to 9×12 inches, a great size if you want to sketch a bit larger. The micro perfs do seem to stay put.
The paper is smoooooth and nice with gel pens and brush pens. It will accept the lightest of light ink washes. It will cockle and buckle a bit but seemed to settle back down once it dried. My usual wet and sloppy watercolors won’t fly here. I like this paper for sketching with gel ink, pen and ink, and pencil. It’s smooth enough my pens are skipping and jumping all over the place, and they didn’t feather or bleed through. The lines stayed where I wanted them to be. The bright white paper means colors look good on the page.
Because this is a 224 page hardcover sketchbook, it weighs a ton. Like most classic sketchbooks there is an overhang from the covers all around. I know for some people this is a deal killer, I don’t see it as such. The point of the overhang is to protect the edges of your paper from fraying and damage. It does have a ribbon place marker but lacks a pocket and elastic. 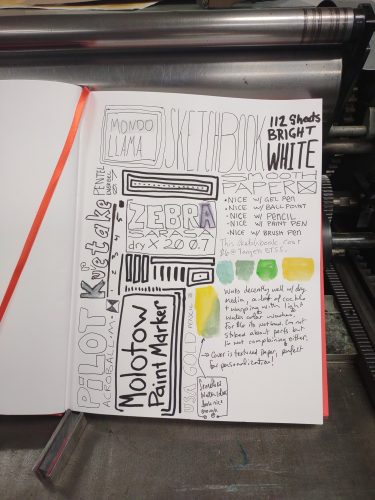
The sketchbook is a great deal at $6. I like it enough that I’m going to use it despite the perfed pages!
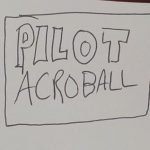
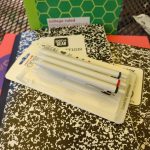
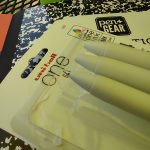
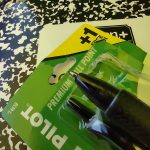
Uniball introduced these white Apple-esque pens last year. The exterior of the pen looks nice, if you like white and for your stuff to look filthy as soon as you touch it. The white matte plastic feels pretty nice. The slightly rubberized grip is comfortable to hold. It’s slightly narrower than other pens in the same price bracket. But I’d also say it’s leaps and bounds better than their other capless pen with an extended rubberized grip, the Signo DX, which at some point I declared the fugliest pen in existence. This is better- there is something about the tip of the pen having a bit of a seam and not being rubberized that saves it from fugly fate.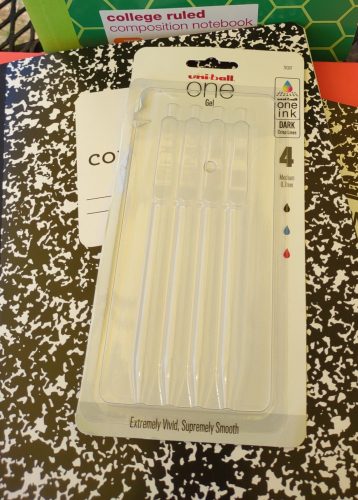
I also like the wire clip. It doesn’t feel like it would hold onto much of anything well, but it stays put, especially to the neck of my shirts. It’s not tight but it’s decent. I wouldn’t go jogging and expect it to be there when I finished, but for normal day-to-day workplace stuff, it’s okay.
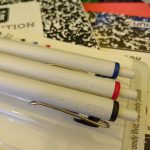
Inside, Uni has developed a “new ink” technology. It’s a gel ink that sits on top of the paper a bit more and the pigments stay suspended on the surface, for a more vibrant look. Does it look more vibrant to me? I don’t know. I honestly can’t tell the difference between this and other Uniball pens. I can say that the black ink (I also purchased a red and blue pen) is nicely black as all Uni black pens are. The ink is somewhat water resistant, maybe waterproof once the unbonded ink moves around. The ink that does lift, isn’t much and it is a cool neutral gray shade. Doubt it would foul all but the lightest shades of yellow watercolors. The .7 medium tip feels and writes more like a fine to me, especially when compared with other .7 tips.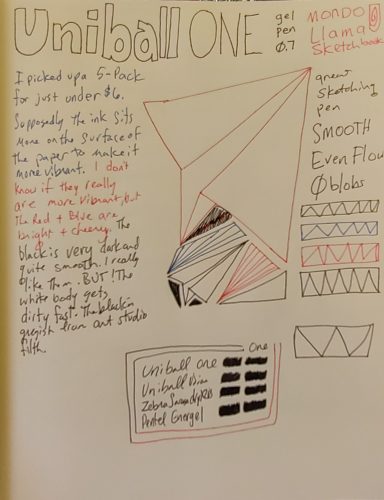
I took quite a few meeting notes with this pen on the Talens Art Creation Sketchbook (review forthcoming) and it didn’t skip or blob. It feels smooth as butter on that paper and all the Composition book reviews I’ve done this year. nThere were a few instances of a line being “hollow.” Byt htis I mean the point seemed to not get ink on it and only the edges of the ball, odd. This only seemed to happen when I applied a lot of pressure tov the pen as I wrote. Honestly I like this pen quite a bit. But the white barrel is a deal killer for me. I have grease, paint, chalk, charcoal, or other art materials on my hands all the time, and in the 2 days I’ve had this pen for testing, it’s now grayish. It’s pretty but just not practical for me. 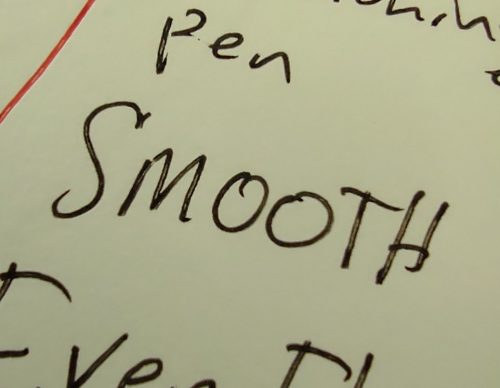
I bought my pack at Walmart during back to school sale for $5.78. Singles sell online for $2.20 so a 5-pack for under $6 is a good deal. I like them but I don’t know that I’d buy more, just because of the white barrel.
I picked up this 3-pack of pens at Target for $2.99 during back to school sale season. It was a 2+1 bonus pack. I purchased it because the package made some recycled claims and I’m a sucker for greenwashing.
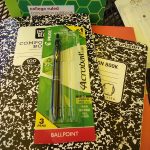
The pens are made out of 77% recycled plastic. It points out that they are refillable for “continued use” but fails to mention where you can get refills or include any in the package. Personally I think the package should be 2 pens plus 2 refills. That’s me though. What do you think?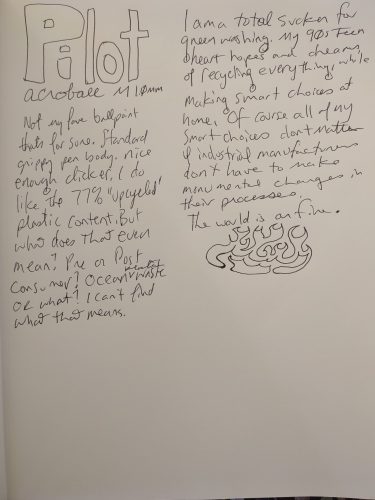
The ink is smooth and doesn’t skip, but like most ballpoints does blob a bit here and there. I find the pen body comfortable enough but it’s not blowing my mind at all. I do like the click mechanism and appreciate how it works.
Overall if you need a ballpoint for anything this is an acceptable choice, at a buck a pen it’s a bit on the high side. A Bic Cristal is a better and cheaper choice.