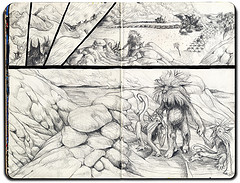
This kid's work is a little different from what i usually post. Its more of a straight sketchbook than art journal, but I like his use of line and 2 colors on a tan background. There is nothing wrong with working something SIMPLE. Black and white on tan. Its kinda genius.
Category Archives: Uncategorized
Technique Tuesday: feelin like crapola
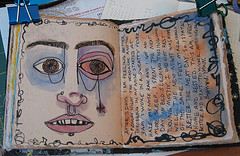
feelin like crapola
Originally uploaded by lessherger
I decided to start a new feature on my blog. Every Tuesday I'll take an
Art Journal image of mine and dissect the techniques I used to create
it. Welcome to the new Technique Tuesday!
A few weeks ago I was hellishly ill with the flu (I think) and was out of commission for 2 days. I was sick enough that I didn't art journal! So when I started to feel better I was working on raw paper again. Again the paper is Stonehenge 140lb. I started this page by creating the border. Using a waterbrush I outlined the page in water. The edge was still moist when I used my brush pen to scribble the border. I held the pen at the very end and allowed myself to work very loose. Because the page was moist the ink feathered and spread out. Because I had not gesso'd the page the spread was very controlled. On the right page I again wet the page so that the ink would spread more. I then sketched out the left page with a pilot G2 gel pen. With my waterbrush in hand I added watercolor as I finished an area of the sketch. I used my watercolors to add color to the facing page, allowed that to dry and then wrote in the same gel pen I'd used to sketch the previous page.
This was a very simple but effective page to create. I particularly love the spread of the ink onto the moist raw paper and the conjunction of the watercolor and ink.
You can see the full sized image and get a lot of detail by clicking on
the thumbnail above and clicking the "see all sizes" button above the
image that comes up.
“I am the referee. I am not your momma.”
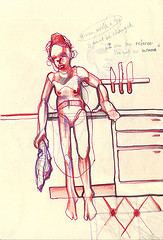
"I am the referee. I am not your momma."
Originally uploaded by outsketch
This is creepy but cool. I don't know anything about the artist, but this is nice.
Forest Spirit
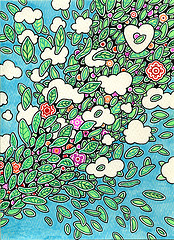
Forest Spirit
Originally uploaded by Alkaline Samurai
I love repetitive patterns. I used to draw a lot of them when I was younger. I think it was stress reduction. Now I draw and paint and listen to music… Not much has changed. Great colors in this one.
Orkney Sketchbook 1999/2000
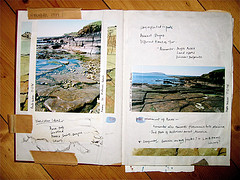
Orkney Sketchbook 1999/2000
Originally uploaded by Jinn 'n Tonic
I'm not always a big fan of photos in a sketchbook but follow the link to this flickr stream to see some great stuff.
Try This: Obessive Drawing
I want to write a little post about repetitively drawing something
over and over again. Why? Because it helps you learn how to see and render that
item. Monet painted the Rouen Catherdral repeatedly in different lights and from many
angles. Van Gogh obsessively drew scenery around him. Rembrandt drew something like
90 self portraits. Van Gogh is one of my favorite examples of this sort of
exercise. When you get a chance look up some of his early work, the stuff he
did before “The Potato Eaters.”His early work was without a doubt dark, dingy
and as one of my professors would have called them, sophomoric and angsty.
Particularly look at his drawings of that early time period. Proportions are off;
his use of line is stiff and disconnected. Across a year or two he develops his
eye, his connection to the paper and canvas and a definite style. Ignore his
colorful later work and look to his lovely work in ink. Van Gogh developed
himself into a superior artist through HARD WORK in ink and pencil.
And you can do it to. You don’t have to give up the kids,
dog and house to traipse the seaside village of Arles. You can do it through
careful observation, hard work and repetition in your own home and your own
community.
A few days back I drew a face from memory. I couldn’t get
the nose just right, and for lack of a better way to put it, it pissed me off.
So I challenged myself to draw a bunch of noses from the few scant magazines I
had in the house and from images on flickr. (please for the love of all that is
decent do not search flickr for face shot… Trust me, it’s a bad idea.) So I
found some great pictures of faces, self portraits, and magazine images. I
found a few particular people that do a lot of lovely self portraits from all
sorts of angles. And I drew, so far I’ve sketched out 30 or so noses. I’ve
sketched them from all sorts of angles, given each one careful consideration,
to the angle of the bridge, the crookedness of the front bulbous portion, the
nasal cavities and nostril flair. I’ve
also looked at the wrinkles around the eyes and the laugh-lines. I’ve looked
carefully at distinguishing features, and sketched them all.
So some ideas on how to try out this sort of exercise. I
chose noses but say eyes or mouths interests you more, or trees or buildings,
you can pick whatever you want, just stick to it for a few sessions. Grab a
cheap sketchbook or unlined notebook. When I mean cheap, it could be loose
printer paper. You want to not worry about how expensive your paper is when you
try this. You want to be able to get ticked off and toss it if you want, or
when you move to the next spot on the page to move on with no worries. I like
to work this sort of thing in mechanical pencil, cheap bic pencils. Again these
are something inexpensive. (Van Gogh cut his own pens out of reed.)
Look at the angles and lines in what you want to draw. Look
for a second before you put pencil to paper. Consider the item then draw. Look
at the shading. Where are the darkest areas? What are the lightest and
brightest areas? Where are the highlights? Fill a whole page with these images.
I fit 6 to 10 noses onto a page, work small and work large, but fill the whole
page, let the images overlap. The idea is that you’re not creating a work of
art but practicing.
What kind of lines do you keep making? Soft smudgy lines?
Scribbled scratchy lines? Jagged coarse lines? Smooth soft lines? Try different
types of lines, try making smooth gradations. Eventually you’ll find a way of
working with that pencil that looks right and feels right to you. Don’t add
color to these, keep it black and white.
Keep track of which page was your first, number the pages if
needed. Look back at the end and you’ll be amazed that after 3 or4 pages of conscientious
effort of drawing one thing over and over again you’ll be amazed at the difference
in the first drawing and the second. Try this exercise over the course of
several days. I’ve been working on mine now for about a week. I’ve noticed a
substantial difference in my ability to render the human nose. You can see some
of my images here and here.
sketch3
sketch3
Originally uploaded by jason.solo
I'm not sure what is really happening here but I like it. Lovely little illustration in black and white. The image doesn't say what the media is but it looks like it's either pencil or ball point pen.
Art Journal Video: MissiSnowWhite
This is a good video of someone's first art journal.
Technique Tuesday: Doodle and some text
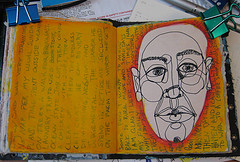
Doodle and some text
Originally uploaded by lessherger
I decided to start a new feature on my blog. Every Tuesday I'll take an Art Journal image of mine and dissect the techniques I used to create it. Welcome to the new Technique Tuesday!
In this image I started with raw paper. In this journal I'm working with Stonehenge 140lb printmaking paper. I drew the image to the right and then wrote on it with a Pilot G2 gel pen. I allowed this to fully dry. I then used liquatex heavy body acrylics and a wide flat brush to spread the paint out. I allowed it to sit heavier in some mares. I did not attempt to get a even coat. I wanted to obscure some of the writing. I worked quickly to avoid lifting the gel pen. The G2 is water soluble even after allowed to fully dry on absorbent paper like Stonehenge. I used my heat gun to dry the acrylic fully. I then used my caran d'ache watercolor crayons to outline the drawing of the face. with a waterbrush I smoothed this out and allowed the color to blur. I dried that with my heat gun. I added some additional color with the crayons.
You can see the full sized image and get a lot of detail by clicking on the thumbnail above and clicking the "see all sizes" button above the image that comes up.
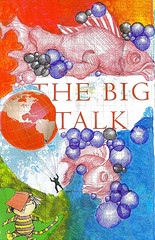
big talk
big talk
Originally uploaded by chance.press
I think the person should have drawn birds and bees around the words big talk….