These 3 hedgehogs are interesting. 1 is made with chocolate brown sep hide and the other 2 are made with new leather, a mottled chocolate brown cow hide. Its super stiff and doesn’t require backing (I’ll wax philosophical about this in another post) and makes a damn fine hedgehog. I was particularly impressed with the stiffness of the leather when glued down to the stiff card end sheets I had put on the 2 hedgehogs. It does require some special care when cutting.
In other words, use a SHARP blade! I would also suggest that anyone working with a heavy weight leather like this NOT use their good rotary cutter, it dulls the heck out of it and it’s not worth it I would suggest my favorite tool – the simple box cutter or click knife. (BTW this is 3.5 to 4 oz weighted leather, my usual leather is 1.5oz this is a heavy weight leather.)
Back to the hedgehogs, these are lined 160 pages of 20lb Wausau ivory colored paper. OF course they are stitched in the normal hedgehog way, clamped and glued under pressure. I used the book press to adhere the cover and it was perfectly smooth. The leather is flat and tight to the book block with no evidence of curling or cockling. I love the book press, I he’d never really gotten to put it through it’s paces before I gave it to my Dad to sse if he could make a heavier duty stronger press. I must say that it’s sweet, and I do wish that I had room for both presses, but alas I don’t.
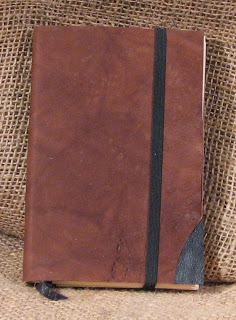 The hedgehog above is the new cow hide with a sheep hide inlaid corner. There are some letters and numbers punched into the edge of the hide here, I’m t sure what they are for, probably something to do with the leather and color, to keep track of it at the tanning factory.
 This one is choclate brown sheep hide- super soft and smooth with a hint of darker spots in it.
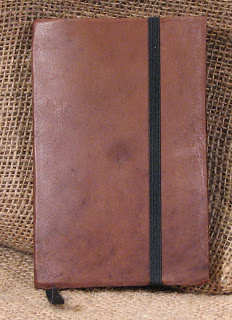
 This is ALL the cow hide, when I ordered it I wasn’t sure of the “marbled” coloring, but seeing it in person really made me realize how cool this mottled brown is, like milk chocolate.
Anyhow 2 will be on etsy and one on eBay or some combination of that.


