Tag Archives: print

Review: Casemate Neon Pattern Printed Pencils Hex

The current iteration of Walmart’s Casemate pencils are darn good. Made by Hindustan pencil company they feature a top notch HB core that is dark and smooth. I find the neon and multi-colored packages to be better than the plain yellow pencils. The key to getting good Casemate pencils is to look and make sure the pencils are made in India. I’ve heard other reports that these are often round. The package that I picked up is a hex pencil.

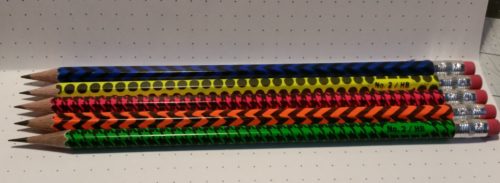
I had hoped to pick up a pack of the plain unprinted neon pencils or a package of the premium tinned pencils. Neither was to be found so I took a chance that the 30 pack of printed neon pencils was as good as the neons.

The packaging for the 30 pack is a pillow box made of stiff clear plastic, with a bit of foam at the base to protect the points, and a thick label wrapped around the belly. In a pinch it could suffice as a decent pencil case. Each tube has 6 pieces of 5 colors- pink, orange, yellow, green, and blue. All are neon except the blue, which in my package is a royal blue color. Each 30-pack is $3.24, which is roughly 11 cents per pencil.

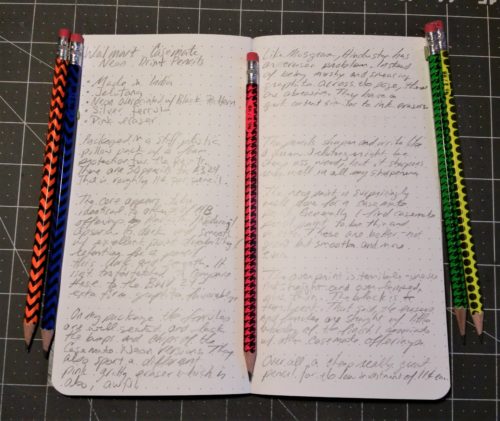
The pencils themselves sport a standard Hindustan HB core. That is to say it’s silky smooth across most papers and is nicely dark. I’ve found very occasional bits of grit in some of my pencils, but this is rare and to the same extent that I find them in much more expensive pencils. The core has excellent point durability/retention. I get a few pages from a sharpening with my Carl A5. The wood is jelutong which sharpens well but has no distinct odor that I can detect*. It is lightweight and I have grown fond of the look of this wood. It ranges from pinkish tan to nearly white to speckled. All of my sharpeners handle it well.

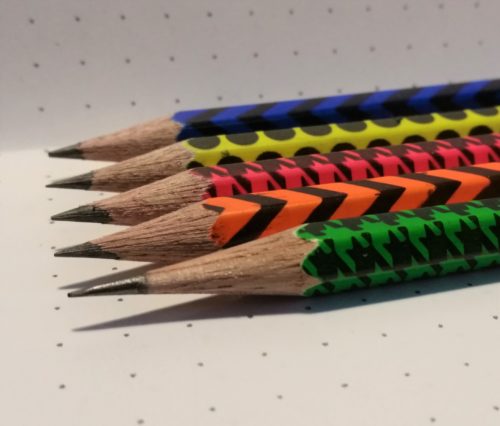
The paint appears to be a layer of white, with neon atop that with an overprinting of a very thin coating of black. The black is nearly see through in some areas and the neon colors definitely pop through the black patterns. The black patterns are a pox upon an otherwise lovely pencil. On my pencils- every single pencil the printing is crooked, the grade designation is not only off center of a side, it’s often printed on a hex point and at an angle. Further the crooked printing is overlapped in some areas and not others. The patterns are also everso slightly stretched on some of the pencils. The images I’ve included in this review do not do justice to how truly abominable the print job is. It’s atrocious. It is laugh worthy. It is, as my Grandmother would say, ugly as sin.
The silver ferrules are affixed well to the pencil and hold a pink eraser. The erasers are typical of Hindustan and Casemate awful. This batch of erasers is stiff and gritty. In use they have a hard time removing graphite from even the smoothest of pages, and yet seem to lift the fibers of the page. Through repeated use I could see these erasers tearing a hole in the paper. They remind me of the old grey ink eraser like the Papermate Union.

In short these are great pencils for a very low investment. The core is wonderful, its’ just the exterior that makes these look awful.

Continue reading

Technique-I-can’t-wait-until Tuesday: Mini Polaroids with the Pogo

I was over here reading Crafty Moira’s site and I stumbled upon her tutorials, this one caught my eye– pogo printer yes, making it look like an old school mini Polaroid, why yes thank you very much.

After checking it out, I realized it would be cool to have the pogo print the square image and then simply trim off the excess. (read, I'm too lazy to go get my white cardstock.) After some trial and error I figured some stuff out.

First. Don’t work the actual 2×3 inches of the print, you’ll get a grainy print. You need to work larger than the print size so the pogo can compress it down, or something like that. I chose to work in GIMP (a free photoshop clone that kicks butt) with a “canvas” size of 4×6 inches, which is the same aspect ratio as the pogo print, which is 2×3 inches.

Then I opened a photo, I cropped it square and then cut and pasted it to my 4×6 blank “canvas.” It was over sized, I then selected “resize layer” and resized the image to 3.375 inches square. This will give you a 1/8th of an inch border around the sides of your image, and about 1 inch at the bottom. After this you have to flatten the image and then save it as a jpeg. Now send it to your pogo.

When it prints you’ll notice several things. First the pogo has a hard time with square edges, the top edge of my images are all just a hair off square. I don't mind this, but if you do you may wish to go with Moira's original instructions. The second thing you’ll notice is that the bottom part of the image is really long. You’ll need to trim the bottom so that it is ½ an inch high or so that the whole thing is 2 3/8ths tall. Trim with a ruler and an exacto and voila! You have a mini Polaroid, from a Polaroid Pogo. Sawweet.

In Journal Revolution there are instructions on how to make a Polaroid mat from cardstock for a perfect polaroid full sized image. It looks awesome too.

Some tips for printing you want the image to be at 300dpi, if you let the program autoselect 75 or 150 dpi the resulting print will be pretty grainy. I’m pretty sure it has to do with how the pogo processes the images to its format. In any case the higher the DPI the better the pogo print will be. Also be sure that you save it as a jpeg, if you don’t the pogo will not print it at all, its little lights will blink at you, you might get frustrated because you don't understand it's blinking light, unplug it and then turn it on and off*.

So as I was doing this I realized that I could really add any color to the back ground. I remember Polaroid did some neutral gray and black bordered polaroids at one point, but what’s to stop me from making the background any color I want? Or what if I wanted to add some text to that little area below the photo? Or what if I tweak the image in GIMP to create a pinhole effect?

There are so many alternatives to this that it’s crazy.

Here are a few of the images I made, ready to go for anyone's pogo.

Arcadepogo
Arcadepogo
Arcadepogo
Arcadepogo
If you don't have a pogo you could create your blank canvas as 4×5 inches and then scale it to the "correct" Polaroid size of 3.5×4.25 inches. Then you can print it on any printer or load it to a thumb drive and take it to CVS/Walgreens/Walmart/or anyother store with photo printing. (Walgreens has a service where you can load a bunch of photos to a website, place them on an 8×10 sheet of photo paper, and then print the whole thing for a couple of dollars. All you have to do is pick them up at the store in a few hours, they will ship to you for a few dollars.)

Continue reading