When I was a kid my parents pinched pennies and used a benefit at my Dad’s school to get an Apple iiC. In today’s standards, it was little more than a word processor with some BASIC capabilities. My brother’s and I spent hours playing with a program called PrintShop that mimicked a print shop. We created a newspaper that was largely about our cats and printed it on a loud OkiData dot matric printer with continuous paper with edges we ripped off. The printing was always a little grayed out and pale. But we had a lot of fun. Or I did, my brothers soon lost interest leaving me to finish the newspaper on my own.
We added color with crayons and colored pencils and then presented these to everyone in the family. Which I’m sure was met with pats on the head and hidden eyerolls.
I remember watching the images appear from these points of ink deposited by the printer. It never handled it well, but it was really cool to see lines and shade appear from these dots. Considering they appeared as pretty broken up lines on the screen, it was always really cool.
I wonder if this history with dots is why I’m so obsessed with these mini thermal printers set to dot print mode. It’s such a simple technology, hell it was even around back then.
Thinking back this led me to consider how I’d add color to these prints, how I’d manipulate them today.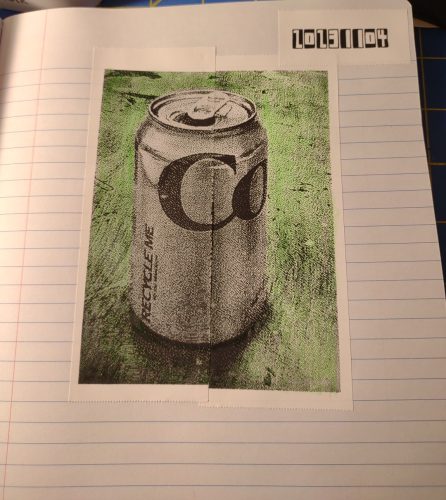
 To start, I used the PikDik (I just can’t with this name.) and it’s “cutting” photo printing feature. This feature will cut an image into up to 3 strips resulting in a roughly 6×7.5 inch image that does require some work to assemble. More on that in a minute.
For the example selfie image:
I shot it with a toy cam, this one to be exact. It is a piece of crap do not buy it. I transferred the image to my computer and then to my phone. A bit of a pain in the arse, but with nearby share on my phone and computer a lot easier than in the past. I have found that these printers, like the toy cams, work best with a lower res image. Which is why I really like the toy cams for shooting for them. But the thermal printing toy cams take better shots than the toy cam linked above. I’ll link to a few at the end of this post.
From there I pulled the image into the app, I tried the share with setting on my phone and the app pulled it into docs. So I had to open up photo then the cutting feature. I then converted the image into B+W in the app and adjusted contract and saturation. I wanted a lot of dark darks and lighter light areas. The initial photo I chose wasn’t that dark to start with. The second photo was much darker. With larger longer and DARKER prints these little printers will overheat. I suggest giving them a rest between prints before printing the second and third sheet, particularly if you are printing something with a LOT of dark areas, like this chicken print.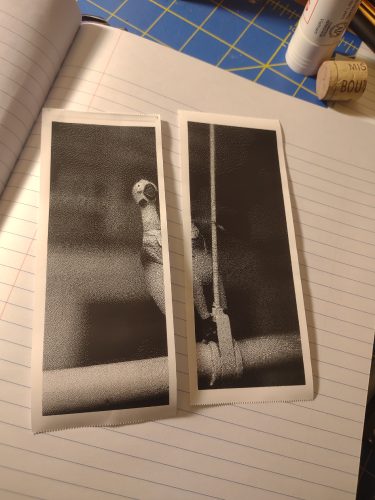 Then I had to decide how many cuts, and how large I’d like the image. 2 cuts keeps it small, 3 cuts makes it larger. The original shape of the photo will matter- the soda can is much large than the chicken because it was taken with an app set to 16:9 while the chicken was cropped to 4:3.
After the image is printed the edges have to be trimmed. I trim one edge and overlap the paper to make the image. This works best for me. The print does not have any over lap of the image, where the print ends is exactly where the print needs to be trimmed to fit with the other side. After I trim one side I use glue stick to apply the image to my journal.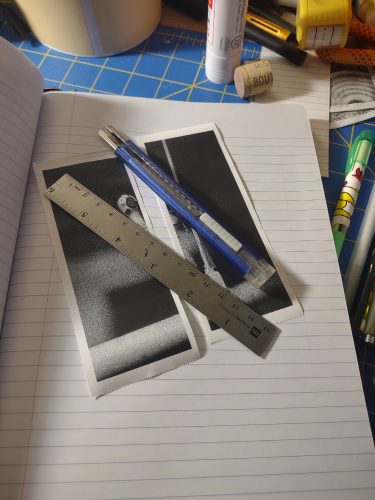 Some notes: These images did not print exactly, that is to say some of my prints were longer than others and some shorter. They didn’t match up perfectly either, it was like there was a 2 or 3 pixel gap. I think the imperfections work perfectly for my uses- my journals.
After printing I played around with different ways of adding color with dry materials- in this case a gel highlighter and colored pencils. The gel highlighter is great for the background of the can- letting the image of the can stand out despite it being black and white. The selfie used colored pencils in the same manner. The color sits on top of the blacks and darks in the image, lightening them but keeping the darks there. I really like overlaying colors. 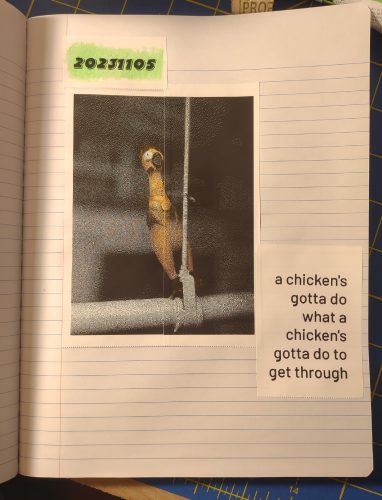 Notes:
If you can edit the photos in a more powerful editor than the one that is in MetaPrint, do so. I noticed that some areas of light, like my eyes, printed quite dark- they are in shadow in the image and the printer and app can’t blow the highlights out enough to capture that white. I used a GellyRoll white pen to add that in. And the GellyRoll pen worked great on this paper. It didn’t sink into the paper at all.
Further Notes: The paper is quite slick and colored pencil took some getting used to for getting it to go on smoothly. I’m not a huge fan of colored pencils anyway, and I think I’ll only use them for some coloration. But it’s good to know that this paper has very little tooth for pencils.
I have found that the paper used really does matter in these printers. That said, the paper is very very cheap. You can spend more on stuff like the Phomemo paper, if you are worried about longevity. I am not. My journals mostly stay closed and in cool dark places. I am not worried about these being archival. I use this paper because it is good and doesn’t have a plastic core. It also comes shrink wrapped and doesn’t have all kinds of extra packaging. I accidentally ordered this one for work and it is also really nice but has a plastic core. It is packaged in a sturdy box with plastic baggies inside.
My feeling about this paper is to use the cheapest I can find that is meant for the thermal cams or printers. I want cheap so I can print a lot of copies of the images and play in my journal. If I buy expensive paper I’m going to be a miser with it and not play.
I’m going to keep experimenting with adding color in different ways.
This toy cam is a much better option for shooting images compatible with these printers. It claims to be a much higher resolution than it is. I take shots in the 8 megapixel setting and I get shots with enough detail for these printers. This instant print camera is also a good option for taking lower res shots, while also getting the instant print feature of these toy cams. You can also use an app like OpenCamera and reduce the resolution down.
I’m going to post this link again, it’s a phenomenal price on the Phomemo M02 printer and I’ve never seen it so low. This time it is posted that it is a limited time deal. So I expect that it will disappear and bump up in price. I use Honey to track price drops on a variety of websites, and Honey indicates that the typical price for these is now around $37. Phomemo bumped the price up to $50 a week before dropped the sale of $25. UGH. I have found a bunch of listings for Phomemo all over the place, it really depends on what they are bundled with. The higher price bundles have sticker papers and other stuff in the bundle.
This has been repubbed from my Ko-Fi page, if you have found this inspirational please head over and consider buying me a coffee so I can keep the inspiration happening on this blog.