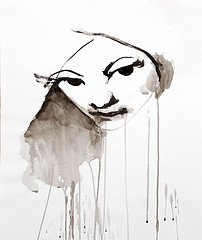
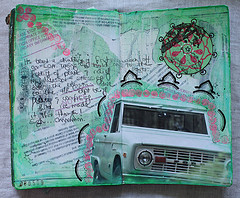
soap opera
Originally uploaded by pierrey
Another great pierry image. Love it.
Another great pierry image. Love it.
those of you who know me know I like Amanda Fucking Palmer. In fact I follow her on twitter, read her blog and yes listen to her music. She is crass, a brilliant musician and a lot of fun. Hence the reason I follow her. Would I attend one of her flash parties? Not likely, you wouldn't catch me dead surrounded by that many hipsters. Would I buy her used glass dildo? (oh great the spam bots will find me) Nah. Do I support her right and insanely brilliant way of marketing and merchandising herself? Do I LOVE the way she leverages social media tools in an effort to make a living as an artist? Abso-fucking-lutely.
Why do I love these things about Amanda Fucking Palmer? Because she put it all out there. She says with confidence what I want to say: I'm an artist and if you like my work you WILL support me. I'll give you some stuff for free but for christ's sake help me out. I enrich your lives, throw me a bone. She puts the tip jar, hat and ukulele case on the curb in your face and is WAITING for you to stuff dollar bills in her panties after a great show. She does a lot without the help of the record labels. I'm willing to bet that the labels would frown upon some of the shit she does, but she's selling her music. (I paid and downloaded it off Amazon, but would download her next CD off her website if offered.)
And for that more than anything else I love her.
Read her blog post here.
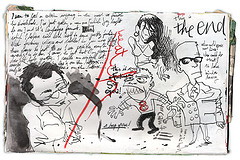
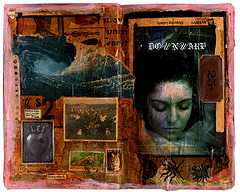
Another SparkleFace collage. good stuff here.
LOve this art journal/ sketchbook great stuff.
My fingers aren't working well so I'll probably edit this in the afternoon, so bear with me for the day…
First off head over to my online buddy's site The Artistic Biker. He's started his first art journal this weekend and he's off to a fantastic start. He's got his daughter started too. Way to go on starting kids off with a lifetime habit that is both educational and very good for emotional well being. I'm sure she'll look at her journals when an adult with fond memories of her father. I htink I was around 10 or so when I was given my first journal. I was one of those orange red locking 5&10 (five and dime) 5 year Diaries. I wasn't artistic in it at all, just wrote my pre-teen angst. Infact I didn't start to journal on a daily basis until I was 12. Which is when I filled the little journals and bought a 6×9 college ruled spiral bound notebook. I decorated the cover with a collage and over the next year filled it with dreadful teen angst. I have all the journals I've ever written. I'm missing 1 from my college years but over all they are all here, somewhere in my home. I digress.
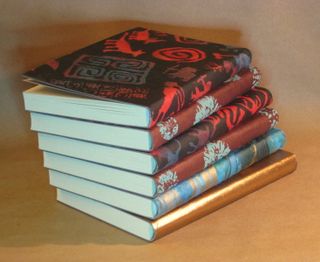
This weekend I created what I'm calling a basic journal. 128 pages of great cardstock, smythe sewn, and a simple cover made of board and decorative papers. they measure 5×8 inches and 1 fat inch thick. The cover is soft and flexible but not too too soft. the cost of them is low, but they are great quality. I've priced them at $12. Find them here on my artfire shop.
Some Artfire news. I'm stoked that they are offering a holiday season free-for-all. All members can list unlimited items for the holiday season. They stay up until January1st, 2010. No fees, no gimmicks no catches. Sell stuff for free and hold onto all that cash you'd be spending on fees. Your saving $36 on the verified subscription price. As a way to pass on all the savings I'm offing a $2 coupon code for all the reader's of my blog, enter PASSITON at checkout.
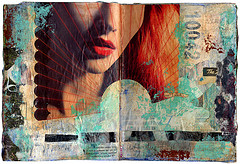
Nice journal spread by eikemay on flickr, check out her stream there are some real gems in it.
Millande has some great techniques for creating one of a kind backgrounds for use in art journaling. They can be adapted to any style.
Great collage in a moleskine on flickr. Love the glaze of color over the whole page. Check out the rest of the stream its pretty good.
I've been wanting to try some white markers out for awhile. I've heard people rave about particular brands, and honestly I've never had much use or luck with them. So I headed to AC Moore and then Michael's with but a few dollars in my pocket and the intent to try out some white markers.
First on my list, Broad Point Galaxy marker. It lays down a wide white line on a variety of surfaces. Sitting as a more opaque white on sealed or glossier surfaces. It had no issues writing over acrylic, a variety of inks and over regular colored paper. The color is more transparent on flat surfaces. No bad odor, slight scent of alochol. Cost was decent at $1.79 at Michael's.
Next was the Elmer's Painter's Pen. It lays down an even opaque line on all the surfaces listed above. It worked great on flat paper. It didn't soak through, the layer of paint/ in k was even and fairly opaque. No bad odor either. Sale price at Michael's was $1.99 regular is $3.99.
Next was the Gelly roll. I read the most hype about this online. It performed okay on flat paper, better on paper treated with ink, and best on acrylic. I liked this pen, it wasn't awe inspiring but performed really well. It was $1.49 at Michael's.
I tried the Marvey Gel Excel. I've tried this pen before. With terrible results. It performed okay. I'm not excited by it. It would do well with just writing over a colored background. I wouldn't want to draw with it. It tends to skip and leave a line that is split in the middle. Of the pens I tested it was the least useful. It was also the cheapest at 99 cents at Michael's.
The final pen I tested and the old standby in terms of a white pen was the Pen-touch by Sakura. It had a fine point and laid down the most opaque and even line. The line also remained narrow.I liked this pen the most of all. Which goes to figure, it was also the only pen with a nasty odor and the most expensive. It clocked in a t a whopping $4.49 at Michael's.
While at AC Moore I noticed that Liqutex had a new line of acrylic inks. The small bottles were $6.99 and the large bottles were $14.99. I wanted to test out the white but couldn't stand to spring for a large bottle when I hadn't ever tested the inks. So I picked up a bottle of silver. I figured the silver would react much the same way as the white. It's really really nice. I suspect it wouldn't do too well in a pen but with a brush it performed very well. It would work well in paste to make paste paper or to tone a page. It was also vibrant on all surfaces, it was also suitably opaque.
The 2 stores I visited were both int he Liberty Tree Mall in Danver's Mass. I've noticed a recent reticence on the part of store's to have open stock pens and markers. Damn those that steal or ruin them. I've have been happy to find small sets in blister packs. Instead at AC Moore I found nothing. I couldn't find any open stock pens at all, nor was I interested in looking more than I did. The store was as usual a cluster f*ck of disaster. Stock in boxes all over the store, employees non-existent and when around avoiding eye contact. I walked past several, while obviously looking for something. No help offered. When I finally found something I was interested in purchasing and made my way up to the registers, I found all the employees, 4 at 2 registers, chatting about their recent tattoo adventures, and loud enough that when I asked a question they didn't answer me, in fact I had to ask my question twice. I then had to wait for the cashier to turn away from the other employee to finish my transaction. Had she simply paid attention to my needs I'd have been gone a lot faster than her ignoring me. It's not like Tuesday afternoons are particularly busy at AC Moore in Danver's in fact it was rather slow. Obviously I'm a little peeved at the utter lack of customer service and complete lack of social graces shown by this kid at the register. I say kid but she's clearly an adult- you must be over 18 in Mass to get a tat.*
When I headed over to Michael's it was the complete opposite. It is a new store with a large amount of square footage. It's well stocked and product is never in boxes on the floor. It was not busy in this store either, but I was able to find everything I wanted and it was clear that they had stocked up on their sale items in advance of their sales- the Paint markers were plentiful, as were all of the holiday items. Items were in their place and easy to find. Staff was ready to help at a moment's notice. they were friendly and efficient. When I checked out the cashier gave me her full attention, even when another cashier arrived to take her place at the next register.
I probably won't be back to the AC Moore again, at least not until this school season is over and they have a staff change. They seem to have a change ever 9 months or so.
*I'm not some anti-tat nutbag either. I'm all for tats and hell it would have been an interesting conversation had I not had to wait for it to end before getting checked out or to have my question answered.