PenSlips

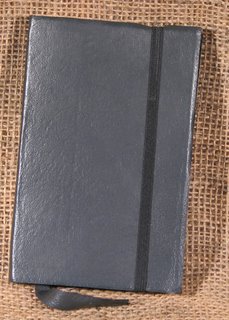
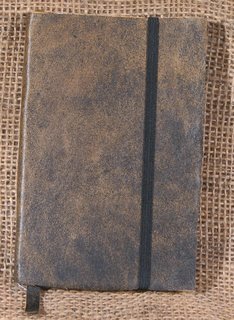
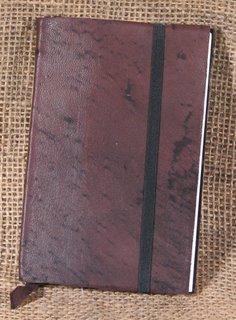
IN response to Dustin’s comment about my PenSlips, I do me them and sell them. I carry them on my etsy account HERE! I can also take orders for them in specific combinations of colored eyelets and leather.

5 of 6 ain’t too bad

Well, yesterday (I had the day off form the DayJob) I backed, folded an generally got ready 6 journals. I didn’t think that I would have time to get the spines designed and sewn but I did!

Here’s a pic of the stack getting ready to have the spines designed and punched.

I thought that they came out pretty cool. I made 4) 5.5×4.25inch 200 page journals and 1)6×9 inch 200 page journal. I messed around with some patterned stitching, and some linking long stitch. I’ll post some pics tomorrow. I’ll be listing 2 on ebay and the other 3 on etsy.

I also spent copious amounts of time working on the website. My brother got me the rest of the buttons this AM, and many of them the day before so I was able to tweak a lot of the links and get thing that I wanted up like a FAQ,Links Page, and a few others.

Tomorrow ebay and etsy.

The Jig

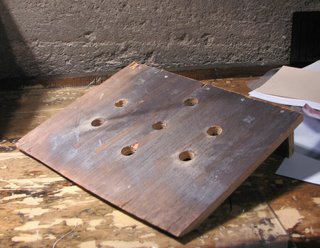
Here’s a pic of what the top of the paper cutter looks like with the wooden block in the middle:


This is a pic of the underside in case you were wondering where to make the cuts. I think I need to add a lock washer between the bolt and the washer- to eliminate the spin when I tighten the wingnuts.

Here’s the top with the bloc all the way to the left. I had thought that making the cuts would weaken the top a lot, making it unstable and thus making cuts that were crooked. What I hadn’t thought of as that the wooden block could act as a stabilizer when the nuts were tightened. I will say that when the block is loose or not in place there is a huge amount of flex in the top.
And here is a close up of the underside. It shows what a crappy tool the dremel was for this job, it melted the plastic far too easily to be of any use. It also shows how far back I had to trim the supports so that the washer would pass.

SOme notes about this project: Next time I would chose a screw with a smaller diameter, this would decrease the slot in the top, the cutting time and overall make this an easer task. I would also get a shorter screw- a 1inch would have been more than enough. A small carriage bolt without threads for the first 1/4 inch would have been a good idea as well. Anywhere with unevenness allows for the threads to get caught and makes smooth travel difficult. I would also bore the holes in the wood block larger, allowing the bolts a little travel, i think it would make adjustments easier. I would get proper tools for the job. The dremel sucked at this but then, perhaps using a different bit would have been better. If I used a narrower bolt I would have been able to use my saw and cut a single cut. But then anything would have been easier than drilling 60 or so holes and then trimming out the remains with wire nips.

All the moaning and groaning aside, this came out pretty sweet if rough looking. It works well and i think that with a few ore modifications it will be damn near perfect for my uses, and if I get another paper trimmer I’ll be doing a similar mod.

Pics of the Vise

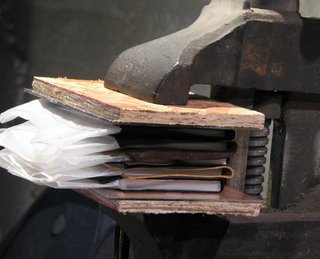
So here’s a pic of the vise in its new orientation. My dad is having a heart attack right now at this! As a woodworker I’m sure he sees many better uses for this 100 year old vise than what I have done to it.

And above is a pic of it closed over 5 hedgehog blocks. My theory is that it will hold a ozen hedgehogs with ease! How freaking awesome is that!!!

NO all I have to do is build the stiff wooden blocks to fit over the jaws…

The Vice and the Jig

Those of you who have been reading me for awhile know that one of the mod’s I’ve been wanting to do to my fiskars paper cutter was to pt an integrated jig onto it. I detailed some plans about a year ago, but last night I put it into action!

I bought
2 brass 1/4in 1.5 in round headed screws
4 brass washers to fit the screws
4 steel wing nuts (they didn’t have brass and they only came in a 4 pack)

I then decided where to cut into the bed of my cutter. I figured if I went right along the rulers Id have a ready made guide. What I didn’t think of or notice that this was the thickest area of plastic on the whole bed! and thus it was harder to cut than anywhere else!.

I then made 4pilot holes. I had intended to use the routing bit my dremel and route the area of travel out, his proved to be both too difficult, because of the speed of the dremel and the cheapness of the dremel routing kit. I then took my drill and drilled holes consecutively until I had a series of 30 hole next to each other for each path.

It was a lot of plastic.

I then used my wire cutters to “nip” out the remaining plastic between each hole. Again it was a l of plastic. I used my dremel to smooth out the remaining areas of plastic. After that I installed the screws, washers and nuts. I used a 1/4 inch thick piece of hardwood I had been using as a jig as the stop bloc. I drilled 2 holes for the bolts and pushed the bolts up through the wood.

I moved the stop block around to find where it would stick and stop I used a knife to shave off small amounts of plastic until it moved smoothly. Now I can slide the wood to where I need it to be, lock it down with the nuts, and cut away, and there is NO WAY this baby is moving ANYWHERE!

I will post pics later.

The Vice should be an entry all on it own, BUT here goes. My work bench came with a huge charming antique vice. I’m in love with it, it’s heavy, patina’d with age and use, and did I mention it’s awesome!?! I knew that it was of no real use to me in it’s normal postion, gravity would make everything slide out of it. So I positioned it on the front of the bench so that the grip works up and down, LIKE A BOOK PRESS!!! The jaw is deep for a vice but not really deep enough for a press, but it is perfect for my hedgehogs! I plan on making some over sized wooden jaws that will make it more useful to me as a press.

Again pictures a little later today.

buttons

My brother got me 90% of the original buttons I asked for and even made me a cute little eraser end for the images! I’m very happy with the work he’s done and his pricing was very reasonable. If anyone is in the market for buttons email me the info our looking for and I’ll email it to him and send you his email.

Anyway, I’m feeling like the site is finally coming together, both image-wise and product-wise. I’m bursting with ideas and happiness. “vce got some kinks to work out a I think that by the end of next weekend I’ll have a majority of my product ordered and hopefully in stock.

For today I’ve got some goals but I’m hoping to spend a fir amount of time in the studio to get some books made.

dreaming weaver

Last night I hit a milestone for use of dreamweaver, I made it do what I had in my head as a design. My hurried sketches and notes in my moleskine for the first time became a reality on my screen. It was combination of things, realizing I don’t HAVE to have full images of everything in my inventory, that thumbnails are a beautiful thing, and the culmination of reading the Dreamweaver book a year ago, and finding the menu with all the secrets that I couldn’t find before. (The book isn’t very clear and I would stop working out of frustration.) But now the page looks like the idea I had in my head and it looks good, or so I think.

I took my new found mastery of the program and immediately made a template so that no matter what I do, all my pages look similar.

When I pulled the screen up in Firefox and IE and it looked the same it was a happy moment in my life.

That being said I hope that Saturday I can get the new front page of the site up. I also hope to get the new

I decided that I would put the rough page up and have some functionality NOW versus waiting, I’m terribly impatient when it comes to these thins. When viewing it please realize it’s a first draft I’m waiting on getting the buttons and a few other custom elements. But go ahead take a look and let me know what you think. Please let me know if there are ay broken links or anything that is working funky.

http://www.ComfortableShoesStudio.com

retails

Other than taking all the pics for website, I spent my day out of the studio. I work tomorrow and have a secret appointment that I can’t write out until tomorrow afterwards, those in the know know, those who don’t will know tomorrow.

I also designated retail prices for the pencils and sharpeners that arrived today. I’m still looking for a wholesaler/distributor for G2s, ECOwriters, Pitt Pens and a few other items (Note, if you work for a company who wholesales those items with a fairly low intial order- feel free to contact me, email is through the about me link.)

SO the price list is as follows:
Palomino 12 pack assorted Grades in Hard Clear plastic Case with an Eraser $14.99+shipping
Palomino Colored Pencils 6Pack $6.99+shipping
Palomino 6 pack Pencil grade 2B or HB $5.99+Shipping
Palomino 6 pack 3)2B and 3)HB $5.99+shipping
KUM Long Point Pencil Sharpener $6.99+Shipping
KUM 2 Hole Brass Sharpener $1.99+Shipping

Shipping will be reasonable for most of these items, they don’t weigh much and will require only a little bubble wrap. Probably $2 for most and obviously more for the 12 pack in hard plastic. Obviouly rush shipping will be more…

I’ll have these up on the website but if anyone is interested earlier feel free to drop me an email about what you’re interested in. I accept paypal.


Admit

OKay I admit , I had never used a Palomino pencil until today. I bought them becase everybody who is into pencils swears by them, lauds them and puts them on a pedestal so high I figurethey couldn’t be that bad.

I’m a convert to their HB. I haven’t tried the other grades but the HB is the smoothest pencil. I wrote a bit with it, and I didn’t break the point off, even after sharpening the pencil with the KUM long point sharpener to a fine point, I didn’t snap it off. The laquer is smooth and shiney and overall it’s an attractive pencil. It handled the kraft paper in my notebook well and has dulled slowly with my heavy handed pressure.

I give these an A+.

I’ll be offering a mix of sets at several prices. I may open some stock and offer single pencils.

Anyway here is what I want Christmas to look like: