Here’s a list of videos, with links this time!
I realize I didn’t post one of these over the holidays so this is going to be a LONG list of videos.
Here’s a list of videos, with links this time!
I realize I didn’t post one of these over the holidays so this is going to be a LONG list of videos.
I answered a few questions about my reasons for leaving youtube 10 years ago. The video should be live now that you see this.
🙂
I’ve written and rewritten this post a hundred times.
Quite a long time ago I deleted twitter and facebook off my phone. I’ve slowly weaned myself off Facebook, without many regrets. I use marketplace to buy bikes and bike parts but mostly, I don’t interact. I do have this blog and my new iteration of this blog cross post to Facebook, to my comfortable shoes studio page. But I also fail to interact there.
I never liked the twitter app, so it wasn’t a hardship to delete it and just use Tweetdeck on Chrome on my phone. But now Eloon has bought it and is quickly ruining it.
quote from cnn:
“By Friday morning, Twitter employees from departments including ethical AI, marketing and communication, search, public policy, wellness and other teams had tweeted about having been let go. Members of the curation team, which help elevate reliable information on the platform, including about elections, were also laid off, according to employee posts.”
Anyway. I used to love twitter, BUT I strongly believe that a social network is only as strong as it treats it’s minority members. I’ve left numerous groups because the person running it didn’t stop bullying or harassment behaviors, both toward myself and others.
So I’m also giving up on twitter, but if you follow me there I will continue to cross post about my posts here, on instagram, youtube and also my Micro Rant blog here.
Part of my Comfortable Shoes Studio Philosophy has always been to do something as long as I can and it makes sense for me. I’ve been mulling it over, but maintaining the RSVP website is no longer sustainable- as much as I want to continue with the seasons of the show, it just doesn’t fit with my life right now. That is to say, I do not have time and to continue with it would mean burning my candle at both ends for something that doesn’t work for me. I’d rather pour that time and energy into Comfortable Shoes Studio and YouTube. So even if I go back to RSVP, it will be under the Comfortable Shoes Studio heading. As such, the website will continue until it runs out (2 more years) and then it will be held under the CSS website (it’s already here.) As such, I’ve already let go of the Useful Journaling blog, as I wasn’t updating it anyway, and it makes more sense to just put any posts that I might’ve put there, here.
The whole point of all of this is to bring ALL of my varied interested- video, podcasts, and art back under the Comfortable Shoes Studio umbrella.
I’ve harped on the idea, loud and long that everyone would OWN their ideas on their own online home. For me that home has always been Comfortable Shoes Studio.
My current plan for Youtube is to do a series of vlogs where I explore life and philosophy. I’m going to work on being in front of the camera again. I know this part will make a LOT of you happy, I’m planning some art instructional-ish videos, right now I’m working on a series about customizing commercial stuff, in this case a sketchbook.
In this video I sand the label off a ChapStick tube. In part because I didn’t want to rep the company every time I used it but also to prepare it for making art on.
In this video I fill out the first page of my new work sketchbook and decorate the front cover with Posca paint pens.
This weekend I realized that I’m about 10 pages away from filling my current sketchbook. I knew I was nearing the end but I’ve had a flurry of ideas to record and noodle out, each time I’ve made sure that my sketchbook is within easy reach. With a mere 10 pages left, my first thought was, “Ohhhh now I have a reason to go to Artist & Craftsman to pick up a new one!”
I did not have access to the car in my moment of weakness, so instead of driving, I dug through my bin of notebooks and sketchbooks. These are books I picked up on a whim at a variety of places when I see them. The first book I grabbed was a traditional hardback black sketchbook with heavy mixed media paper- too “good” for my kick around idea noodling sketchbook. Then I grabbed a dot gridded journal, also not quite right. Then another hardbound sketchbook.
Finally I grabbed a different black sketchbook, and realized that I’d grabbed a black Hand•Book journal, one older than my current version. I had forgotten at one point that I’d bought the black version, and bought a green one about a year and a half ago. Maybe less. It was before I had my interview for my new workplace. Anyway, I had forgotten that I’d bought a black one as back up for my previous journal, blue I think. So I immediately dug into the new red one and left the black one in a drawer. These have been my go to sketchbook for the last few years. The earliest I remember using one was in 2012 or 2013. I know I was using them before i went to grad school- I carried one with me everywhere through grad school.
This does come with a downside- the elastic needs to be replaced or at the very least tightened. Which is a problem I’ve never had with a Hand•Book Journal before. Their elastics have always been snug and perfect, even years later. This is the first of a half dozen or so of this brand where the elastic has been anything but perfect. (I will note that this is a pre-Speedball distribution Hand•Book.)
I do very little to prepare a sketchbook for use, I write my name, address, phone number, and email inside the front cover. For this sketchbook I’m adding some washi tape to the back pocket- the washi will stick but peel off the plastic pocket with ease. Unlike notebooks I don’t do much prep for a sketchbook, the whole point of one is the clear empty expanse of paper for ideas to blossom.
One of the key items in my art making and creative arsenal are my headphones. With these I can create a place to work, make art and be creative, just about anywhere. By extension music helps too.
I’ve used headphones as a way to tune out and tune in since I was in elementary school. Back then I slipped the foam cushions of my Sony Walkman over my ears and tuned out of the world and into my art or homework and later in high school to work. Soon I was using foam covered earbuds and trying to hid the black cords around my ears, through my hair and into a hoodie to wear them in study hall.
My parents had rules on when my brothers and I could wear them.
As I got older I used headphones to tune out a variety of things- the noise of my roommates, construction, late night noises in the neighborhood, the people on the train and other various things. Over time I moved to in ear buds (IEB) and I found they worked better to help me tune out and tune in, and it really kept the noise of the subway out of my head.
At the DayJob I needed to buckle down and get a LOT of paperwork done, some of which I had let build up, so I popped my IEB in and sat in the gallery with my laptop and churned through the work. In the few hours I had I churned through pages and thousands of words of work. The combination of noise cancelation through the DIY plug tips and the music I chose (The Tidal 420 Playlist for giggles) let me tune out of the stuff that was happening around me, while I focused on the music.
Of course when you use true wireless BT IEB it can lead to confusion- one coworker laughed as I pulled a bud out, apologized, then said hello back.
For me, there is something really helpful about being able to isolate myself from the noise around me. I tend to look up when I hear a noise and then get distracted. It takes me a minute or two to get back to what I was focusing on. Headphones means I can ignore all the little inconsequential noises around me, and just focus on the task ahead of me.
It seems dramatic to call this bliss, but as an easily distracted person, being able to focus on just one thing is fantastic. That combined with the controls being on my ears just makes setting up a place to work easy.
In some places, like my home studio, I use a speaker system. That works well enough there since it is a private location, in a more public location, like my DayJob studio, I use a speaker when I’m not feeling distractable, otherwise it’s headphones.
I have to admit, I never really thought much about my use of headphones until recently. I’d been feeling very distracted and popped my IEB in, did my work, then realized I’d been doing this for YEARS of my life, and that I’d unconsciously been making a place to be creative.
It works for me. Do you use headphones or music to make a creative space for yourself?
There is no way to keep a notebook that is perfect for every person. There is only the perfect way for each person. That is to say, keeping a notebook is highly personalized. My method of a pocket notebook and 3×5 cards alongside a sketchbook (currently also functioning as my ETEW Journal) and a separate work sketchbook would not work for most people. Hell most creative people merge home and work into one planner and notebook- especially if they freelance. That doesn’t work for me because I need to create a division between work and life- I need work- life balance.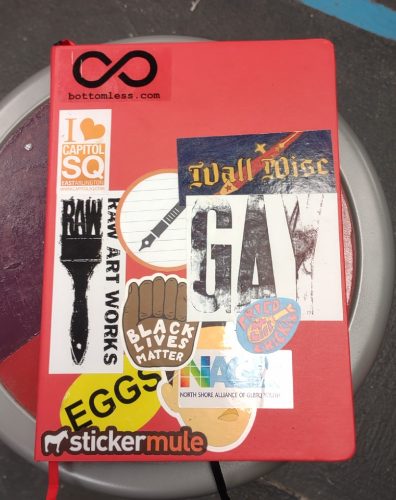
What do these different notebooks look like? (I’ll be using notebook and sketchbook pretty interchangeably from here.) My work sketchbook is an A4 (8×10) red Talens sketchbook covered in stickers. Eventually it will have doodles too. I use a larger sketchbook at work because I use it in classes to teach kids about sketching. We also work larger than I do at home, so my sketches are correspondingly larger. I purchased this sketchbook because it was inexpensive and also the bright red cover could be easily found on any table in my studio.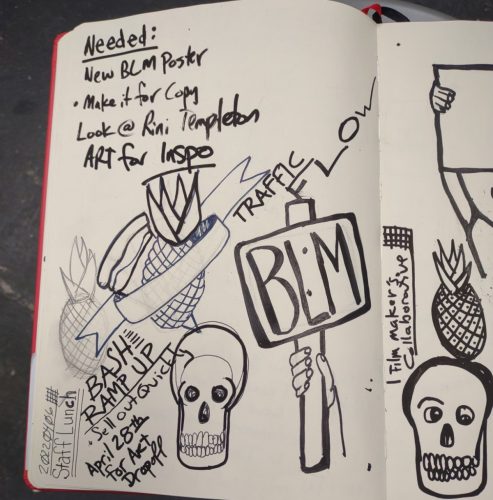
The work sketchbook is a place where I capture meeting and course notes. I doodle and jot down notes and I try to keep each meeting to a single page, but sometimes I use 2 pages. Occasionally I work on a page shared with another meeting , especially if the previous meeting didn’t need a lot of notes.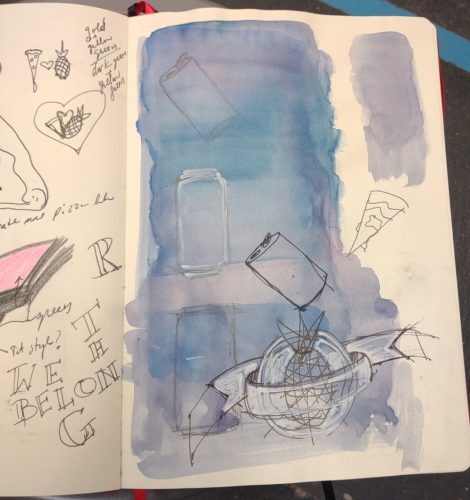
I’ll be the first person to say that my meeting and other types of notes won’t make sense to most folx. I tend to draw the speakers and doodle important words and points in funky lettering. I see the goal of taking notes as a way of jogging my memory. For work we have a notetaker for each meeting, a quick look at the notes will get me the info I need. For trainings I take notes that are a little more detailed but are mostly to jog my memory. I save a copy of any printables to the cloud or my computer and call it good. Generally I believe that info can be pretty easily looked up if I search, but I have to jog the memory of that instruction first.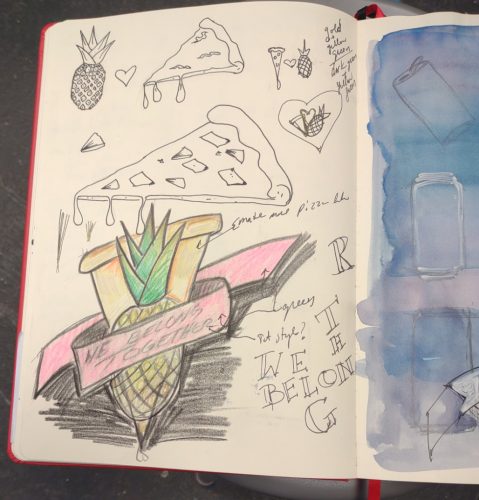
My home sketchbook is a B4 (6×9 ish) Hand Book sketchbook. They’ve changed the name of them several times over the years. Speedball seems to have either purchased or is handling distribution of them now. Which is a good thing, for me, they have been my go to commercially made sketchbook for a few years, and better distro is great. The paper is perfect for a wide range of materials.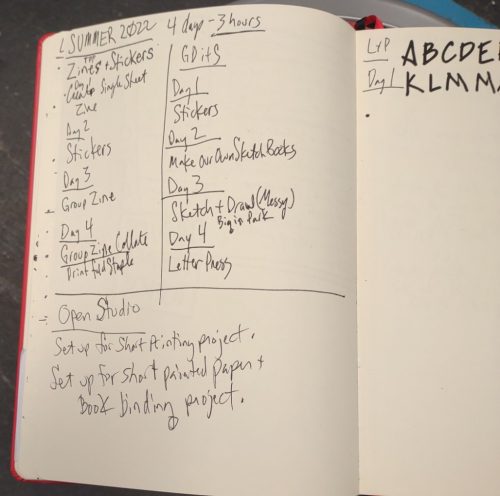
The pocket notebook is where I gather on the go ideas- things I hear on podcasts, in conversations, phone numbers from students for their parents, notes from books I’m reading and so on. It’s a good capture system. Sometimes these ideas get pulled into my Every Thing Every Where journal or sketchbook, or here as a blog post.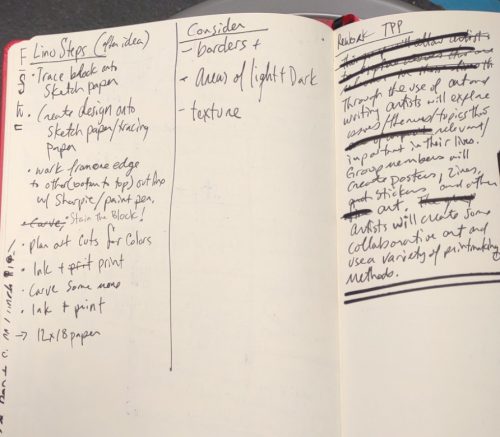
The above is what works for me now. Over the years I’ve used different systems, most documented here and there in this blog. I still like to read about the systems of others. The Take Note Podcast Blog (that’s a mouth full) has had a number of great posts about keeping a notebook where they gather information about authors and creative folx who keep a notebook.
I’ve spent much of my life looking for the perfect pen, pencil, brush, sketchbook, and journal. I read reviews of the items I’m seeking and things I’m not. If a new article starts with “The Best…” I read it. Part of this is that I want all the information before I make a purchase, but also I want the information. *
If there is one thing I’ve learned it’s that the most perfect and best tool for any job is the one I have on hand and ready to go. 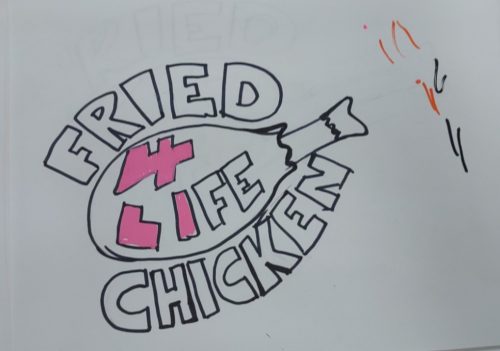
Case in point, when I sat down and started to doodle the fried chicken sticker (see this post) I used the pencil I had in my pocket (Blackwing 93) and the paper I had on hand (Staples recycled 20lb copy paper.) When I sketch out my Trans remembrance poster turned sticker, I used the same Blackwing 93 in my Talens sketchbook. When I wrote up ideas for a new group I used the Uniball Air I had in my pocket in my sketchbook. When I wrote down ideas for a series of found prints, I used my pocket notebook and Parker Jotter.
Much of these choices have to do with the fact that these were the tools that I have on hand, not because they were special or perfect. Though, one might suggest the Blackwing 93 (or other versions of the firm BW) is a near perfect pencil. I think that the Parker Jotter is a perfect pen for pocket carry. The all chrome and steel version makes for a good gift for a starting out pen collector.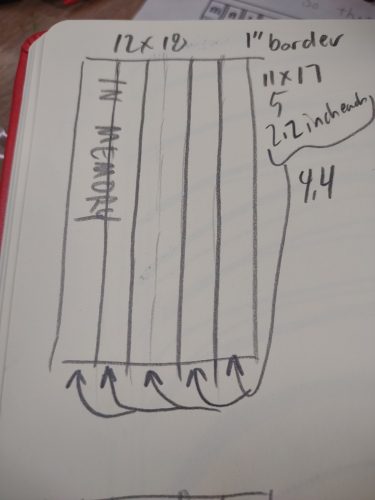
I’ve been known to grab an AmazonBasics No.2 pencil and sketch with it. I have slowly started to switch out the pencils in my studio with Pen + Gear pencils.
If I wed myself to a particular pen or pencil or paper I’ll feel limited or unable to work. But if I use what is on hand, I’ll get something done, or started. I spend a lot of time seeking out the best, but I also let myself use what is around me. The ideas need to be collected and explored, I can do that with anything.
Yes, I make sure I have something decent on hand, but I’ll use anything if it’s there and perfect isn’t around.
* I recently read an article that said this is a trait of formerly gifted kids who strive for perfectionism. If I hadn’t rage quit the article I’d tell the author to go to hell. /sarcasm.
My brain works in mysterious ways, well not really, I know how my brain works but sometimes it puts 2 things together in a way I didn’t expect.
Case in point:
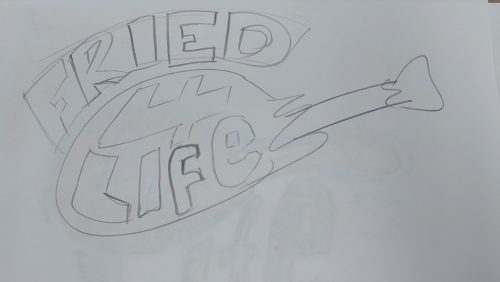
Not the chicken leg I presented her with!
I work with someone who loves fried chicken. I, also love fried chicken. We talk about all the different fried chicken places in the area. Unabashed love for fried chicken. After a few weeks of fried chicken talk, I doodled a fried chicken leg on scrap paper and presented it to her. We laughed.
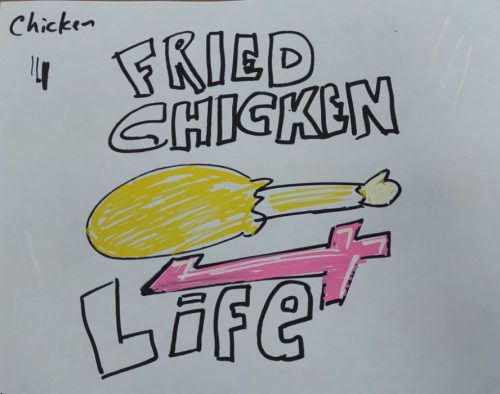
Early sketch and color scheme.
Somehow I started to doodle more chicken legs, this time with the words “Fried Chicken 4 Life” in various arrangements. Then with black Posca pens and finally with some color.

This was declared the winning sketch, and the one that gave the idea of making it a sticker.
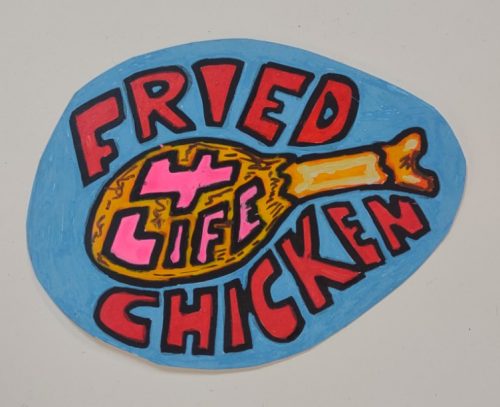
The final color scheme and thick black outline. 7 different colors of paint pen were used.
When I arrived at a final image and color scheme that I liked I took a nice clear photo and then arranged it into a grid in (yes) publisher. After that I printed it off on a color laser printer to sticker paper. Finally the individual stickers were cut out of the sticker sheet.
The sticker paper I used was the most inexpensive I’d found on the ‘zon and has done well with letterpress inks and now paint pens. It also traveled through the color Xerox machine we have at work.
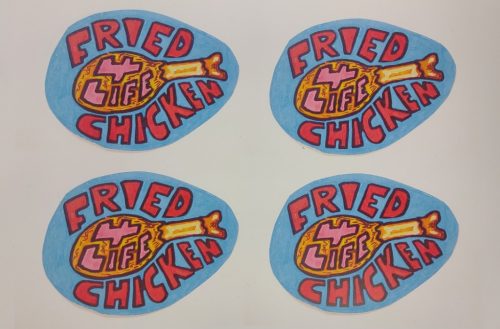
The final xerox printed colors are a bit lighter than the original, but they look great.
Overall I’m pretty happy with how this ridiculous sticker turned out, even the little hand colored version is great. The color photocopied is awesome. I’ve also run this paper through the letterpress at work with some pretty good results.
I’ve been having a series of great conversations about using the good stuff as I reboot RSVP as a solo project. I’ve been able to have in depth conversations with people I wouldn’t have these conversations with otherwise. It’s pretty special to me.
As I have these conversations ideas and thoughts come up. I try to make brief notes about them as we chat. These little ideas sometimes blossom into ideas for the blog(s) here or on Ko-Fi.
Using the good stuff is important to me on a number of levels, and the stories I’ve shared with my friends as part of RSVP are all part of it.
One story that I shared in the early stages of the conversations was about a friend who scoffed at my fountain pen. I was very excited about it and was talking to her about how smooth it was on the paper I was using. She had the blank look of a person who didn’t quite get it. At the end of my pretty excited ramble she help up a Bic Stik, the worst of all the Bics (hell, get a Crystal for crying out loud) and said something along the lines of “This works just fine.” With a snide tone.
She was right, a Bic Stik will work just fine. It won’t be enjoyable but it’ll get words on a page.
It’ll do.
This is in part where material snobbery gets in the way of creation. Will I use a Bic Stik? Sure. Will it kill my wrist? Yes, it will.
When my quad core fancy laptop sang the blue screen of death song, I was sad and immediately wanted to replace it with another fancy high end PC. But I also realized, I don’t need that kind of power for the work I do on my laptop. I write words, barely edit pictures, barely edit audio (RSVP records pretty cleanly IMO), and layout my zine in Publisher. I don’t edit video anymore, so I really don’t need 8 gigs of RAM and a terabyte of storage. Instead I got a laptop that was cheap and handles what I do now- all of what I listed above. It bothered me for a hot minute, then I got over it, and just did what I had been doing- writing.
Here’s the thing, if you really want to create you will. You’ll find a way, if it’s with a fancy fountain pen, a cheap composition notebook, a chrome book, or a Bic Stik you stole from your DayJob.
I think that sometimes we spend a lot of time exploring new materials, new tools as a form of creative block. Maybe just maybe we’re looking for a magic bullet of creativity in a new fountain pen, new ink, new notebook, new pencil, new whatever. Maybe we’re also looking for a thing to blame if the creative juices never flow- I couldn’t create because this THING won’t work right!!!
Maybe those of us who collect supplies need to sit down with one supply and get to know it, and get to creating.
How many of us who want to write look for the perfect distraction free tool to type on? Or the pen with the right flow? The pencil with the right smoothness? The notebook that functions properly with whatever we throw at it?
What if the right thing is to just get to it? Stop with the excuses.
I write all this because I’ve done all this. And It’s a difficult thing to reflect on. I have had fallow times where I don’t create because I’m not in a mental space to do so, and rather than admit that, I buy pens, ink, pencils, and notebooks to fill the void.
The real question is, do any of you see this in yourself? It’s a thing to journal about for sure.
Now that material snobbery has taken hold of my brain I battle it in the best way I know how- by focusing on the art. 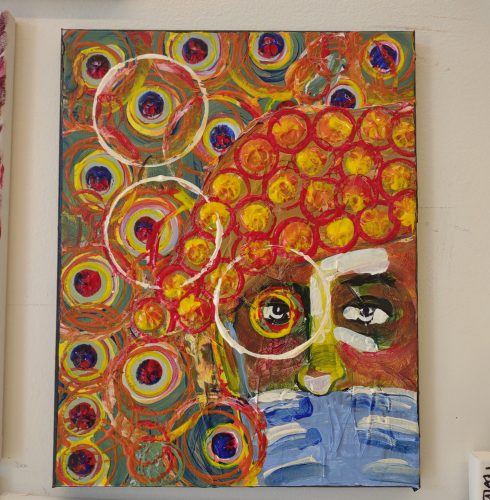
Last week I had a moment where my entrenched material snobbery hit me head ON. I was taking part in an art prompt with my coworkers when I realized that the paints we’d been provided with were…. not my usual brand. Further we were given only the primary colors plus white and black. I was having trouble mixing the colors I wanted and was getting frustrated.
I wanted to run to my studio and grab a package of acrylics I ordered for a group and use all the colors I couldn’t mix.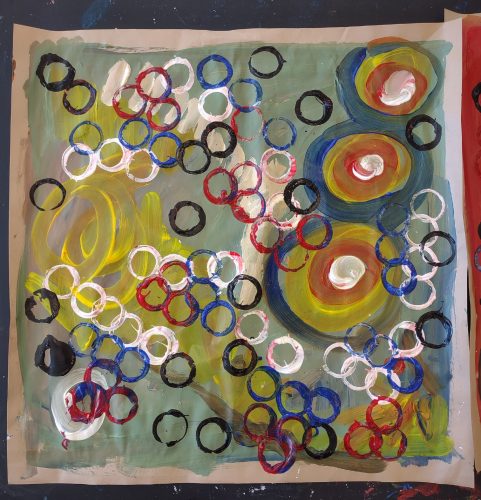
After a bit of frustration I focused on what I COULD do with what I had on hand. The image ended up working pretty well. I used cups to press circles of paint onto my canvas and little creamer cups to press perfect dabs of color all over.
In the end I had fun.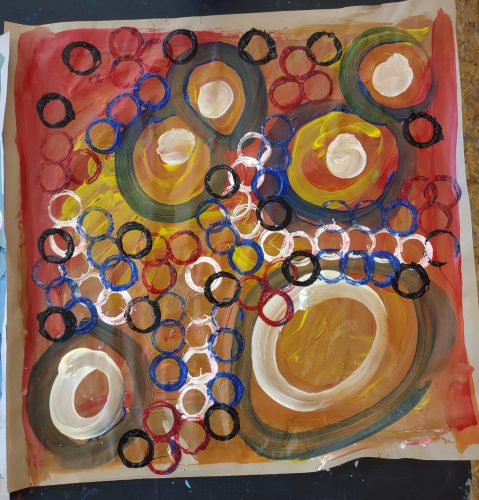
No matter what tools I have on hand I can always find a way to make them work in some way. It might be different than my initial plan, but it’ll work. This is what happens when you let yourself be flexible, and look at the possibilities instead of the limitations of the material at hand.
I try to remember that limitations are possibilities.