Review: Higgins Black Magic Fiber Tip Marker

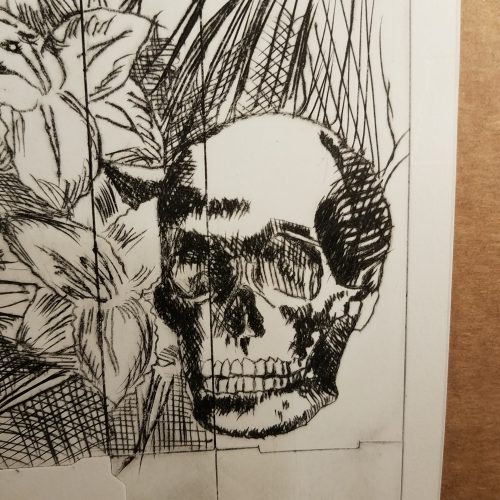
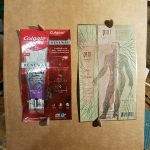
I have fond memories of working with Higgins inks throughout my childhood. My high school kept large quantities of Black Magic on hand. When I went to college I bought jars of it. I used it with dip pens and even *GASP* Look away if you are faint of heart, put it into fountain pens. (Do not do this, it will ruin them over time, maybe put it in a Preppy.) It is a nice dark ink that is pretty good in an ink wash set up and doesn’t budge once dry. It’s not a straight up true India ink, but some sort of hybrid. It dries matte on most surfaces.

All that is to say that when I walked past the display of art supplies in my closest Staples I saw the little blister packed marker and was hit with a wave of nostalgia. So despite it being priced at a whopping $4.99 I bought it.

So you get a little fiber tipped marker that needs to be shaken REALLY well before you first use it. The sediment pools at the base of the marker with the shaker balls in the pigment. It took a lot of shaking and leaving the pen on its side overnight to get this shaken properly. If you use it without a good proper shake the ink will be watery and grey colored. It’ll seem pretty disappointing.

One you get it shaken and primed properly it’ll be a deep dark black that is matte on most paper and works pretty well with most paper. I did find that there was some pretty deep penetration on my surfaces- it bled through the crappy sketchbook I use at work. It looked great on my bright white cardstock but was deeply absorbed. It doesn’t lift much when I erase which is always nice.

On fibery and even some smooth papers this fiber tip is aggressive. I used a light hand and this tip lifted fibers every time. Even on smooth cardstock, I was surprised to see little trails of fibers as well as lifted and bunched fibers on the page when I was done drawing. I think if you mash the tip it’ll be softer, but who wants to purposefully do that?

Like many pump style fiber tipped pens, this one is likely pretty easily refillable. When I get to that point I’ll post a tutorial. If you know how to take apart a paint pen you will probably be able to use that same technique here.

This is a bold line, no fine lines at all here. The tip is at least 1 mm if not 2mm in diameter. You won’t be doing fine line work, but you can pretend you’re Aaron Draplin and doodle some THICC lines.

Given the cheapness of Higgins Black Magic ink it’s difficult to think about shelling out $5 for a single pen, when you can buy an entire 1 ounce (33ml) bottle from $3 to $5. If it is refillable, and easily so, then the $5 is not a bad price at all. Continue reading

Show Your Work: Bizness of Zines

Zines are rarely profitable. This is a truth and can be false. Zines are a multitude of truth and fiction.

In disclosure and transparency I decided to explore the (un)profitability of Useful Journaling.

I chose to use the Ko-Fi sales platform, on a year long subscription of Ko-Fi Gold. This way Ko-Fi does not take a cut of the money used to purchase my zines and things*. That said I did pay $4.50 to use the service for the whole month.

I chose $3 with US shipping included as my total price. To get an address via Ko-Fi, I had to break that down to $2.50 with shipping extra. Paypal took 39 cents per sale. I always forget the enormous amount paypal takes. I think I block it out. Postage within the US was 50 cents (1 stamp)**.

Materials breakdown is as follows, per issue:

  • Cardstock: 8 cents
  • Paper: 4 cents 
  • Black toner: 4 cents
  • Color toner: 30 cents
  • Sundry items: staples, envelopes, craft blades etc: 10 cents
  • Total: 60 cents an issue

The largest expense here was the color toner. I was gifted the color laser printer and a box of fresh 4 color toners, but had to replace the drum, and now the transfer roller (could be called something else but it’s the bit of film that rolls the image onto the paper/roller). The cost per issue is the same given the amount I have spent on the cursed machine.***

I also repurposed many of the items from previous projects- I already own a long reach stapler, colored staples, really nice cardstock, plain white paper, and a black and white laser printer. So while I’m not out any of those items and have slowly accumulated all of the things I WISHED I had back in 1999 when making zines.**** It’s taken me 20 or so years, but I finally have all the tools for zines I ever wanted. It is kind of amazing that layout can be done in an app and even online if you really want.

The net profit from each copy of the zine, not even coming close to thinking about time and labor, is $1.51. From the first printing I made $105.***** The second printing will be slightly different and slightly more profitable- I’ll be using colored cardstock at roughly 10 cents a sheet and eliminate the color printing. So the total cost of physical supplies will drop from 60 cents to about 30 or 40 cents.

The $105 I made will go toward replenishing supplies- black toner ($20), more paper (moving toward 100% recycled paper for the insides)($10), yellow toner ($20), colored staples ($5), and more cardstock ($20). Leaving me with about $20 to spend on a bag of coffee. I have my priorities.

A thing to remember is that for much of this- the more copies I make (and sell) the lower my cost becomes. If I can buy a bulk pack of black high yield toner cartridges, that drops the cost of black toner from 2 cents a sheet to 1.5 cents/sheet. I strongly want to keep this zine very affordable to get it into the hands of more people. I do have loose plans to create special editions- so things like the first 3 issues bound into a special cover, notebooks with related content and covers, prompt cards and many other things. For now, I am enjoying the tactile nature of these items, but PDF versions might be a possibility in the future. I suspect that eventually I will need to upgrade to a new computer. The Lenovo I bought… Well it’s one step above a pizza box in terms of functionality, and I can really see where it lags with graphics where my previous computer did not. So that is a thing I need to keep in mind as well.

Continue reading

Review: Bic Gelocity 0.5mm Gel Pen

I’m going to start with this rather bold statement, I wanted to hate this pen from the moment I opened it’s blister package. But I don’t, not entirely.

The Gelocity is an inexpensive pen, a 4-pack costs $3 at Walgreen’s and less if you look for a sale. They are sold in a blister pack ready to hang on a peg. There is nothing particularly eye catching with the package or the pen. As far as packaging goes, it is as standard as one can get.

What caught my eye was the 50% off sale offer. Except I didn’t read the fine print, I needed to buy 2 Bic products, one at regular price and the second lower priced item at 50%. Well, crap. Still at $3 these aren’t breaking the bank.

Once the package is open, you see that you get what you pay for. As far as gel pens are concerned you aren’t getting much with the Gelocity. The pens look cheap and feel cheaper. The clear plastic is adorned with concentric circle blob things that look like doodles on might make in a design program when first learning. The end cap removes but you can’t take the refill out from the end cap end, nope only from the point end.

The cap itself is removed and posts with a satisfying click. The clip does not look like it will survive a day in a classroom let alone the amount of time it will last in use. The nose/tip is made of plastic, the whole pen is made entirely of plastic, except for the tip of the refill. This makes the pen ultra lightweight. It is also very narrow.

Which brings me to the grip. There is a silicone sleeve with some grooves molded into it. It sits above the area where the cap clips. It is too high for my hand grip, so my fingers grip the hard plastic of the cap clipping area. Which I found uncomfortable but not painful.

So the pen is not great in the feels department.

The refill though, if you like a narrow line feels and looks more like a 0.38mm to me. It isn’t dry but has that narrow point scratchy feel of a 0.38mm on the paper. The gel ink isn’t stingy it has good flow and is nicely black. The narrowness of the line is nice for some tiny doodling and sketching, allowing for some nice cross hatching and building up of darkness. I have not tested it for lightfastness. It does seem to have some water resistance but is not waterproof, so not a great sketching gel for anyone interested in using watercolors.

If you are in need of a bunch of pens for cheap this isn’t the worst choice. If you are looking for a multi use pen that allows you to write and sketch with perhaps a bit of watercolor work added, this isn’t it. 

Continue reading

On Making Things: Tearing Down to Repair

Last Friday I told you about the Printer, in passing. I was gifted a 10 year old Samsung ColorXpressions laser printer. It’s a 4 color printer and on the outside in great shape. I remember my Mom buying it for herself way back when and being super jealous of it. New, it made amazing prints, clean, crisp and clear.

When my mom cleaned out her classroom the printer came home with her and sat in a pile, she had neither the time nor excitement to set it up at home. To be frank she didn’t want to. They had another printer and after 10 years the excitement was gone. 

She knew I’d probably continue  to use it, so she offered it and a box of 4 brand new unopened toner carts to me. I didn’t think before I said yes.

Then I brought it home and let it sit, for another… 6 months at least.

Then we set it up and the printing was a mess. Clearly it needed a new drum. I searched out and found that the printer itself was discontinued as were the parts for it. Then I found rebuild kits for the drum, and finally, a drum itself for not too much. Ordered. And still the printers were a mess and the machine would not pick up cardstock.

Disappointed I looked at color laser printers, and used ones on Craigslist and Marketplace, whoa, expensive. I hadn’t realized what a gift this machine really was.More research, and I found that there’s another part called the image transfer roller- a belt of some kind of plastic that transfers the image to the paper. I could clean it! 

First impressions were that mine disconnected in a different way from the video I watched, so I did a halfway cleaning, and things were better. 

Finally I decided to remove a few screws, and voila! I could see where everything connected and was able to disconnect the roller and remove it from the machine. I then sat down with rubber gloves, rubbing alcohol, and rags and proceeded to clean off the transfer roller. I took it apart and took it outside and let the dust blow away, and then wiped down the whole thing with alcohol. I took the moment to clean out the dust from the machine itself, there were streaks of toner everywhere. The alcohol picked it up and cleaned it out.

Then I put it back together and did a test print. I was hopeful, but worried I’d need to buy a new part. A quick search showed the parts to rebuild the transfer belt range from $80 to $200, depending on the part. Given the cost of a new printer, that is a feasible investment.

The prints that emerged at first were crisp and clean and perfect. I did a few more test prints and a few covers for some possible No Brand Notebook covers, and the results were pretty clear, but it was also apparent that years of use had warped the scraper bar inside the transfer unit. I won’t lie, this was disappointing, but also not horrible. I’ve found that if I print the same image for a few prints (the intended use of this machine anyway) that I get nice clear prints and it takes 3 prints to get clear prints.

But it is also an easy fix, also cheap. A new scraper bar costs around $10, and replacing it is pretty easy. So after the next issue of UJ I’ll be replacing that. Mostly the wait is that I have to wait for the bar to arrive. The best place to find them has been A1Xpress or ebay and I simply have to wait for it to arrive from China.
Another great thing about the printer is that because it is old, the market is flooded with a variety of remanufactured toner cartridges. They range from ridiculously cheap to pretty expensive. This means I’ll be able to keep printing UJ with pops of color and hopefully some color inside, at a relatively cheap price.

I’m optimistic that I can keep this printer running for a good long time with careful repairs.

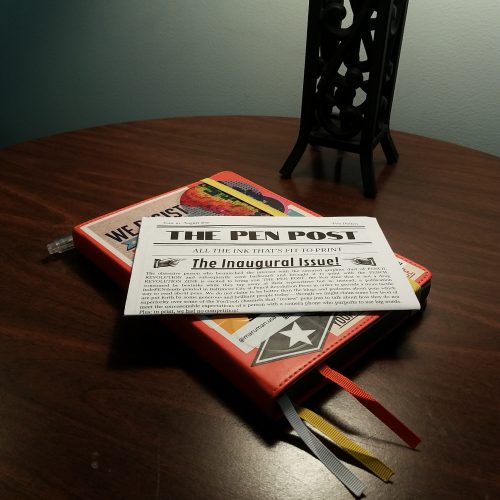
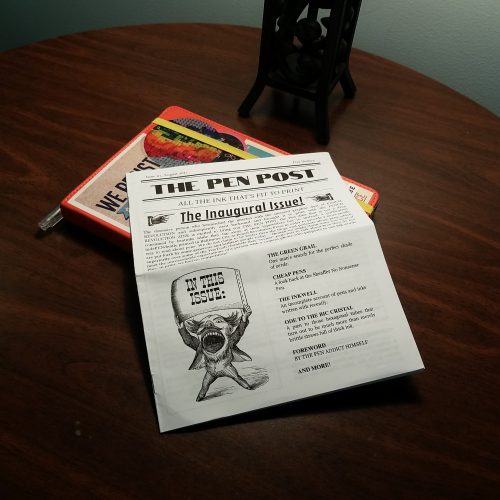
Review: Pencil Revolution The Zine

I love zines. I’ve loved them for years and years. I’ve made many of my own and collected a lot of them. Sadly I’ve lost the couple of hundred that I had collected. So when Johnny of Pencil revolution, the blog told me he was starting a zine, I got excited. I had no idea what he had planned, but I knew it would be good. You see, Johnny can write, and it is always a joy to read a zine written by someone with a grasp of language and a true joy of their subject matter.

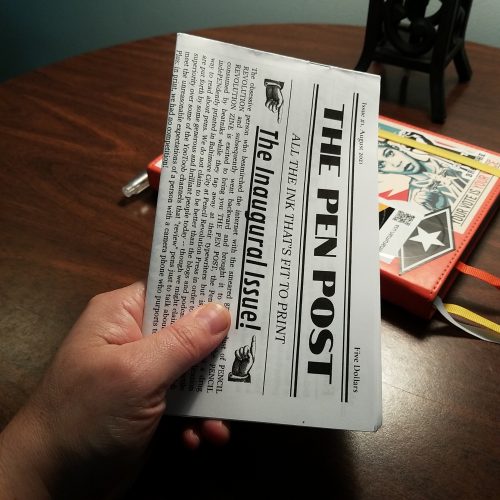
Johnny did not disappoint. His physical manifestation of Pencil Revolution is both precious and informative. He’s made a tiny little zine so packed with pencil history I’m not sure how it can be held in such a tiny package. He uses a single sheet book format that folds up into a sweet little pocket sized book. It would even fit into the pocket of a pocket sized moleskine!

The first 4 issues are all about the history of pencils. With any other writer you might find this dry or boring, but Johnny’s writing style pulls you in and holds your attention. Which I might say, can be really difficult when writing about the history of pencils. (Ahem, looking at other histories of pencils.) He’s clear, conversational, and a bit funny. If you enjoy Pencil Revolution the blog you’ll love Pencil Revolution the Zine, plus it’s inexpensive!

Review: Baronfig Guardian Pro for Confidant Notebooks

I regularly use an A5 Lihit Labs Bag-in-Bag to contain my notebook and journaling supplies. I also use a large sized to contain my laptop and cords and cables. I love the simple slim packaging of these cases and how I can look into my bag, select the right case with the right stuff. The Guardian Pro enters an already crowded arena of things that do a similar job.

The Guardian Pro (GP from here) is top notch in what it does and what it does it for. Compared to the Lihit pouches I own it feels both sturdier and more expensive, which is good because it is significantly more expensive. The zipper is smooth and moves effortlessly. Which is good because the GP fits snugly around my Confidant and everything else you will want to shove inside.

The GP pushes you toward minimalism in your tools. It will hold a Confidant, a Vanguard, some Strategist/index cards, and a few refills. The index or pocket notebook pocket will hold a phone, so long as it isn’t in a fat Otterbox Defender with a Linkmount. It holds my work iPhone in it’s ultra slim case just fine. The pen loop at the spine is a great touch. I like how it is both out of the way and in the center of the case. If you are putting a Baronfig Squire in there it is bracketed with yellow stitches that perfectly match the zipper and classic Baronfig ribbons! Such a nice little detail.

I’ve only had the GP for a couple of weeks. So I can’t report to you about the longevity of the case. I can tell you that I haven’t been gentle. It gets shoved into my bag along with my Kindle (I don’t like the Kindle in the front pocket of the GP), my current composition notebook, a thermos, and assorted other things. It has yet to pick up as much dirt as my other bag organizers. I really like the materials Baronfig chose for the exterior and interior. The exterior mimics the Confidant while the inside feels more like a traditional backpack. The slightly  rougher feeling of the exterior has a nice tactile appeal. A step up from many of the other  canvas materials, it feels grippy.

I have to admit that other than pocket notebooks that live in my back pocket I rarely see the need for a case for my hardcover notebooks. The cover does the job of protecting the books well enough for my needs and any damage done is a line in the story of the life of the notebook. So when I have used a notebook in a case like the Lihit Labs (bag in bag) I use the journal separate from the case. I was a bit worried about working in my Confidant inside the GP. I was even more surprised to see that I LIKED IT.

Because I am a notebook and journal agnostic the GP won’t fit all of my notebook case needs all of the time but for the time when I’m using a Confidant it fits them perfectly. It is an investment but the better quality materials and detailed touches like that zipper and stitching really make this case stand out. Overall, the Guardian Pro challenged some of the ways that I use my notebooks– working in a case, use of a case for a hardcover notebook, but it also let me carry just a pen and a few other supplies in a safe way. Since I may end up going back to “Office in a Backpack” this will allow me to bring a level of side hustle to the Backpack Office.*

Continue reading

Week o’ Links

One of the many things I left behind when I stopped blogging as much was my link love posts. Since I’ve been doing more reading of blogs (yay for more time?) I have stuff I want to share again. Don’t expect this to be regular, nah week links will be totally irregular.
I was on Erasable having a conversation about NaNoWriMo with Johnny of Pencil Revolution and Harry of Home Work and other goodies. It was a great conversation.

Brad of a little podcast called The Pen Addict mentioned Useful Journaling, Pencil Revolution, and The Word Distro on his podcast. Awesome, everyone should read zines, especially mine, and Johnny’s and Ed’s.

I’ve been reading about bookbinding again. When did I ever stop? Alisa Golden <3 posted this single sheet binding technique that makes me think about zine possibilities… Just sayin’. Also, a snake book, a pretty common structure that I’ve seen again and again in many books. Here’s a nice art journal format.

The Comp book reviews keep pulling folx over to using the finest cheapest of stationery goods- the composition book. The Write Experience has the right experience with a classic- the Pen+Gear composition notebook all the way up in Canada.


On Making Things: Return to Roots

If you’ve been reading CSS for more than the last few years, you realize this blog didn’t start out as a review site. I started out blogging about a break up and my attempts to find my footing in my new single life. It quickly morphed into an exploration of art, journaling, and bookbinding. Soon the old title of the blog no longer fit and I chose Comfortable Shoes Studio as an homage to a gag project I’d made in college. I moved my blogging to CSS and the transition was easy.

Here I started to write about my art and other projects. I was open about sales, ranted about eBay and PayPal fees increasing and all the other issues that occurred with being an artist and craftsperson online. Through all of it I was open and transparent about the business side of things and about the process of making art and art journaling.

Reviews were (are) a side effect of making art and writing. I did product reviews because I was making art and using the materials and readers had questions.

Then life got complicated. Work got complicated. I went back to school. I changed jobs, a couple of times. I made less art, but I had a lifetime of using art materials and could write reviews with much less effort than writing about making art, which I was making less and less of. As for bookbinding? I do less of that than ever because my wrists and hands ache after a binding session, the act  of pulling a needle through paper and board causes pain like no other. So I just don’t do as much of it as I used to, it hurts too much, and if I’m honest, it hurts a lot to think about not being able to bind like I once did.

I’ve gone back and looked at some of my old posts, posts where I’ve “shown my work” when it comes to art, zines, and the business of art. Now that I’m in a more stable place in my life I hope to reclaim some of my writing about more than just reviews.

I wanted to write a bit about the creation of Useful Journaling. While it is a culmination of a lifetime of journaling, it is also about teaching myself how to paginate and do layout for printing and binding. In the past I have always done my layout with a physical original. I’d cut and trim things to a paper copy and make a first really good copy of that which I’d print from. I really like the physical aspect of making a paper original copy. There is something really nice about sitting down with a glue stick and craft knife and making that first original. 

I like learning things, I saw learning how to do layout on the computer as a challenge. And wow is it. I hate and love it. I love how clean it can make the flow of words from page to page. I write all the zine in one doc and cut and paste it into Publisher* and it just flows through the document. Easy. I then add in the various elements I’d use glue and scissors for a physical copy but instead I photograph them and crop in the computer. It’s similar skills but all in the computer. It was a challenge to learn how to bring it into the computer but I know I can also make a physical original which I can scan and turn into a PDF and print from that.

Another challenge is printing. I really like the idea of a color laser printer for the cover and inserts. But WOW are they a total pain in the ass. Of course the one I was gifted is old and I needed to order new parts and do a thorough deep clean, but it hates printing on smooth cardstock. HATES it. So future issues will use coverstock, which means I can possibly add 4 more pages.

Which brings me to another thought out aspect of UJ, the size. I wanted the zine to fit into the pocket of an A5 notebook, so it had to be pocket notebook size or a quarter sheet of US letter sized paper. I also wanted it to ship for the cost of one US stamp in the US, even if I added extras (and I did) so I went with pocket notebook size. The number of pages was determined by weight, I knew if I went with 16 pages I’d stay below an ounce for that single stamp. The hard part is that I WANT to make it longer. I want to pack in the content. I also wanted to keep the font large enough that it could be easily read. I get frustrated with zine with font sizes that are too small to easily read.

Anyway, I’ll be chronicling more of my art adventures here, but still be writing product reviews, just less of them.
Continue reading

Review: Staedtler Metallic Norica HB Pencil

Staples had these up with a limited time exclusive sign. I’m not sure if that means that these pencils will only be available at only Staples for a limited period of time or if it means they’ll be available like some of the other exclusives I’ve seen from Ticonderoga where they are available at Target for a limited time period then everywhere later. I’m thinking of the Ticonderoga Stripes in particular, which were sitting next to these on the shelf. I didn’t buy these because they were an exclusive Staples item, rather because they had really pretty shades of metallic paint.

The 10-pack costs $2.99, which is pretty pricey in the land of Norica pencils. At 30 cents each these are among the most expensive Noricas available.

The package is a nice blister pack, though I do wish they were in a simple cardboard box, with a window instead. At least this is a good rigid package. Upon opening the package I found that some of the packaging printing had adhered to the paint of the pencils. I was able to scrape the stuff off with my fingernail and the paint underneath looked great. The lacquer is thinly applied but nicely metallic and glossy. The rough areas of wood are fully visible. The imprint is silver and well done. The ferrule is a simple silver job and on a few pencils had pushed up the paint around its base. Not too awful, but not overly pretty either. The white plastic eraser is nice and works really well.

Inside all that is linden/basswood wrapped around a smooth core. The pencil is very lightweight. I added a silicone gel grip to decrease my urges to death grip the thing. It is not as dark as the previous version but for a 30 cent pencil it is smooth and holds a point well, even on rougher papers.

I’m glad I bought a pack of them and they’ll likely get used, I’m a real sucker for metallics. These would make a great gift for a kid or adult interested in pencils.

These pencils were purchased with  Ko-Fi support!

How To: Fitting an Energel Refill into a Baronfig Squire

I read once that the older Baronfig Squire pens accepted some gel ink refills. Imagine my surprise when mine did not. Apparently somewhere along the way things were redesigned and the Squire lost the ability to accept a standard gel ink refill. It is non-reversible, but the pen will accept the old refill once the mod is completed.

To do this mod you will need:

  • A Baron Fig Squire
  • 1/8th drill bit for wood
  • Skewers and masking tape
  • Pentel Energel Pen- you need the refill and the spring
  • Patience
  • Craft knife

I went through the process of stuffing every gel ink refill I own from Pilot G2 to Pentel Energel to Zebra Sarasa into the pen, and each and every time, blocked. I poked around with a skewer, and found that there is a lip down inside the tip area that holds the narrow tube that holds the pen’s tip. It is snug to stop the refill from rattling around. Since I really like the Energel Pro for sketching doodling and general writing, I measured it against the Schmidt P8126 refill I usually use for the Squire. There was exactly 1mm difference in the diameter of the tubes, and the Energel refill’s tube was roughly 1/8th of an inch.

I decided to do this mod by hand, for many reasons but I did not want to take a chance of removing too much material and damaging the Squire beyond use. I’m not kidding when I say the Adrift is my favorite Squire. I grabbed a brand new 1/8th drill bit intended for wood and taped it to a wooden skewer, yes, masking taped it to a skewer. Again, this was to force me to use a light hand and prevent me from binding up the bit into the metal.

The skewer also allowed my short bit to reach deep into the pen. It is important to point out that you drill the INSIDE of the pen, NOT from the tip in. So drill inside out. While I do not recommend it, if you chose to use a drill press for this mod, you’d need an extra long bit.

I bored the inside a small amount then test fit. Then repeat that until I had bored out roughly ¼ inch or 5mm deeper. I attempted to use the Squire’s spring. It didn’t work with my Energel refill. The Energel spring did work. Even when I went back to the original refill I still needed the Energel spring. The Energel refill will need to be cut between 76 and 78mm from the base of the ink reservoir, not the tip, depending on how far you would like the tip to emerge.

Results? It works perfectly with the Energel refill. The metal part of the Energel tip fits perfectly into the Squire and there is no rattle or more movement than you usually see with a Squire. It’s smooth in deployment, the knock works perfectly and man that gel ink is great.

You might wonder why I went with the Pentel Energel Pro over say a PaperHate Inkjoy or Uniball Signo or even the Sharpie SGel or Zebra Sarasa refill. I really like the Energel Pro for sketching but also writing. It is also the only refill available in a 12-pack. I can buy singles or 2-packs of all of the mentioned refills but I really wanted a 12-pack. When I’m sketching, drawing and even writing a lot, I drain gel ink pens. Buying a 12-pack feels the most economical and ecological. I know a lot of people will buy entire pens and just use the refill. I feel wasteful doing that, so I’m going to stick with buying refills for this pen.