I read an article in a magazine at B&N last night about Van Gogh, those of you who know me in real life know of my obsession with his work, in particularly his ink sketches. Back when I lived alone I checked out book that had a great deal of images from his huge assortment of sketches and drawings from Arles of the local landscape. I love those sketches. I photocopied them and had them all over my apartment, so that everywhere I looked I had great art to look at. I spent a great deal of time that summer outside sketching with pen and ink, no thinking of making my own reed pens; I did use brush, dip pen and fountain pens. I also dipped sticks in ink and used those to work. My work while it held a variety of line and were some what interesting never had the huge variety of line that the sketches I viewed of Van Gogh’s which I tried too emulate in my own fashion.
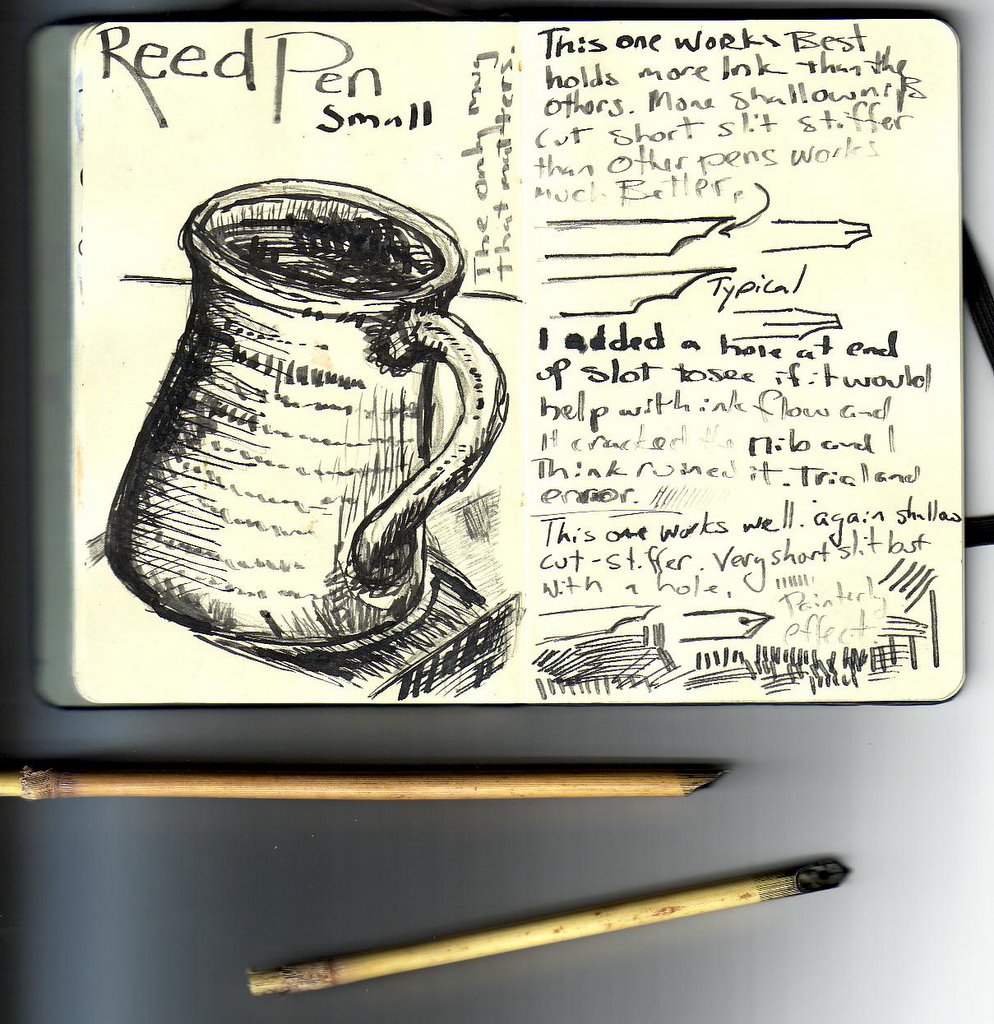
These little sketches in my moleskine are using a reed pen, Van Gogh’s instrument of choice, in Arles, anyhow. I picked a variety of reeds while at Charrette today, from their parking lot no less. I brought them home and got out the click knife and began experimenting. I downloaded instructions and some of them worked and some didn’t. What I found is that every reed size needs a style of cut. I’m sure that not all reeds are a like and that the reeds I used, a local reed for Mass, may not use the same cut as the reeds from Arles.
I found that the larger reeds didn’t produce as nice a pen as the thinner reeds. I’m sure with practice I can get a nice pen from the larger reeds, but the thinner reeds, about a ¼ inch in diameter, were just as stiff as the larger reeds and didn’t split as much. If anything I found that the larger reeds made a very flexible tip, that didn’t hold nearly the amount of ink as a smaller reed. This may be due to how I cut the reed but I haven’t had time to experiment with different cuts.
On my way home from work tomorrow I will head the back way and stop behind the strip mall and gather a wide variety of reeds. The reeds there grow much taller than the reeds in the parking lot at Charrette, we’re talking close to 10 to 12 feet tall. I’m interested in seeing if the bases of these reeds are sturdy and thick and if they are more so than the other reeds.
Anyway the lines produced from reeds are painterly and effective in shading and texture. I need to now find something to draw with texture so that I can really play with these reeds.
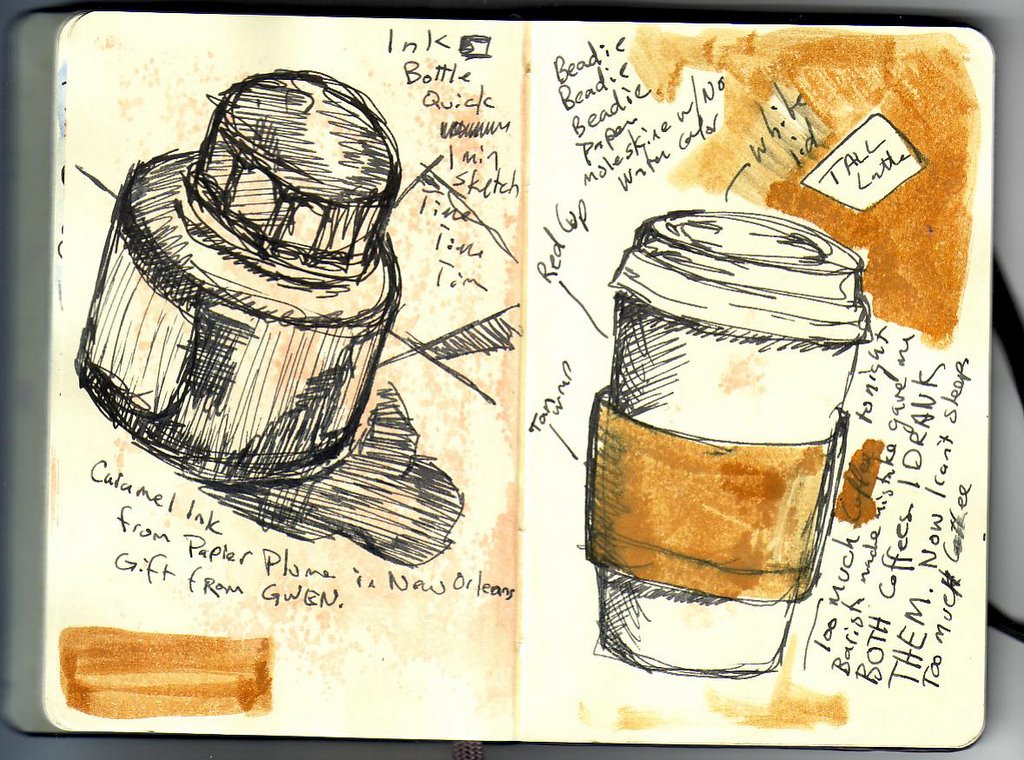
Here are a few examples of my sketches with reed, as well as some EDM inspiration.