Tag Archives: ideas

Old Town Hall

I wanted togive you a little look into how I created my large sized town hall image. I was asked to make a poster with a drop box for my coworkers to put questions in for a special meeting at work. My idea was to create an image of a town hall. My other idea was to create an image of a group of people inside an old style town hall. Given the time frame (1 day turn over) for creation, I went with the simple idea instead.

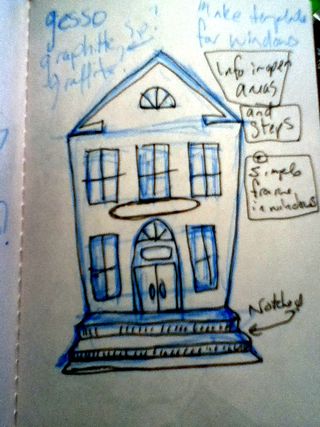
I spent some time looking through google images for "town hall" then remembered I shot a pic of Salem's Old Town Hall a few weeks ago. It turned out THAT was the image I had in my head. (That or the town office from my youth.) I quickly roughed out my idea in light blue ink and then finalized the idea in black ink. I jotted down some ideas for the image in words around the edges of the sketch.

IMG_0907

 
Below you'll see the large sized version transfered from my mind to a large 4 foot high by 2.5 foot wide piece of standard corrugated box cardboard. To rough in the image I used a 0.5mm HB mechanical pencil. Then to fill it out I used my E+M clutch pencil with creatacolor 4B graphite pencil. I finalized the location of all the elements of the image and then started to add areas of shadow. I darkened these areas and gently filled in the rest with a light coat of graphite. IMG_0907
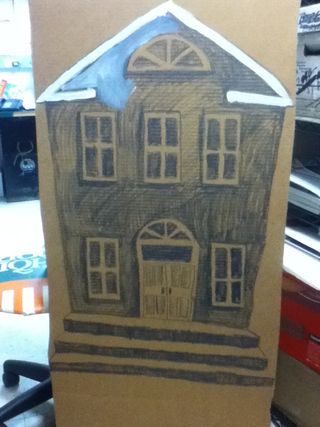
I started to layer in white house paint. Scrubbing it in with my brush gave me the blended and mottled gray effect. Sure the Salem Old Town Hall is brick but no one said I couldn't make it creepier with a black and white effect. IMG_0907
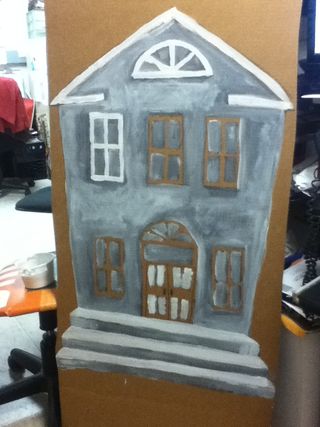
I used a clean brush to add put white to the windows and trim. IMG_0907
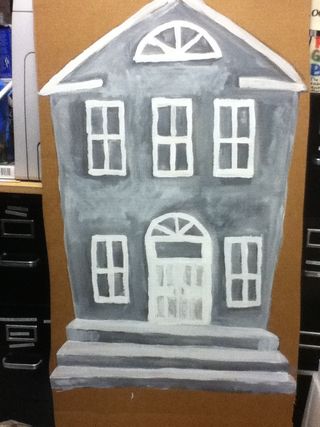
I then cut the image out of the cardboard. I added some definition with creatacolor's version of a conte crayon also in my E+M lead holder. I made a small sign that says town hall that is stuck to the image. The sign is 3d and adds some weirdness to the already wonky lines of the building.IMG_0907
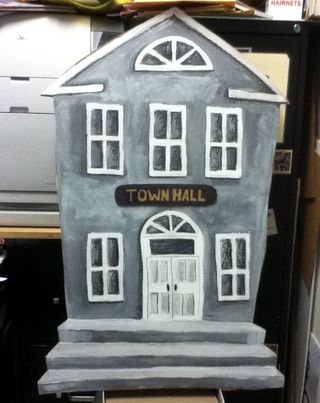
Overall I'm pretty happy with how this came out. I was given the assignment just before I left work on Wednesday, thought about it for about an hour last night and then completed the image over teh course of the morning at work.

Now I want to do a whole haunted village for the front lawn…. Hmm how soon is too soon to get ready for Halloween?
it’s not too early Secretly I hate Christmas

I don't but what I hate is trying to find unique gifts for my family for Christmas. My family is notoriously hard to buy for and this year I'm taking the handmade plunge and going all out and getting only handmade Christmas gifts for some of the hardest to buy for people on the planet.

I got out of my Mom's birthday easy with some handmade beads for her troll bracelet. For Dad's birthday we got out of it easy with a thick book on drying foods. (He's a farmer) Last Christmas I scored with a reusable shopping bag full of thrift store wool sweaters and a vintage polish coffee percolator. The middle brother got something I don't remember and I copped out and got my youngest brother a…. gift card. I hang my head in shame with that one.

So this Christmas I'm going handmade. But what to get. For my Mom I'll probably get her something again for her bracelet- there are a lot of artists selling really cool lamp work beads for troll bracelets.

I'm not sure what to get Dad or Matt. Allen, well, I'll look for something World of Warcraft related or iPod touch and that will be easy.

I have to start early or I"m left scrambling around in the last week looking like a moron at the mall nearby wandering the aisles with all the men who waited until the last minute. My goal is to buy everything handmade this holiday season!

Good idea for plein air painters or those who want to start

This blog has a great idea on how to make a watercolor or gouache pallet out of an altoids tin and old milk caps. It's seriously very cool. I was thinking and I think I've seen out there a blog with instructions on how to dome something similar with sculpy or fimo clay. The milk caps are the fastest I've seen thus far though. How easy is it to simply hot glue those in? I've also seen one where the guy used tin snips and created dividers with sheets of metal.

Hump Day #13 Sharpie and Gesso

Hdprompt_4

The prompt is open ended and deals only with the material, subject and content are up to you, but the material is dictated.

The next material that I want to write about is actually a combination of materials but it’s a very cool combination that will give you a ghosting effect. The 2 materials are plain old Sharpie brand markers and plain old white gesso. I use Liquitex brand gesso but I think this would work with any brand.

Start out by writing up a journal entry in sharpie. You can use any color, I’ve done this techniques successfully with black and red but I’d love to see results that use other colors. After giving the sharpie some time to dry fully, go over your lines of text with gesso. A nice even thiin layer. There should be no need to thin it with water but if you aren’t getting an even layer you can loosen it with some water. You should barely be able to see the writing under the gesso while it ‘s wet. The key to this technique is a thin even layer.

Now wait for it to dry. If you are impatient like me you can hit it with some heat and dry it out, but you don’t have to.

When you come back to it you should see a faint purplish bleed through of your writing. I find that mine is barely legible but it can clearly be read. From here you can decide if you want to write on top of the gessoed words or draw or collage. As you layer over the gessoed writing you’ll find it becomes more faint and more ghostly. It makes a great background for more writing, drawing or collage.

Prompt # 13 Combine 2 materials: Sharpie and Gesso.