Author Archives: leslie

3 of 30 in June

This
page was done in a 6×8 inch Stillman & Birn Epsilon sketchbook. I
It’s got this awesome smooth plate finish, smooth enough that pens are
great on it but tough enough I can work several layers and use
watercolors. The finished image is 5×7 inches and is available matted
and ready for framing on etsy here.


I
started this page with Derwent Watercolour Pencil. I’ve got a set from
the mid-90’s that was given to me as a gift, so while expensive they
last a long time, even with frequent use. I did my writing which filled
half of the page. I then added clean water with a big brush. I moved the
water around over the pencils and then dragged the colored water down
to the white area of the page. After I’d covered the page in pale blue
color I added some more water and manipulated the pencil some more. I
then allowed this to dry at an angle so that the colors dripped and
moved around the page.

IMAG0660
IMAG0661While
the main page dried I grabbed 3 of my die-cut sheep. I used a 2-Way Glue
to temporarily hold them to a spot in my big art journal.
I then added yellow, orange and bright red watercolors to them. While
these dried I then considered my writing and what it meant. My choice of
the sheep is usually to address my own sheep-like tendencies. The
writing was about breaking with the herd and skipping out on something
traditional. It also addressed some of the consequences of not following
tradition.
IMAG0662
IMAG0662
IMAG0662I
keep looking at this page and thinking it needs something indefinably
“more.” But at the same time I love it’s perfect simplicity. So, in the
end I’m leaving it as is and turning the page. Maybe the fact that it leaves me feeling that it's unfinished is what I'm supposed to feel withthis page, I think that art journaling sometimes unveils feelings we aren't ready to conciously think about, but by looking at and considering our pages it makes those feelings clear and easier to address and explore.
IMAG0666

Continue reading

2 of 30 in June

This
page was done in a 6×8 inch Stillman & Birn Epsilon sketchbook. I
chose it for it’s smooth yet tough paper. The finished image is 5×7
inches and is available matted and ready for framing on etsy here.


This
page started with a section of junk mail security envelope collaged
onto the page. I used a UHU glue stick
to glue it to the page.

IMAG0648

I
then did my writing, in a technique I call overwriting. You’ll be able
to read exact instructions on this technique and more in my upcoming
zine, “My Headlines and Stories.” I used Derwent Watersoluble Graphitone 2B
labeled as a brown or tan. (It turns out the
color on the label is only for identification and NOT to indicate that
it’s tinted a color.)

IMAG0650After
I was done with the writing I wet the water soluble pencil, completely
saturating the page. I used my brush to move the graphite around, but
mostly allowed the water to do the work.
IMAG0651While
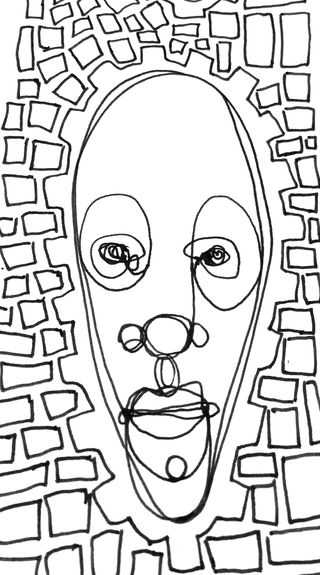
letting the page dry I printed off 3 copies of a self portrait I drew. I
painted these with a hot orange red. I used turquoise blue to paint a
stripe over the eyes. The red and blue mixed to create a purpley grey
color. I painted these pages very wet so the colors dripped down the
page. I encouraged this by tapping the page on it’s edge.
IMAG0653While
waiting for the faces to dry I went through my personal ephemera, stuff
I’ve gathered over time and looked for items that struck me as fitting
the page. I pulled 3 cup sleeves from Karma Coffee.  I was not sure if
I’d use them or not. After some fiddling with them and the faces I
decided to glue them down with just the word KARMA sticking out over the
heads. After the faces were completely dry I cut them from the larger
page. I used UHU glue stick to adhere them to the page.  After gluing
them down I realized I could use my exacto and scrape off the word
coffee, so I did.

IMAG0654
IMAG0654
IMAG0654I
wanted to utilise the elephant that is part of the Karma Coffee logo,
but wasn’t sure how. I fiddled around with the look and placement of the
logo. Then I decided it would be a shame to cover up the great texture
created by the overwriting technique, so I cut the logo from the cup
sleeve. I then positioned this here and there over the page before
settling on a final spot. Once I glued it down I realized it
disappeared. I drew a circle around the logo and then filled with
withthe same turquoise blue I used on the eyes. I used a rag to lift up
some of the color, creating a nice mottled effect.
IMAG0657Things
I like about this page:
I like the use of repeated imagery, something
that happens in a lot of my work. The use of personal ephemera,
particularly the Karma coffee sleeves, as they are now from my past as
is the topic of the writing. The logo of the Karma Coffee Company is an
elephant a perfect metaphor for the topic of the writing. the overwriting texture is awesome, but hard to see in these images.

Things
I don’t like about this page:
The lack of control on the watercolors in
the faces. I went very wet into wet with these and wish I’d let the red
dry a bit before applying the turquoise. Alternately, the lack of
control is very appropriate given the subject of the writing.


Available on Etsy here.

Continue reading

Priestly Thoughts June 1

This
page was done in a 6×8 inch Stillman & Birn Epsilon sketchbook. I
chose it for it’s smooth yet tough paper. The finished image is
5x7inches and is available matted and ready for framing on etsy here.

I
started the page with a sheep mask with an overlay of chrome yellow and
red liquid watercolors. Yesterday I found some images of guys in funny hats on Flickr, and I had sketched them a few times, I decided I wanted to continue with that theme. So, I sketched a guy with a funny hat in pencil using a palomino blackwing original.
IMAG0642
I
then inked the sketch. I used a Pentel Pocket Brush Pen
inked with
Platinum Carbon Ink.
IMAG0643

I
wrote my journal entry with a Derwent graphitone in 2B light, in some
tan or brown color. (Some of the text is blurred to protect the not-so-innocent.)
IMAG0644


The image of the man in the funny hat didn’t stand
out from the background so I used some earth toned watercolor on the
negative space to make the face stand out and blur the writing. It
worked.

IMAG0646
Then looking at the face I decicded he needed some highlights. So I added some highlights with a white China Marker. (Which you can see in the above picture.)


Finished piece is on Etsy here.

Finished

Things
I like about this image: The graphic quality of the line in his face.
The hot colors in his face. That he overlaps an image of a sheep, in the
context of the priest gives some interesting meaning. I love the layers
of meaning here. The writing is about a formerly catholic friend who is
dying, so add the additional layer of meaning to the already complex
page. I love that the text is muted and partially legible in the
finished piece, but very hard to read. This perfectly compliments my
feelings on the subject. (It’s a complicated friendship.)

Things
I don’t like: The earth tones in the negative space. I think this image
REALLY could have used some color opposites, a nice indigo would have
been perfect in opposition to the oranges. But the problem is that it
would have blended with the oranges and made something muddy.

Continue reading

Curious Incident

Yesterday
while I was trying to kill the last 15 minutes before I had to pick C
up from work I decided to clean my Noodler’s Ahab Flex pen. It’s been
working pretty well, writes nicely, with plenty of flow. It was in
desperate need of a good cleaning. So I gave it one in plenty of warm
soapy water. Everything got a good scrubbing, including the tiny
breather tube.

Then
I brought it back into the office for a good once over with my floss
(piece of tin can cut to scrape gunk out of the fins of the feed) and
get it put back together right. I blew the water out of the breather
tube and sat it down, never to be seen again. Did I mention that I had
it working perfectly? Once you get an Ahab tuned perfectly you don’t
really want to mess around with that perfection, you never know if you
will get it working right ever again.

I
searched for it and was nearly late for picking up C, and never found
it. I have no idea where it went. One might think it’s somewhere on my
workbench, but I can't see it. Resolved that I wouldn’t find it again
and prepared to fiddle with the *(&*%*^*&* pen for
the rest of the night, I put it together with 9 fins showing and the
nib fully seated.


And wouldn't you know, it works perfectly and if anything, better than before.


Oh and later I'll  have my first 30 in June post up. Are you playing along?

30 in June

If you are interested in joining in with me for the 30 in June Challenge, here's an image you can post on your blog or blog post:

30 in June
And here is the code for blog loading:

<a title="30 in June by lessherger, on Flickr" href="https://comfortableshoesstudio.com"><img style="display: block; margin-left: auto; margin-right: auto;" src="https://comfortableshoesstudio.com/wp-content/uploads/2013/05/8901630644_ee3c7a087d_n.jpg" alt="30 in June" width="168" height="223" /></a>

Just copy and paste the red text!

Let's bust out of our journaling habits and try some new things!


Read about it here and here.

Still Journaling

You
might think that because I'm working so hard on  "My Headlines and
Stories" and making books that I'm ignoring my art journaling. While I
might go a day or so without art journaling I'm definitely journaling.

IMAG0635I'm
also getting ready to do 30 in June. Which I've mentioned before as my
method of getting back into the daily manner of art journaling, which
I've definately NOT been doing. I wrote about the 30 in June here.
(Let's see if I can remember to link that up when I post this…) Small
5×7 pieces posted to the blog, daily along with being put on Etsy. Yeah,
I'm going to sell the art journal pages. Why? No idea, but the thought
was to keep me honest and force me to have a goal in their creation and
to keep creating. Without a forced public goal (blog post and etsy) what
is to keep me creating? I think eventually I'll be able to just create
on the positive vibe of the art making.  Who am I kidding, I like goals,
I need goals, so I give myself goals…

IMAG0636

Do you want to join in or just watch the fun? Starting June 1, watch here for lots of art journaling experimentation.
IMAG0637
IMAG0637

Trying to Make Them Vegan

I’ve
been making these recycled covers for a long time, and with the
exception of the beeswax on the hemp cord, they are vegan. Yesterday I
decided to try and make them 100% vegan.

Beeswax
acts in a couple of ways when binding books, first it keeps your thread
or cord from tangling. Secondly, it helps the cord to pass through the
stations as you sew. Lastly when you tie a knot the beeswax helps it to
stick in place. I also notice that it improves my grip on the needle,
since the wax is slightly sticky at body temp.

Since
the hemp cord I use on these books doesn’t tangle I decided to omit the
wax altogether. Big mistake, the protection the wax gives the cord as
it passes through layers of paper keeps the hemp from fraying and
getting too fibrous and insightly.

IMAG0628I
have some paraffin leftover from canning. I decided to test that out.
Instead of melting to the cord as it passed through the wax, it was as
if the cord cut it, like a chain saw, leaving behind lots of tiny little
flecks of paraffin all over me and my workbench. What a mess. the
paraffin on the cord was also in these tiny little pieces. I used a
lighter and carefully heated the wax and melted it to the cord. It
worked really well. However at body temp it made my hands very slippery.
I had to use a pair of pliers to pull the needle and cord through the
paper.
IMAG0630My
next experiment was to melt a small puddle of paraffin onto a piece of
cardstock and pass the cord through the melted puddle of wax. I used my
fingers to press the wax into the cord a little bit and to pull off any
excess. This seemed to work the best of any of the methods.
IMAG0631

I’ve
got a couple of unscented candles that are made out of other waxes and
don’t contain any beeswax, so I’m going to mess around with melting the
candles along with some paraffin to see if I can get a wax that works
better.
IMAG0633

27 Covers and Counting

The covers freshly cut from signs.
These banners were all about 3 feet high and 8 feet long. One was only 1.5 feet high. They had brass grommets about every foot and a half which really screws up with my ability to use ALL the poster. I can either cut 3 inches from each edge or cut covers from between the grommets. I chose to cut between the grommets.image from www.flickr.comInterior pockets, with ID tag sewn in. I use a jig to keep placement of the tag similar on each pocket. The tag is first temporaily glued in place then permenantly stitched in place. After stitching the extra thread is removed then seared with a lighter.
image from www.flickr.comThe pockets start as a 5.25×8.25 sheet of old cardstock poster. The poster has a top corner folded over. These pockets are then temporarily glued in place then stitched to the covers. I use a zig zag stitch for strength.
image from www.flickr.com27 finished covers including 3 that are not perfect. I will hold off on stitching the seconds for awhile. These covers have some neat patterns created not only by hte images on the posters but the text that appeared on the posters.
image from www.flickr.comI have a few more covers to stitch up before I even get to the task of adding paper to these covers.

Handmade Journals

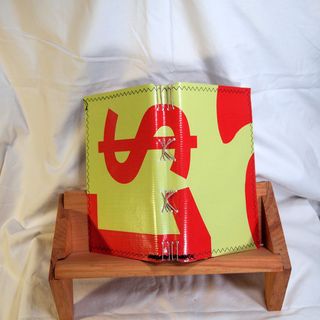
I
finished a few books from some covers I’d made years ago. I had
forgotten how much I like bookbinding. It’s really relaxing. Anyway,
these books feature a sturdy soft cover made from an old advertising
sign. The cover is vinyl. The paper is a heavy duty cover stock, almost
cardstock weight but slightly lighter. Each book has a pocket in the
front and the back of the book. The pockets are stitched in place with
quilting thread. The books are bound with super sturdy and tough hemp
cord.

This
style of journal is one of my favorites. I’ve used them extensively to
take notes at my old DayJob, creating tough notebooks of reference
information. I have one that is over 7 years old, and the cover has only
gotten better looking with age. Bumper stickers stick to these
notebooks incredibly well.

Anyway find them on my etsy shop here.

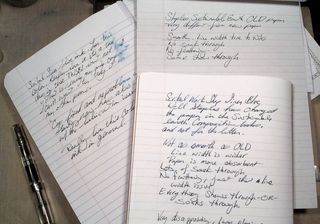
Oh yeah, this paper? Great with fountain pens.

P5234899


P5234899
P5234899
P5234899

Baa Baa Sheep

IMAG0623Awhile ago I picked up some Staedtler watersoluble crayons. They work okay, but seem to resist melting as easily as other brands. For this page I started with some collage of personal ephemera. I then dusted the page with watercolor crayon shavings and added water. I smeared and moved the crayons around the page with my procaulk tools. After allowing the page to dry I sketched the olde-timey dude and used a stick eraser to remove some of the watercolor crayon to add areas of light in his face. After that I added the die-cut sheep and tissue paper.
IMAG0623In the Pukka tea sachet is a folded up note that was written to me. I added a small tab to allow the note to be removed and read with ease. The sheep, as usual, reflect sheep-like thinking on my part and the author of the note.
IMAG0623I received some neat parting gifts from my coworkers as I left my DayJob. The frog I sketched here was one of the gifts. It's a neato still life subject.
IMAG0623