I’m very excited right now! If you head to the etsy homepage, you will see one of my journals as one of the featured items! It’s
HERE!!!! How freaking cool is that!?!
How cool is that!?!
2 Replies
I’m very excited right now! If you head to the etsy homepage, you will see one of my journals as one of the featured items! It’s
HERE!!!! How freaking cool is that!?!
OKay, so I had intended to update yesterday in the AM, but tiredness and the DayJob got in the way of that, so here’s the picture with the hint.
I’ve removed the picture because I’ve had several correct answers and I’ll be trying this out again, with different prizes.
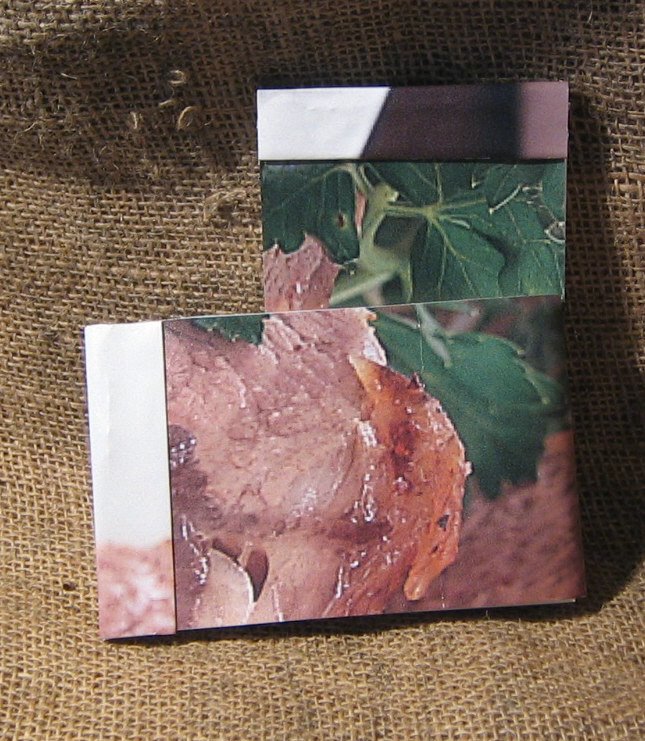
I’ve been scoring big time at work lately; a coworker has been hooking me up with the giant window posters that are a heavy duty paper coated in vinyl. ONe side is pristine white and the other has a printed image. The printed image side is the side I think that is the most intersting. My only issue with the posters is that they are covered in stupid logos. So I’m thinking of creative ways to use those but not have it look like what I’m making is a product from the company. For right now I’m simply hacking those parts off and cutting the chunks of poster that I like.
The 2 posters that I’ve got right now had large chunks of roast beef on them, since the coworker has been so cool to give me the posters I decided I was going to make him a “meat” sketch book. I cut out a prime cut of the roast beef (c’mon i had to go there.) and folded it over and wrapped it around a stack of essentially trash paper. I’ve been going through the recycle bin to snag anything with any blanks sides- misprint fliers, unused fliers and other assorted blank on one side papers. They work great for this style of notebooks/journal; because it doesn’t lay flat.
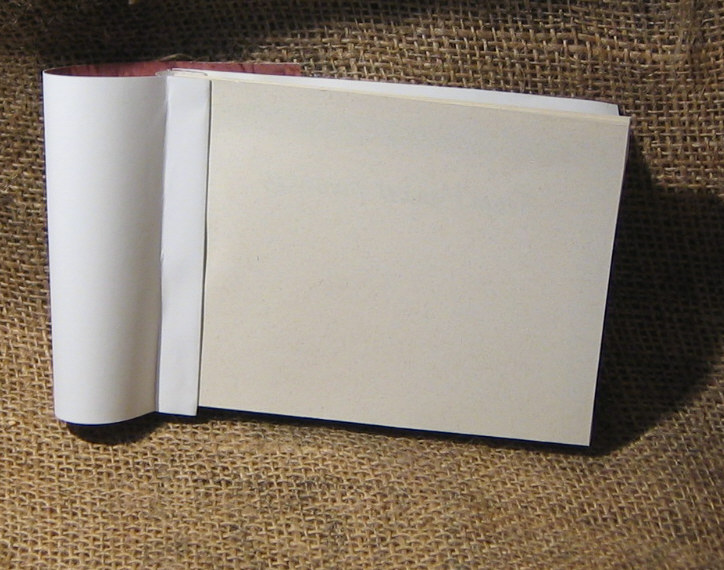
I didn’t take any shots of the books I gave my coworkers but here’s a few shots of smaller books made ofthe scraps from the meat photo. It’s the same idea.


Here’s a little contest for people:
Can anyone, who doesn’t know me in real life or work with me recognize what retail establishment employees me?
If no one answers by the time I wake up I’ll post a photo with a give away clue.
The first person to email me (not post a comment here) with the correct answer will receive a set of 3 matchbook notebooks- a combination of meat and special sign covers.
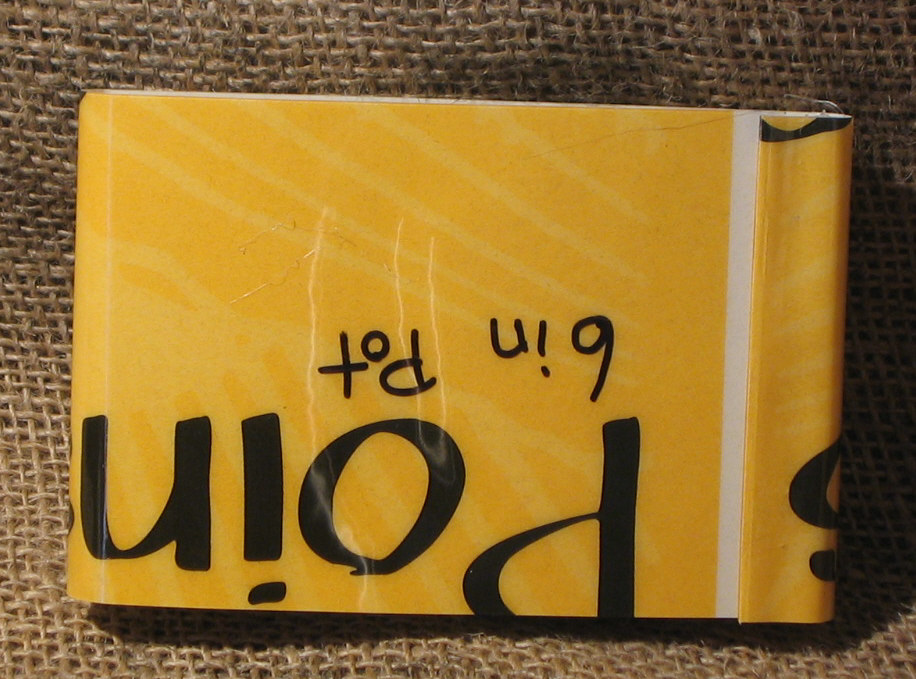
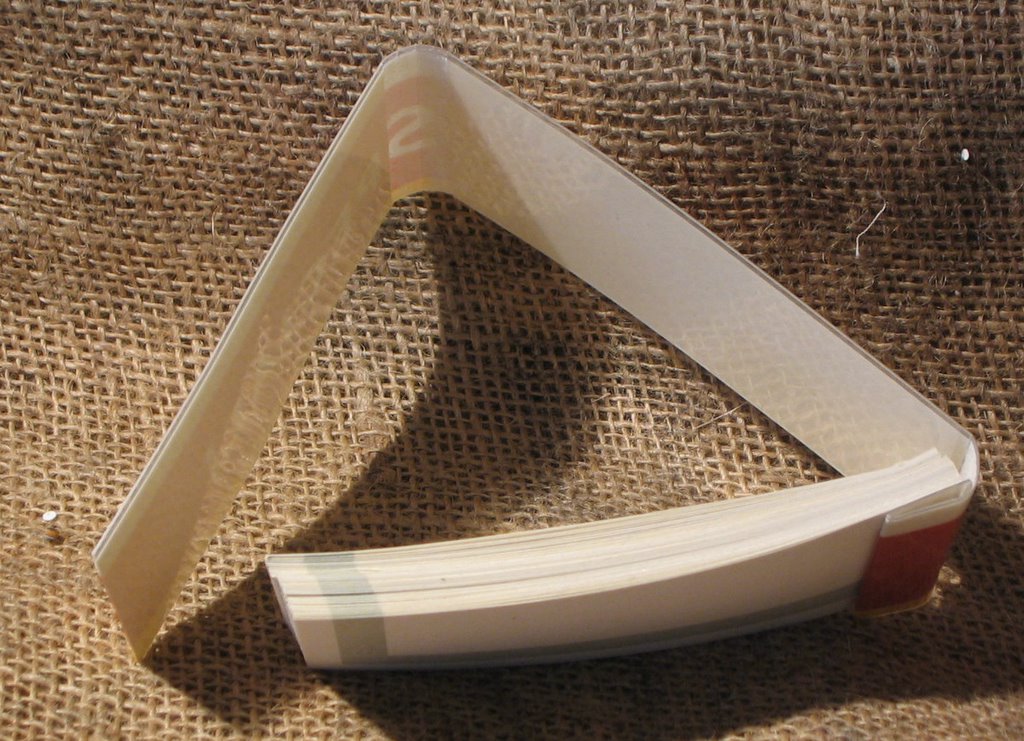
So these are my latest adventure in alternative bindings using unusual materials. These are all recycled- using signs from a grocery store that have been laminated, special signs, regular signs, anything that was laminated I chopped up into 3 inch by 11 inch pieces. I then used (purchased for the purpose) a large heavy duty stapler (heehheheh laughter of glee- office supplies!!!) to staple in about a hundred sheets of recycled paper.
Things I like about these- it’s a really adaptable way of making a cover. If I have scraps of drawing paper or any paper i can stack it and wrap one of these covers around it. i can hide a cardboard piece in the back making it sturdyier than one might think. It’s fast. I was able to figure this out from looking at a picture on etsy and adapt the size of my text/paper block to the size of my available cover size. I was also able to make these with a huge assortment of recycled materials. (more on that later.)

I’ve been pretty busy in the studio the last few days, which explains my lack of posting. I‘ve had several special orders in which I’ve finished and mailed out.
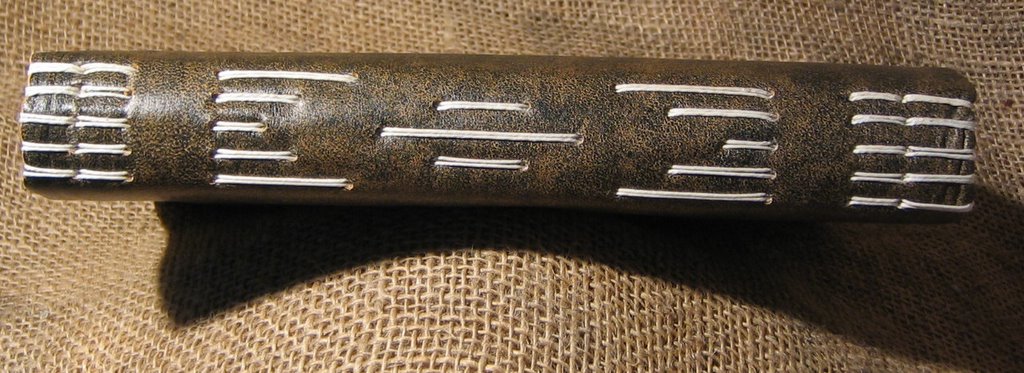
I’ve been having a few experiments with patterns on the spines of the books; I’m trying to think of them as cross-stitching or as needlepoint. It’s an interesting experiment, because I’m limited to a top to bottom arrangement and angles. I’m going to continue to play with it but I’ve had some very interesting results so far. Some of them are listed below. Some are simply the recent custom orders I’ve been working on. This is simply a simple 200 page, 10 signature, black thread on golden deer hide with linking.
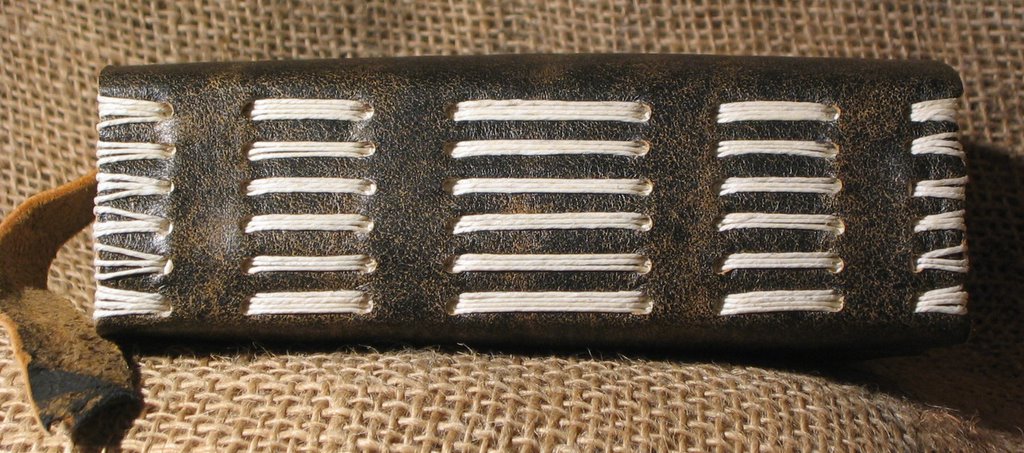
 This is the first of my experimenting with the cross stitchor crewl work style of sewing. It’s 200 pages and 10 signatures, natural thread, you can see int eh center where I skipped stations on some of the signatures. i think it adds a lot of dimension tot eh spine.
 This is also some of the patterning along the spine. All I did here was to change where I placed that stations.
 This is perhaps one of the most intricate designs I’ve sewn thus far, the aditional stations in the center added a ton of time to the sewing process, not to mention tht it’s a fat 400 page journal in the 6×9 inch size. It took over an hour of timeto sew. It’s listed on etsy here.
 Ah pink. While I don’t personally like pink many do, and here is another pink journal. It’s a copy of the scarlett journal, per the request of a customer.
I’ve been working on some 400page journals. They pose certain issues that don’t come up in other sizes of journal. The spine is much thicker than in other journals and the number of pages and signatures forced me into a funny set of stations across the spine. I’m usually very happy with an odd number of stations. The number of signatures, 20, forces me to use an even number. It being a square number (see kids Math IS important!) I can’t get it to work in an odd way. I need to play with this style and see what I like and don’t like. This may be the perfect number of pages to work with slots and angles.
The first 400 Page journal is listed here on eBay and I’ll have another up on etsy this afternoon.
I had a guy request a really distressed and beaten on journal, on that looked like it was old and abused. I think I fulfilled that request with this journal. I started with a chunk of oil tanned leather, applied a variety of acrylic paints in layers, wet them down moved them about and wiped them off. I scrubbed some in with an old toothbrush and scraped the leather with a knife and a few other tools. Using a brush I applied some darker paint to areas and rubbed that in with the end of the brush handle, wiping off areas that were raised leaving darker pain in the recessed areas. After all that I took a braided piece of hemp laid it across the cover and beat it in with a hammer, which left an interesting impression. I then folded the cover so that the area where the spine was would be measured and applied darker paint in that area so that it would look like the spine had been handled a lot; after all that I took and iron and bees wax and heated it into the leather.
I ended with a leather that looks dark and abused, as if it has been through the ringer and back again, surviving god knows what.
The details:
Long stitch with decorative Xs on slots
200 pages of Eaton paper
Sewn with black Irish linen thread
Raw flap and a black leather strap- cut thick
Check out the pics:

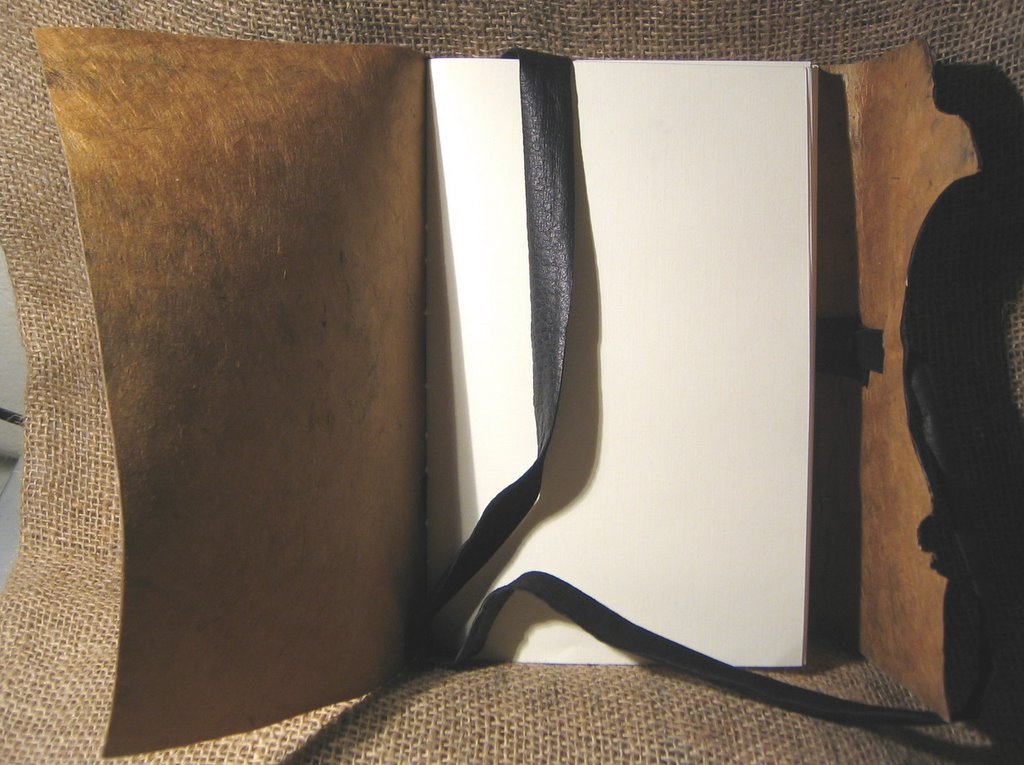


This journal is already called for.
I’ve been working on a few new designs. I figure that the best way to combat the imitators is to innovate and continually change my offerings, continually is a bit of an over statement but change them often and continue to innovate my historically based sewing.
The versionI’ve been working on is a 400 page journal. I’ve had people request it, so I’ve developed a journal for those people who wantt o write 1 page a day for a year and then move on. Of course a 400 page journal gives them a little leeway with the writing but it’s a thick little book and I’m going to list one on eBay first and then list the next on etsy. So we’ll see how they do.
The details:
400 pages in 20 signatures, Eaton 24ln 25% cotton paper.
Unbleached Irish linen thread, hand waxed, just alittle with pure bee’s wax.
Distressed sheep hide, great pattern, cut from A premium hide.
Basic long stitch.
Raw edged flap with an extra thick strap.
So here are some pictures to enjoy:


I’ll list at eBay later and post a link here.
I have been working on eBay since 2001 with journals and art. I started looking at what people were selling and how they sold. I’ve learned a lot and I’ve taken notes. As frustrated as I am with their current fee structure, I still like eBay and will continue to use their services. I’m in flux with my feelings about the amount I make versus the amount hey take but I know that the best way to combat that is to continue to sell and get my prices higher.
Never once in my time on eBay have I ripped off someone completely in his or her description of an item. I’ve taken notes on what has worked for that person and adapted it to my needs. If one were to go back to any of my descriptions and look at the wording, you would find that it’s all my words. It’s all me. I get frustrated when I look at another book artist who hasn’t put in their time on eBay and is deliberately ripping off my work, right down to my phrasing. The thing about people who buy journals and sketchbooks is that we are addicted to the process and buy them if we like them. There is no need to rip off my work, people will find the work and like it or not. You can boost sales on eBay by lowering starting prices and listing more items. I thought a LOT about how I used eBay before I listed an item, about how I read a description and what I look for in a journal. Selling on eBay is easy if done smart. There is no reason to steal from some one else’s hard work.
So what prompted this? There has been a seller who has been selling journals very much like mine for some time now. I’ve ignored her forays into my territory until now. She has always somewhat styled her auctions after mine, now she has ripped me off almost completely, using my phrasing in her auctions. The other issue is also that she is now making journals like mine. Her bindings are sub par and her photography stinks but the fact remains that she has started to rip off my designs and now she’s ripping off my auction styles. All of my new auctions will feature a little tag at the end that will discuss that my auctions are my words and my work and that copying them is LAME-O!
I am much more balanced on this than I was the last time I found someone ripping me off, being angry about it doesn’t do anything, so I’ll figure out something.
I feel like I got very little done though I really did get a lot more done than it at first seems. I managed to cut a load of really nice covers, some of which will fetch high prices at auction as well as on etsy, keep an eye out over the next week or so. I learned a lot about using and making a reed pen. I’ve filled 4 or 5 pages in my moleskine with note and doodles. I plan on using this tool a lot and maybe offer some for sale on etsy. I’m not sure though. I’ll have to make a pamphlet on how to sharpen them.
Anyway, I forgot to mention that the scan of my moleskine with notes about the reed pen had reed pens scanned in below the image. So I cropped the scan here to show just the pens. Please note that these are my first attempts and are not wonderful.
One of the things I found is that it’s really important to get the pulp center out of the reed. If I don’t the ink doesn’t flow freely and then suddenly blobs out, making an ugly spot. On my newest pens I used my tiny metal file set to really scrape out the “pith” leaving me with a nice smooth surface. If I am careful and scrape out the pith I don’t need to scrape out an ink channel, it flows along the veins of the reed easily. I also must eb careful to NOT file down too far, or the ink flows too freely and blobs. It’s a careful medium. I’m pretty sure I’ll have this figured out in no time and will end with easy writing tools.
