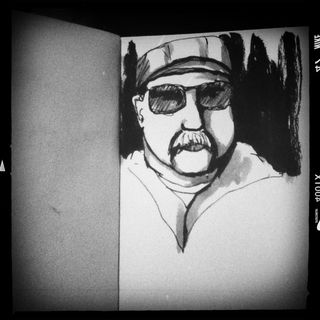
It’s been a crazy few weeks. I had to help count inventory a while back for the DayJob and it threw me for a loop. I’ve been trying to get back on track ever since I was sick and having my schedule screwed up really just put me back to spinning my wheels in the rut again. This weekend was a good one for getting me back into the flow of things. Jane and I met and had a good cuppa at one of my favorite places, Atomic and then we took a walk in the park here in town. Where I sat and sketched and we talked about PioP, which is shaping up to be really really cool. I can’t wait for the reveal of what it is. It’s going to be awesome.
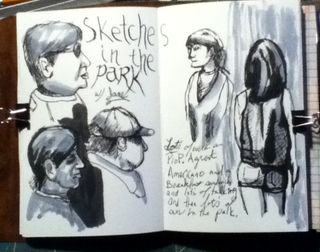
This is the first sketching I’ve done in awhile. I could make a lot of excuses but I won’t. Honestly life has been flying at a million miles an hour and I find that instead of sketching or arting I make a few notes in my journal or veg out watching Hulu* at the end of the day. Fortunately though those notes are all forward progress, important tidbits of information. I’m looking forward to sharing those with you once everything is in place.
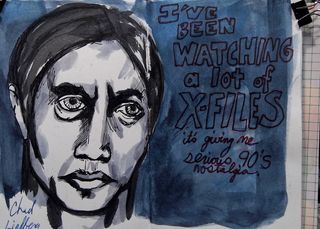
I picked up a copy of Kerri Smith’s new book, “Finish This Book.” I’ll have a review on it here soon.I’ve also picked up a bunch of new fountain pens, some inks, a brush and a few other odds and ends. Hopefully this week I’ll get to writing up a bunch of reviews. That means I’ve got Thursdays covered. Hopefully I’ll be back on track with my blogging as well as my journaling. I've also been attempting to practice some "ultra light weight" journaling/sketching. It's centered around my Midori Traveller knock off. I"ll get a post up about that too. Lots of good stuff is in the works.
Author Archives: leslie
Midori Traveler Style Notebook
I've been using a knockoff of the Midori Traveler notebook system for about a year now. I decided to make one for a friend and while I was working on it I tried a few things and really liked how it turned out. I then decided to make myself a new one and a pocket sized version.
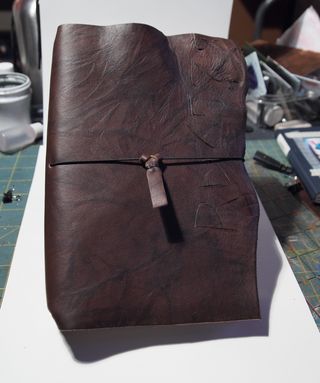
I really like how deep and dark the leather is and how supple it's surface is while remaining stiff. I can't wait to put these through the ringer! For the large I used an edge of the hide that had numbers and letters cut into the surface. I buffed a ton of cold wax into the surface, which I used a light iron to heat into the leather, to really deeply impregnate it with the wax
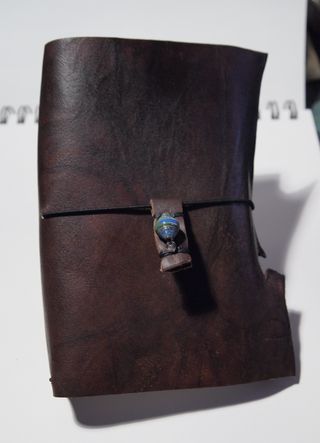
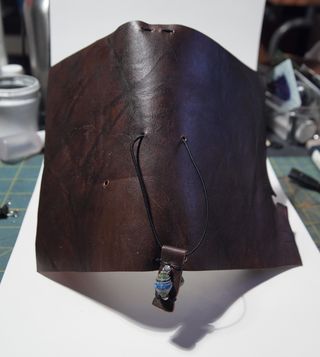
This time instead of punching a hole directly through the center of the cover I made 2 holes, one on either side of the "spine" area. This lets me use a smaller knot and I like how it holds things together.
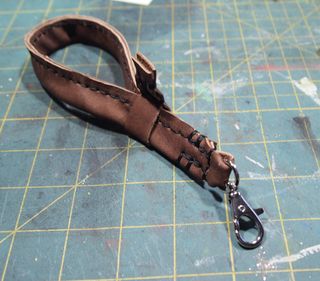
While I was at it, I figured I'd make myself a strap for my camera. I made it a touch too long but I do like it. The hardest part was finding a heavy duty clasp to hold it to the camera.
Some construction notes: For thelarge notebook I started with a 9×13 inch sheet of leather and then trimmed it once I had the cover constructed. For the small I started with a 6×9 inche sheet of leather, which I again trimmed down excess once I had the elastic installed. In both of mine I'm using my own notebooks but the small would hold any 3.5×5.5 inch notebook, like a Moleskine Cahier, Doane pocket notebook, Bandit Carnet, field notes etc… Any of the small pocket sized notebooks would fit in the small size, and likewise for the large, any 5.5×8.5/9 inch sized notebook would fit.
Review: Airmail 69T Fountain Pen
The Airmail 69T /Reg D is an Indian fountain pen that I purchased from Kevin at FountainPenRevolution.com It costs $16 plus shipping. I call it the Reg D due to the markings on the pen, but Kevin lists is as the 69T. For this review and currently for writing I've got the pen filled with Chelpark Royal Blue, a very nice regularly colored blue ink.
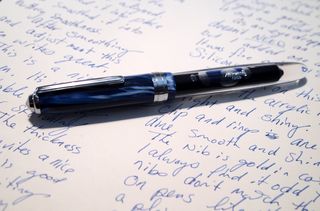
This is a good looking fountain pen. Of all the Indian eyedropper pens I've ordered this is the best looking. The blue swirled acrylic is shiny and bright the surface is perfectly smooth. The clear acrylic portion of the pen is also perfectly smooth and crystal clear. The clear acrylic has the thickest wall of all the pens I've ordered from FPR and would not crack easily. It's very sturdy feeling. The pen is thick, but not too thick just enough to encourage a loose relaxed grip which is fantastic for long periods of writing. The section is made of the same swirled blue acrylic as the cap.*
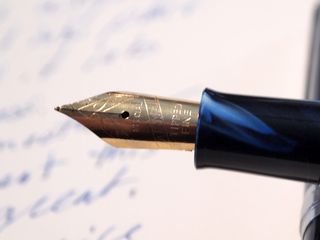
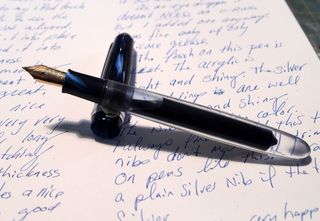 The trim is all silver colored while the fine pointed steel nib is gold colored. I always find this odd. The nib arrived quite scratchy. I used the macro lens on my iPoo touch to find out that the tip was not aligned, the left side was higher than the right. I was easily able to adjust this down. I then ran it over a nail buffer to smooth it out. I further adjustted the nib to write a wet line, rather than the somewhat dry line it was writing. Writing and sketching with this pen is now pure joy. In it's scratchy state it was okay, adjusting the nib would have sufficed, but the added smoothing of the nib just made it better.
It is an eyedropper pen. For sealing it all that is needed is a small amount of silicone grease, I went ahead and added a small o-ring. Before tuning the pen I noticed some blobbing but I suspect that won't be the case now that I've adjusted the pen. The pen holds around 3ml of ink, which is pretty standard as far as eyedropper pens are concerned. It's also a pretty lengthy amount of drawing, especially with it's fine nib.
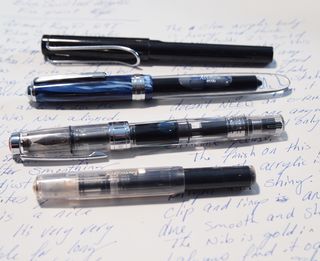
Over all, now that this pen has been tuned to perfection I'm quite happy with it. It's a great fine pointed pen that is great for writing or sketching.
So Little Time So Much To Do
I filled another journal, in 27 days. It’s that Canson Blue Book I’ve been tweeting about. I’ve got a review coming on it but it won’t be posted here, it’ll be published someplace else. (hint hint) I burn through a small 3.5×5.5 journal every spring, and I don’t see this slowing down anytime soon. I’ve been crafting a class around my spring journaling style. An anything goes sort of class using a small inexpensive journal and everyday materials, a pen and something to add color. It doesn’t get much more simple than this method. The difference is the approach. I’m keeping much of that to myself, but suffice it to say there is a reason why I return to this journal burning method every spring.
In the stack of small journals that sit above my desk I shake the dust of winter out of my head, embrace the blossoms of spring and come up with some fantastic. My spring blaster journals are where I’ve had some of my best ideas and some of my worst. I can’t wait to bring the 2 classes I’m working on to ArtJournaling.Ning.com
Part of my spring funk blaster is daily journal work. Not just making a pretty page, but real actual digging deep into my head- drawing, mind maps, lists of ideas, observations and the like. I purposefully stretch my mind in this journal. I enlist my creativity and get art centered.
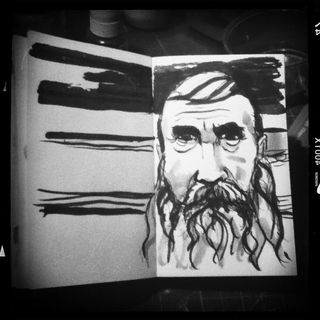
It’s not a 5 minute a day kind of thing. It’s not even a 10 minute a day sort of thing. It's a mind kind of thing. I take this journal with me everywhere and I blast my way through it, spending every available moment working in it. That journal and a pen are ALWAYS in my pocket.
I’m very excited about this and the fountain pen class. The FP class is becoming a book with videos to further explain points. I have so much to do on it and so little time! I can’t wait to take my vacation so I can work on it for full week with no interuptions!
Q&A on Youtube
Every now and then I get a series of questions on Youtube and Facebook that warrant longer explanations via video. Here are the latest batch. Feel free to ask more art and art journal related questions in the comments.
Versatile Blogger Award X2
Well both Tammy of DaisyYellow and Wendy of LateStartStudio have nominated me for the Versitile Blogger Award. *blush*

So, in no particular order, here are my 15 picks:
- Diana Trout– For her no nonsense and down to earth approach to art journaling, refreshing!
- The Journal Junkies– These guys are up my alley with an approach to art journaling that is fresh and process based.
- Millande– Her videos are lovely and inspiring, check out her seed journal series WOW!
- Traci Bunkers– I love what she does with tradiational photography and with paint, great stuff.
- Jazmin- Sirensidyll I adore what she does in her journals and her approach.
- Tammy of DaisyYellow– Rules smules, I read her daily
- Sketchings & Jottings– Not just one artists work but a collection of great stuff all over the net.
- Doodler's Anonymous– Great inspiration on an irregular basis.
- Sketchbob– Highly creative, his journals inspire me.
- JournalArtista– Paula is amazing and motivating.
- RightBrainPLanner-Follow her on INstagram for some photo goodness
- NoPenIntended– This feeds my addiction love of pens.
- ArtJournaling.ning.com I love to head over and check out all the stuff people add on a daily basis
- CraftyMoira– Moira is a great teacher, writter and full of inspiration, I lvoe her daily face drawings she's been doing.
- Chongolio– Great guy with great advice for art journalers, very inspirational YT videos.
Now 7 things about me:
- I'm from Maine, I grew up on the coast about an hour and a half from Canada.
- I've never been lobster fishing, though I have been on a friend's lobster boat. I also fell off his boat, at the dock, mainly because a friend pushed me off the boat. I feel into the bait grease slick. In case you don't know, lobster bait is rotting fish.
- I'm an adventurous eater but I used to be vegetarian. My college roommate are still shocked when they hear me talk about cooking meat of any kind.
- I'm an accomplished cook, who enjoys complicated recipes.
- I started blogging in 2000. My first blog was done anonymously and thankfully the server it was housed on had a catastrophic failure and burnt to a crisp.
- I have horrible allergies to pollen and dust.
- I've been making art since I could hold a crayon.
Recent Art Videos
I've been putting up some sketching videos showing my process when I work in other materials like brush pen, pencil, pencil and acrylic and a variety of other things. Lots of portraits.
Check 'em out, thumb them up and share them!
Overhead Camera Mount
A lot of people ask me how I get my overhead camera angle. I use a boom microphone stand with a gorrila pod clamped into the microphone mount. This instructable could be modified to be mounted to the left or right of your work and the camera mounted to the appropriate side of the mount shown, instead of on the very end of the mount. Not a hard modification for a perfect camera angle.
The Old Zine
It's not a big secret I've been working on a new project with my friend Jane. The new project is called Put it on Paper and you can keep up to date on it here. We need to figure out if MagCloud is going to be the right place for us to publish our new project. so we figured we'd take all 3 issue of Art Journaling: It's ALL Good and offer all 3 issues combined. I finally got the combined zine up on MagCloud today. So far so good.
I decided to offer the zine in both a printed format and an e-zine. If you buy the printed issue you get the e-zine for free. The cost of the 3 combined issues in e-zine format is at a lower price than it was to buy them each individually.
You can go to the site and flip through and see what the zine looks like. I really think that using MagCloud will fix all of the issues we had with sales of the first zine- all those technical download glitches? Gone! You want it printed- here it is.* They'll ship it to you for a couple of bucks, just like a real magazine.
I'm excited to be using MagCloud for PioP and the old Art Journaling: It's all good! Follow the link below to buy a copy and to follow ComfortableShoes on MagCloud to be notified of when we load new content!
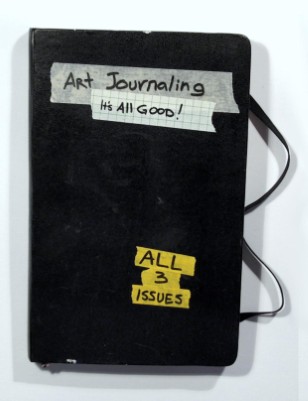
Art Journaling: It's ALL Good All 3 Issues
All 3 issues of Art Journaling: It's All Good in one fat 100 page download. All the art journaling goodness in one!
Creativity Kick Start
@sirensidyll wrote, "What motivates you to push the comfortable boundaries you're accustomed to and treading in the choppy waters of the unknown artistically?"
It got me thinking what DOES get me trying new things artistically?
My initial answer was a new color of a favorite material, and that's true nothing makes me happier than a fresh new color of watercolor or acrylic. I test it out and mix it with old standbys seeing what fresh new colors I can get, sometimes I mix up whole jars of the color to make perfect flat washes.
Other times it's a sketchbook in a size I haven't used in awhile. Like my old standby 3.5×5.5 inches(9x14cm) that I get every spring**. Or a new tool like those Pentel Pocket Brush Pens or the E+M lead clutch. Sometimes it's a blog post written by a friend or fresh discovery.
I realized I needed to dig a little deeper on this question, because the overwhelming first thing I do with all new materials? Search flickr's commons and find a friendly face and draw it. It's a great way to get to know a new material, find something you're comfortable with and draw it, it will tell you what that material can do.
The meat of the question was about stretching myself artistically and what triggers that stretch.
A relatively new phenomenon for me is drawing in coffee shops. I know that you all think I cut my teeth drawing in public, the truth is all through college I hated it, despised it. I enjoyed being with my classmates in class and talking to them but actively hated drawing in class. I always felt self concious about my skills, or lack of them. I thought that my friends my judge me based on my erasing lines and then redrawing them. I was not a sit out and about on campus drawing type of student, unless I knew that the spot was relatively secluded and I wouldn't be bothered- hence my many many drawings of the Stillwater River, drawn from the dock in the evenings during October, March and May*.
You might be wondering what was the catalyst for this change. It was to prove to myself I could do it. Force myself to see that no one really cared, and if they did they would look on in curiousity not judgement.
The truth is, that is exactly what I've found. No one judges me. Most people don't care and even fewer still look over my shoulder to see what I'm doing. Mostly children ask questions, "What 'cha doing? Are you an artist? I'm an artist too!"
Mostly the thing that stretches me artisticly is myself. I have something to prove to myself, and only myself. I can do it.
You can do it too.
