I want to start this off by stating that I’m not an audiophile, I just want my true wireless in ear buds to stay in my ears, which they just don’t with the typical silicone tips that are packaged with most entry level buds.
My search for tips that stay in my ears began when the collar of my winter coat brushed my new BT earbud and it tumbled out of my ear and onto the train tracks. Luckily the train was still 10 minutes away and I was able to retrieve half my investment.* I’d heard of foam tips before but hadn’t ever needed them for my corded earbuds. Everything I read suggested that the foam tips would solve my problems.
Because I didn’t know what size would fit my ears, I ordered a mixed pack of small medium and large tips from Comply. Be sure to check the Comply website for the right size tip to order for your in ear buds- I ordered the wrong size and the tip would slide off the stem and stay in my ear. The cost plus shipping for 3 sets was just a hair over $20, you can get them on the ‘zon for about $15. After that I purchased a package of JLab Cloud- you get 4 sets, 1 small, 2 medium, and 1 large. The cost for those was around $7 (price fluctuates).
My right ear is sized small and my left medium, so each mixed pack nets me 2 usable sets with Comply. With the Cloud, I can wear medium in both ears. But the small fits well. I like the JLab Cloud– they are super soft and feel great, but they don’t fit my back up pair of Skullcandy Sesh (purchased via Woot for under $15.)
Foam tips stay put and my expensive buds stay put, my cheap Sesh stay in my ear. Also, the noise canceling effect means that my wife can watch TV and I can listen to music while I read.
A major downside of foam tips is that they degrade and after 3 months or so they get mushy and floppy, they still stay put but they are a pain in the rear to put in. You have to have fast hands to get them in place before they expand.
Even more annoying is that every brand of bud needs a different Comply tip or they won’t fit into their case, then they won’t charge. Annoying. My search for a cheaper option lead me to the JLab Clouds. At $7 for 3 usable pairs is a better deal for my more expensive JBL buds, but they don’t fit my Sesh well.
I knew I could get a perfect fit from Comply foam, but I have a hard time spending more on tips than I spent on the buds. I could order a mixed pack and get 2 usable pairs, or I can order a pack each of small and medium- which would cost around $40.
Yikes.
So DIY options?
Most that I searched for were for IEM like Klipsch with very narrow posts for the tips or to make large silicone custom tips that lock into the ear. I have a couple of sets of heat moldable material (link to a DIY silicone version) that I use with corded buds, but I’d be into the problem of removing the tips every time I needed to charge. I’ve also grown very fond of the noise cancelling effect of the foam tips. It’s great for when I use the lawn mower or snow blower.
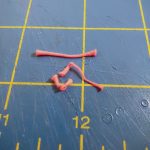
I found a number of DIY options using ear plugs. Which totally made sense- ear plugs are made of the same soft squishy foam as the tips. I also considered craft foam. Which did not work at all.
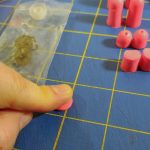
My reading of the above linked articles and more led me to picking up the softest ear plugs with the highest sound blocking rating that I could find… at the local CVS. I found a 10-pack of super soft plugs that reduce noise by 32 decibels, in hot pink. They had a variety of other colors but they all looked rather medical, other than another version that didn’t reduce noise by nearly as much. I like the hot neon pink though. 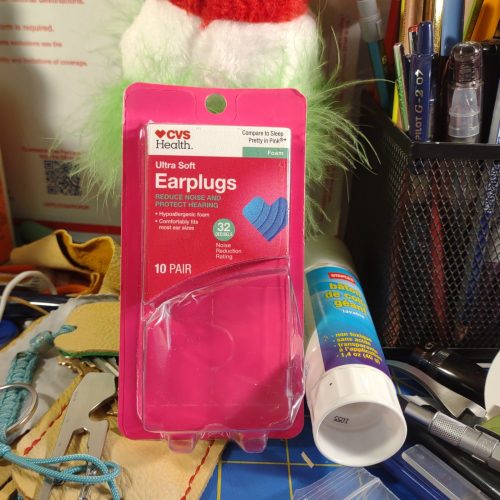
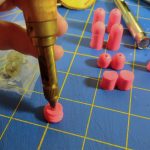
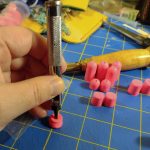
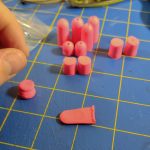
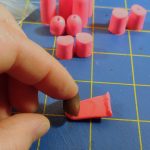
I decided to poke the holes first then cut to size. I used 2 different hole punches- a Japanese screw punch with a 2mm and a 3mm bit and a hammered leather punch with a 3 mm bit. Because of how they cut and the properties of the foam, the holes were smaller than the bit themselves. With the punch the middle section and end of the hole are substantially smaller than the first part, which helps hold the tips to the buds very tightly. 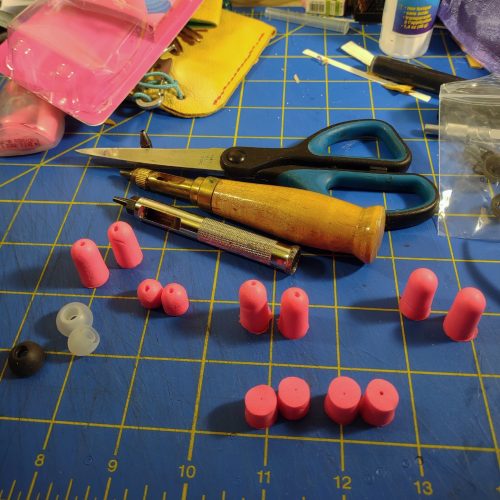
-
- Squish
-

- flattened
-
- Screw Punch
-
- Leather Punch
I was worried that the plugs would slip off the buds without recycling the interior of a Cloud or Comply tip, but the hole is so small and the fit so tight they don’t. Keep in mind that the memory foam is expanding in all directions- so the compressed foam is trying to compress back into that tiny hole and compressing around the stem for the tip. I’ve been using a set for a week now and not had a problem with them slipping.
-
- The compressed foam cuts wider at the ends than in the middle. This makes for a secure fit!
-
- The compressed foam cuts wider at the ends than in the middle. This makes for a secure fit!
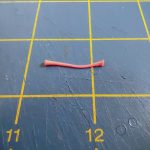
After you punch the hole through the height you need to let them expand, this works better if they are warm, so hold them in your hand. After they have expanded to their full height you are going to lay them down and flatten them along the height. Measure a silicone tip, add a millimeter or 2 and then cut the plug with a sharp pair of scissors. EDIT: The step of adding a couple of mm to the length of the tip is really important. Without that length they are too loose to stay put.
-
- Flatten the long way
-
- measure, add 2- 3 mm
-

- cut
Now be patient and let them expand again, then flatten them like you are punching the hole again. While the plug is flattened pancake style, stretch and pull the donut shaped plug over the stem where the tips usually sit. Pull the plug down past the end of the stem, the stem should poke out a bit. Let the tip expand, when it is fully expanded, wiggle it around until it’s sitting where you want it. It should not expand too far past the tip of the plug.
Every brand of IE buds will need a little different work. The Skullcandy Sesh were much easier to DIY- the way the plug fit over the stem was easy, and it fits into the case perfectly, so the buds charge without interference. My JBL Tune125TWS needed a bit more tweaking- I had to trim out the tiny hole over the stem so the foam wouldn’t interfere with the sound. I also used the interior of a dead Comply foam for these buds and they worked well. I would suggest, leaving a bit of old foam on the core to keep them put inside the plug.
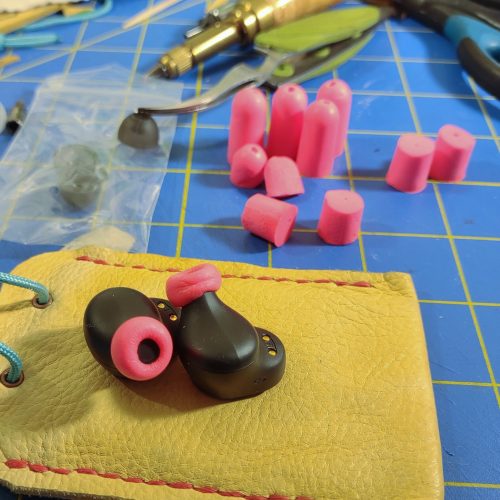
The ultimate goal here was to create a cheaper alternative to Comply foam tips that fit into the case of my various BT IE buds. This has been accomplished and they look pretty decent and fit in my ears just as securely as the Comply, if not more so. They sounds pretty decent too. Like I wrote in the intro, I’m not an audiophile, but I like it if my buds sound good and don’t need to be cranked up to be heard.
The cost? A little elbow grease and $0.25 per pair. Not gonna lie, I’m pretty excited.
Many of the instructions offered other suggestions for poking the holes- from mechanical pencils to the metal tips off gel pens. Anything will work so long as it is at least a millimeter smaller than the stem on the in ear bud.
I did reuse the interior tubes from a couple of Comply tips, they were a bear to fit into the ear plug material, but once in there, they seem to hold well enough. I get the Comply tips with the added acoustic grate that keeps dirt out of the IE buds. I’m not sure this extra step is worth the effort and work. Continue reading