How it’s Done

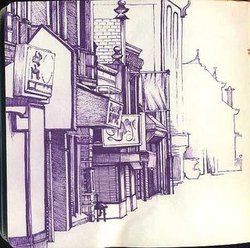
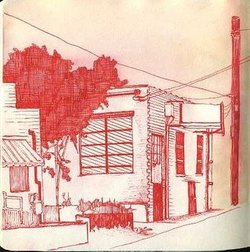
I’m going to post some pictures of this a little later, but I’m writing out my process for my moleskine paintings.

I start with a photo from the AP or another website. I print it off fairly small. I then take a pen and outline the major areas of dark and light. Anywhere I see a shape of different shade I hit it with the pen. I scan this in and open it up in photoshop. I edit some of the darks and lights and make sure my lines are all visible in black and white. I use a little find edge filtering and really highlight the lines I made on the print off. Then I save it as a black and white jpeg. In the photo wizard I open up the image and go to print. I pick 4×6 print, which enlarges and distorts the image a little more. After printing it off. I cover the backside with a even coating of soft graphite pencil- usually a 4 or 5B- SOFT is best.

I tape the image down to the page in the moleskine and trace my lines with a hard pencil 4H, or a ball point pen.

After transferring the image. I start with my blacks and lay those in. I work progressively through the shade until I get to white. I’ve been told I should work in reverse and maybe I will one day but I find that when I try and change up the painting style it screws me up and I end up making the painting messy.

After I finish the face I lay in the background. Depending on how much soak through I have from previous pages I decide on watercolor or gouache for the background. Lately it’s been all watercolor no matter what.

After all that I let it dry and close up the book.

coffee jotter and finished order

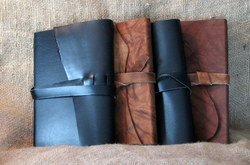
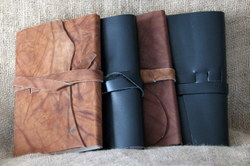
Last night I finished the big order I wrote about in a previous post. I took the book into work with out taking a picture of each of them. So… I’ll snap a quick pic today when I get to work of the spines. Since I can’t show the covers without photoshop anyway, it doesn’t make too much of a difference. I will say the matching bindings in hemp are very cool. The excessive company branding is even cool when you look at how totally random it looks even if it isn’t.

After a week of being used and abused the coffee jotter is standing up VERY well to use. The mylar packaging is showing no signs of wear. The stick-on label is showing slight signs of wear but this is not a surprise. The label is a sticker meant to survive the abuses of a short sweet life on the retail shelf, not the travails of my jeans’ pockets.

written:8/17/07

I never did get a picture of the books but I did get them to the person purchasing them! He was really happy.

jotter cover ideas

Ideas for recycled jotter covers:

Advertising fliers in the mail- cardstock mailers

Covers from magazines

Paper shopping bags

Laminated plastic shopping bags

Old calendar pages

Old spiral bound notebook covers

Cardstock from the craft store

Advertising signs

Paint chips

Old magazine covers

The Finishing touches

To make your coffee bag jotter can be finished easily now that you’ve prepared and cleaned your bag. Start by lightly ironing the mylar, use a very light setting on you iron and cover the mylar with paper to protect your iron.

Too hot and you mylar bag will curl. Be careful.

I like to stitch down the flap with a zig zag stitch but you could use any decorative or straight stitch- or not stitch it at all.

Here you can see where I’ve stitched down the flap. Now you want to trim all the edges and make your piece of mylar square- it’s easier to work with this way.


Flip the bag over and measure out the size of your notebook with a sharpie. I’m making a small pocket sized notebook here, so I’ve measured 5.5 inches down from the top. Trim the mylar to the right size.
Measure the size of your front cover plus 1/4 of an inch- so for my notebook I’ve measure 3.75 inches in and ‘scored” a line with a pencil. Measure the same for your back cover and score again with you r pencil. Fold along the back cover score and fold any remaining mylar to create a flap.
After you’ve created your flap cut an angle to allow for creating a pocket.
After you’ve folded and cut your flap stitch the flap down again.
Stack the cover with 15 sheets of paper and use binder clips to hold it in place. You should just be able to see the score mark you made originally.


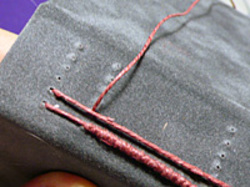
If you use a sewing machine stitch down that score mark using a wide straight stitch. If you don’t have a sewing machine you can punch 15 holes and stitch through them to make your notebook.

Fold along the stitches press hard, use a bone folder to really crease the fold.

Hold the covers tight to the paper and gently hit the spine with a hammer, sharp hits but not pounding hits.
Line a ruler up witht eh back cover and trim away the excess uneven paper.


Here’s the finished book. If you don’t like how the cover sits, run your iron over it. If the mylar is too flimsy feeling you can raise the temp of the iron and laminate the cover to the first page.

Vacation Photos

This isn’t at all book related but I’m back from my vacation. IF you are interested in seeing pictures from my vacation, you should be able to follow this link to my flickr account and see all kinds of pictures of Maine. I only loaded some of the best from the many I took. Enjoy!

Prepare a Coffee bag for making a Jotter

Get one used mylar coffee bag.

Flatten it. Trim the bottom of the bag along the seam, just above it. You want as much usable mylar as possible to make your notebook.

After flattening and trimming find the air lock. On some bags it’s clearly visible and other’s it’s harder to find. I noticed that starbucks and Pete’s hide theirs in their logos. Keeping with the theme of keeping as much usable mylar as possible trim straight up from the bottom along one side of the airlock and them up the other side, you’ll be left with a strip of mylar about 1 inch wide with the airlock in it. Discard it.


Use a damp sponge wipe down the mylar. Then use a spray cleaner to continue to clean it. It may take several cleanings to get it clean. Don’t leave any of the coffee oils on the mylar as it will stain the paper when stitched in.

After this you can cut and stitch the mylar just like you would paper or fabric. I like to stitch down the seam along the back of the bag and then sew the jotter as if I was using cardstock.

Toner

I’m pretty excited abou this- my newer printer allows me to make toner transfers! This is awesome in so many ways. My old Oki wouldn’t work with toner transfer techniques, the new Brother does.

So many possibilities.

Vacation PLans

I’m officially on vacation. I kicked off my vacation with a dinner at a very nice restaurant in a central Mass town near where we used to live. It was very cute and very tasty. Meals were artfully arranged French style but more American fare. It was an expensive kick off to the week but well worth it.

My plans for this week are simple, relaxation in Maine. Heading to a few key scenic areas, making some art and mainly relaxation.

One of the places that I’m heading to is Cape Split in South Addison to see the area John Marin painted. I never understood Marin’s work until I took a wrong turn when looking for an office in which I had an interview and I ended up near Cape Split. It was a brilliant sunny summer day and I had recently seen some of his work in person and was amazed and overwhelmed by seeing suddenly with clarity the scenery in his paintings in person. It was suddenly clear. I could see the shapes in his paintings in the scenery. I guess you have to see it to believe it. I’m hoping for a few clear sunny days while we’re up there so I can get a few good photos in and maybe even some painting. The one big issue I have is that while we go to see some of the area it’s going to be some driving and gas up there is pretty expensive.

The other main attraction that we’re going to go see is Cobscook State Park. IT is amazing, particularly if we have a nice day.

The final place to see is West Quoddy Head. It’s an easy day hike, a few miles only, gorgeous rocky scenery that I never got tired of when I was in Maine. It’s a place that is easy to get to and easy to enjoy and take lots of nice touristy photos. It’s also the location of a pretty gruesome attempted murder- about 5 or 6 years ago a man and a woman were getting divorced and she asked him to meet her at the park to discuss a few things. The decided to hike and she pushed him off a 100 foot cliff as the tide was receding. There was only a few feet of water between him and the rocks, and it almost killed him. He was spotted by tourists and barely saved.

Anyway. I’m looking forward tot eh 9 delightful days off I’m going to have. I’ll be posting to Flickr and her from the road, and we aren’t leaving until Sunday night.

Beer and Moleskine’d thoughts and a future ‘zine

One of the things I really love in the hot summer is a good cold beer. I don’t drink a lot but damn in the summer a nice cold beer is wonderful. Today it’s HOT here in the northeast and I’m sweating my a$$ off.

I’ve been editing an article I’m writing for both my blog and for a prospective ‘zine. Well, I thought about the couple of beers I have in my ‘fridge and I decided to crack into one. This is a St. Peter’s Golden Ale. It’s the color of apricots and honey. It’s smooth and easy drinking, light and refreshing, perfect for the summer. It also only comes in very expensive 17-ounce containers. It also seems to be quite heavy on the alcohol…

All that stated my article is going darn well. I’ve got 22 half sized (11 letter sized) single spaced pages of good solid starting out online advice as well as hints and tips for marketing art. I’ve been devoting about 2 hours a day to working on it. I spend my evening writing up notes and ideas I’ve jotted down during my various breaks in the day and random ideas I’ve had while waiting for things to load at work. I print the pages out after all that and when I get home from work, edit the pages and fix all the edits I’ve put into the draft. Repeat process. Tomorrow I’m taking a break from the process as I won’t have free time and I’m going out after work.

So Saturday I’ll be working on it again. I’m expecting a 30 or 40 page half sized ‘zine out of this effort, in 2 or 3 weeks. I’m very very excited.