Tag Archives: bookbinding

Binding Tutorial

I’ve added a new page tot he left of my main page. I’ve copied the text and images into this post so you can see it. I’ll update it periodically when I come upon some new websites with tutorials. If you have any suggestions leave a comment below.

So you think you want to start your way into this fantastic hobby of bookbinding? HEre area few tutorials, and beware binding can be addictive… like crack…

Coptic Style Tutorials: CHeck out this Youtube video:

There is no sound so don’t worry!One of the things that makes that video so great is that he’s showing a single needle tutorial with the covers attachedi n the correct way. See how his cover and spine edge of the signatures are even- the covers don’t overhang the spine? Yup, that’s how they should be. It shows a few good things- tensions are correct and the cover is attached properly.
Coptic15

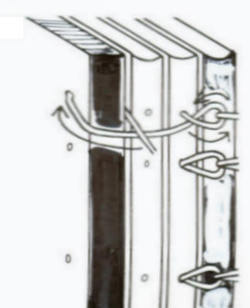
This little gem of a tutorial is written from the stand point of a teacher as a classroom aid. (I remember those days, wish I’d had time to teach my students how to make a coptic book.) This is also for a single needle coptic book. (Image above is from the website.)

Tools

This tutorial is also for a single needle chain stitch. This tutorial features some great clear images of the sewing process. However, I disagree with the author in the section written on threads. The weight of the thread comes into play not because of "knotting between signatures" but because the thread lies in the fold of each signature. The thicker the thread the larger the stack of thread and paper along your spine, which causes the distinctive "coptic" spine flair that makes coptic bound journals so great for collage work. If you have knotting between your signatures you have other issues…. That being said this tutorial is one of the better out there. (Image above is property of the article author.)
Millepeede

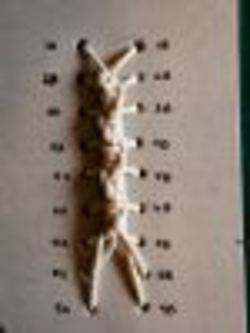
This is not a true caterpillar stitch but it’s like a mini version. It’s from Evil Rooster, a website I love for it’s name not to mention that the site owner makes some great books. One of the many things that I really lie that is done on evil rooster is the use of stitching cards to learn new techniques. I have half stitched books, Evil rooster has card. I like the cards because you wouldn’t be tempted to sell s technique card like you might be tempted to sell a really col experimental technique journal…. Not that I’ve done that or anything….(Image belongs to Evil Rooster)
Make Your Awl the Charles Atlas of Awls

In a discussion on the HedgehogsForever list the topic of awls came up. I’ve got several, all work different purposes for me, but the basic is to put holes in stuff. One I use for cardstock pages, another for softer paper, and another still for the custom journals. I made my first awl, bought another and made another; then had my brother design and make a hand turned awl for me.

I love the one my brother made for me, hate the one I bought and use the 2 I made regularly.

Some awl tips-

  • Keep them clean. It might seem kind of anal retentive but a more useful suggestion I can’t make. I use my awls for lots of stuff- piercing paper, picking up junk off my table, and lifting bits of glue covered paper. Wipe clean with a damp cloth and any cleaner you like. Allow to air dry before storing. Wet and damp metal will rust.
  • Keep them sharp. There is nothing worse than a dull awl. Seriously, have you ever tried to pierce through paper with an awl that is dull? UGH! I bought a super fine grit diamond stone at HD to sharpen my awls. I grind all my awls to an easily sharpened 45 degree angle, just like a chisel or a knife but you can also sharpen the awl in a rotating motion and keep a more typical needle point. That’s a lot harder than a 45 degree angle. Remember a dull tool is a dangerous tool. (That’s what my Dad always told us… And it’s a mantra I’ve found true- I’ve got scars to prove it.)
  • Polish them. Okay so I thought keeping them clean was going to top the list of anal retentivity. This does. Why polish? It allows the metal to glide through the paper with ease. It reduces the drag from the paper against the metal making it easier to push through a large and thicker stack. To polish you can do as I do and buy a polishing kit for a dremel or by hand. I’ll start with the dremel. Use the fabric wheel and add a little of the red fine compound. Turn the dremel onto a medium speed. Put the length of the awl needle against the spinning wheel with the point in the direction of the spin- DO NOT go in the opposite direction. I tell you this because I like my eyes and I’m sure you like yours too. Turn the awl in your hand. You’ll see a little gray begin to appear in the red compound. This step only takes a few seconds. Switch over to a felt tip. I prefer the small wheels but a bullet tip will work too. Here you can switch over to a white or super fine compound OR you can just put a little bees wax onto the tip. I run this until I see no more gray coming off into the felt. It takes only a few seconds. After doing this the needle will shine like a mirror.

You can polish buy hand with a commercial polishing compound and felt. Or you can polish with a little beeswax and baking soda. You need a little grit to get the polish going. Rub some bees wax onto a piece of felt or soft cloth, sprinkle a small amount of baking soda onto the cloth. Hold the cloth between thumb and forefinger and fold it over the business end of the awl and rub. It takes a little long and it will shine like a slightly older mirror, but it gets the job done.

I’ve found the combination of these 3 things make my awls cut through stacks of paper like butter. In short you can go through pushing through 20 sheets of paper to 40.

Maine Vacation Journal

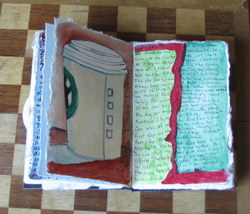
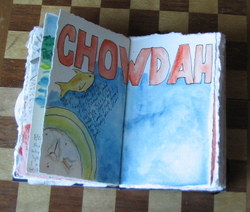
Earlier this year I went to Maine to visit my family and take a brief vacation from work. I had made a sketchbook filled with 140lb 100% cotton paper. It was awesome to work with, the combination of the paper and the handmade book made it easy to draw what I wanted to and add the color I wanted. See below for few pictures of the book.

Img_4813


Img_4815

PIpe Clamp Book press

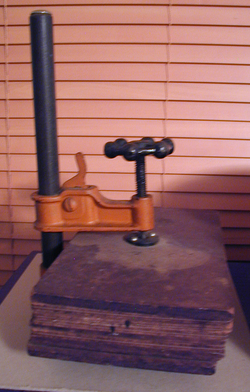
The book press below might not be pretty but I’m sure it’s plenty serviceable and would give anyone the amount of pressure they need to press up a few hedgehogs. I found it on this website.  And it’s currently for sale.

Bookpress

It’s made from a pipe clamp- readily available from any woodworking store or big box building store like Home Depot. Most pipe clamps can be bought in the pieces and you then buy the pipe to mount the clamping pieces and the system works through leverage. After sliding the top clamp into place you then screw the turn screw to create the tight pressure. Because you can buy pipe in any length this is a great design to work with- the only limit to the stack is how high you want to go. I wouldn’t suggest going over 16 inches, but that’s a lot of books. Hurrah for a binder thinking outside the box and making something that works, is relatively inexpensive and provides more than enough clamping pressure for the home binder.

3X5 cards/GTD/ Wausau and Staples

This one is for all you GTD addicts and Hipster
PDA
users. I was at staples today and I found Hipster PDA 3×5 card wallets,
completely ripped off from the Levenger’s pocket briefcase. Featuring black and
brown leather and a seemingly decent quality. They also have business card
wallets that I couldn’t resist.

I can’t find a link to the Staples version of the 3X5 card case but trust me, it looks JUST like the Levenger case. Probably a lesser quality but still very nice. It retails for $14.99. They had a bunch of other snazzy accessories, notebooks and portfolios. All coordinated in colors and designed to look good on any desk.

*warning Paper geekiness below!

In bookbinding news, Staples has discontinued Wausau’s pastels paper in favor of their own line of paper. The Staples paper is also acid free BUT it only comes in at 20lb, Wausau’s paper was and is 24lb. But Staples now has acid free pastel colored cardstock @ 110lb and wonderfully coverstock @ 65lb. Here’s my one issue with the I would be fine with the change if the Staples brand was in a comparable weight but its 4lbs less, which makes one hell of a difference when writing with a fountain pen.I bought a package to test out and see what it’s like but I’m not holding my breath. What I am excited about is the coverstock. I’ve been looking for a decent coverstock for age that was both cream in color and acid free most brands do not make it. Usually it’s bright white and not acid free. I would suggest that thus far the range of papers they are introducing isn’t comparable to Wausau but Hammermill and because of the acid free labeling on the Staples paper I"d say thus far they are beating them out.

Have I mentioned how much I dislike change?
* a quick check online shows that the Wausau paper is available online, in the colors I use (IVORY) even cheaper than I had been buying it in the stores. So I’m wondering if they are getting rid of all their stock and I’ll never find it again.