Author Archives: leslie

Composition Book Round Up Target Part 1: The New Kids

This is the last Target round up, I’ll be tackling the Walmart offerings in my next few posts. These are the two new options available from Target. One is good, one is trash.

Let’s start with the positive review. I’ve read a lot about Top Flight composition notebooks being great. I’ve had a variety of experiences, most of them of the bleeding fountain pen variety. When I saw this Fashion Card covered Top Flight I had to buy it. It boasts 80  pages and a fun ecological message about bees on the cover. It cost $2.50. I could only find wide ruled at my local Target. (Why Target WHYYYYYYY!)

The cover is made of nice thick and stiff card. It is not floppy. The design work looks a lot like someone drew some lines and then slapped some stickers onto the page and then snapped a photo of it. It’s not bad but not good either. The spine tape feels a bit narrow and is mostly smooth. I don’t know why I prefer a nice textured tape on the spine but when the tapes are smooth, I don’t like it. The stitching is wide and pretty tight, though I did have to melt the thread because it was frayed and loose at the bottom edge.

The paper is great. Smooth but toothy. It felt great with all my pens. Fountain pens felt really nice and didn’t bleed. There is some show through but that is expected IMO for paper this thin. I really liked it with pencil too. Despite it being smooth it has excellent tooth, so pencils glide on the surface but also deposit plenty of graphite for a clean dark line. 

At $2.50 this is not a cheap book. It’s not expensive either. But when there are cheaper options that work very well, why bother with this, unless you like the fashion covers?

Finally, at the end of the Target offerings, we have the shoddy Jalapeno Paper Company composition notebook. These are made by Michael Roger, Inc; the same company behind Decomposition notebooks, but at a lower price. A little googling show that these are made specifically for Target. These are priced at $2.99 for 80 pages. It boasts being recycled and being 100% post consumer waste and being printed with soy inks. All of this sounds good.

The cover design is what drew me in. There were a few really cute designs- and I struggled to decide between avocados and octopi. I ended up with octopi. The design has that Michael Roger feel. I posted a pic of these on insta and Johnny of Pencil Revolution and Erasable, immediately noticed the design feel of Decomposition notebooks. It’s not a rip off, it’s the same designer.

And frankly even with that, you shouldn’t buy this notebook. 

The wide ruled paper is utter trash. It’s got this slick glossy newsprint feel. It’s pulpy and soft while also being too crisp. It feels awful. I touched it in store and almost put it back. It just feels weird under hand. Then I put a variety of writing tools to it and even more yuck. Fountain pens immediately feathered and bled through. Writing on TP would be more enjoyable. Pencils slide across the surface there is an utter lack of toothiness. Even normally dark pencils look light and feel hard on this surface. Gel ink is the only thing that feel okay here. 

I cannot tell you enough to not buy this book. Get the Top Flight, hell get the We Mean Green for a buck more, it’ll serve you more.

Overall if we’re looking at value for the dollar, the best bet is the Up+Up card covered notebook. The various Five Star offerings are also quite nice but not the best value.

Review: Pencils.com Custom Pencils

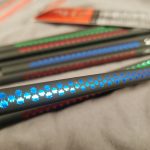
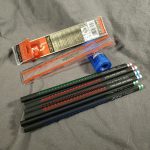
I’m not sure if Pencils.com has historically had custom pencils available, but for a long time they had Blackwings available with their Pearl (balanced) core available in black or white with a custom imprint. Not long ago they announced a full range of custom pencils in a range of prices. They range from round screen printed to foil stamped on a range of pencils to stamped on natural raw cedar. The standard custom hex is $80 for 200 or $100 for 400 pencils, which is quite a decent bulk discount. Discounts show up at check out. I’m told there is another bulk discount at 1000.

This is a good time for me to be reviewing pencils. I’m working on a few different novels and recording the ideas in composition notebooks but also writing my first drafts with pencils and pens in them as well. I’ve churned through some of my pencil nubbins and put a work out on the samples Pencils.com sent me for review. I’ve worn each one down an inch or so in the weeks since delivery. Suffice it to say, that’s a lot of writing.

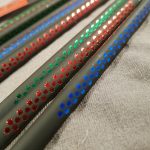
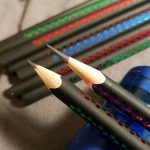
The least expensive is the round screen printed pencil. You get 432 pencils for just over $95. That’s 22 cents per pencil. This option has the largest amount of colors and fonts and lines of text, including a mascot option*. You can really customize your message. The sample version of this pencil was not cedar but linden/basswood and sharpened up well with a smooth HB core. 

The custom hex heading has 3 options. I’ll write about each.

The standard custom hex costs $80 for 200 pencils or 40 cents per pencil. It is available in 10 colors, with 7 color options for the imprint; this includes gold and silver. You get one line for text.The ferrule is cold with a pink eraser. The wood is cedar. The pencil is made in Thailand, finished in the US.

This is a solid pencil choice. The cedar smells great and sharpens well. The core is dark, mostly smooth with some grip on the page. It holds a point well on even the toothiest of pages and sharpens nicely without crumbling- in all of my sharpeners from the finicky Pollux to the Apsara long point to the brass bullet to my Dahle 133 to my Classroom Friendly. The lacquer while not thick is applied very well and nicely glossy. The imprints look good too. While I suspect I was sent rejects that were slightly off or not perfectly imprinted they still looked great. I particularly like the white on black imprint. I was sent a white pencil with a gold “Chaos Coordinator” imprint and it is great.

The raw cedar custom hex costs $110 for 200 pencils or 55 cents per pencil.The pencil is made in Thailand, finished in the US. This pencil is almost identical to the standard custom hex pencil, but with the added benefit of being raw cedar and with a black ferrule and eraser. The imprint is available in the same 7 colors as the above. I have one with a gold imprint and another with a green imprint and I have to say that I really like the color green on raw cedar. The wood is smooth and feels great in my hand. I suspect the core of this pencil and the standard are exactly the same.

The premium custom hex costs $250 for 200 pencils or $1.25 per pencil. It is available in black and white with 7 imprint options. The ferrules are slightly different than the standard- a smooth band instead of ridges, but still gold with a pink eraser. The lacquer is noticeably thicker and glossy when compared to the standard hex options. The cedar and core sharpen with all the above mentioned sharpeners perfectly. The pencil is made in Japan. 

This pencil is amazing. The core feels like a Palomino HB or Camel HB. That smooth graphite that glides over a page is evident here. There is a marked difference in the graphite between this pencil and the standard in core alone. Combined with the difference in paint and just wow. The camera doesn’t pick up the difference in ferrule colors but the premium is slightly warmer in it’s gold shade.

Some good with the bad here. The round pencils, while the best priced and well, round, were made with the worst core and the finish is less than stellar. The eraser is great and it holds a point well, but it’s very hard and light. It’s just not a great pencil. But the options of more text and little icons is awesome.

I’m not gonna lie, you all know how I love a raw cedar pencil and of these options, the raw cedar found its way into my hand more often than any other in this package. The blue black ferrule and black eraser are great and that smooth raw wood is fragrant and looks great. It’s grippy in a way that a matte finish can’t match. The core is good too, it’s not as great as the premium pencil but it’s darn good. It has just enough grip  on the page that you know it’s there, it doesn’t glide or skate over a page but it feels good on all of the various composition notebooks I’ve tested it on. That is across 5 brands with a variety of smoothness and tooth.

Obviously the premium is the best of the bunch. It’s a great pencil that feels like I’m using a Palomino HB, which is a favorite of mine. 

From the standard to the raw to the premium, you can’t go wrong with any of these options. Even the round isn’t bad, it’s just not the same quality as the other options. Head over to Pencils.com to get your own custom pencils.

In Defense of Plastic Covered Composition Books

If you’ve been a reader of this blog for any period of time, you may know how much I love the humble composition notebook. My journey from hate to love was many years long but I have embraced them as not only an object of aesthetic appreciation but a useful workhorse tool. During these times of pandemic, when I went from blank brain fog to a period of large creative output I also embraced a new way of working, or perhaps for me, an old way of working.

You see, I went back to working in pencil and a comp book. Sort of like when I won nano by writing by hand. In the last month I’ve filled 3.5 comp books with notes and ideas, and yes, the workings of several novels. I’ve allowed myself to write the scene out of order, unplanned and as they spring to mind. I’ve written an ending and an epilogue. I’ve got to tell you, that this new-ish manner of working has freed my mind. Given that my mind was caged by fear for three of the last 4 months, this is a new feeling, and oh wow does it feel good.

But that is not the reason for this post, well, without the above the reason for this post would not have occurred.

If you know of my love of compositions books you may also know of my disdain for the plastic covered version of the. If not, now you do. The plastic doesn’t fold over well, I’m left with a lumpy writing surface and really, the cardstock and cardboard covers work just fine at keeping my comp books safe in my bag. Sure they get a bit worn and beaten, but let’s face it, that is a look I adore.

Yesterday I sprained my ankle, Yes again. This has been a frequent thing since I was 21. One of the things I forget about spraining my ankle is how much the pain of it knocks me for a loop. Pain and healing make me tired. (I swear I’m getting to my point.) It also means that I roll over in my sleep, knock that foot out of place and the jarring pain wakes me. Which means I’m still tired. When I’m tired I’m clumsy.

When I’m clumsy I knock over my coffee. Onto my work-in-progress notebooks. Luckily it was an iced coffee and more ice than coffee splashed onto my notebooks (and kindle).

All of my comp books survived with minimal damage. 

Those with card covers have a bit of waver and smell a bit like coffee. (Yum for now) 

The plastic covers wiped clean with ease and don’t even smell like coffee. (A bit sad)

The interiors were all okay and frankly part of that is due to where and how the coffee was spilled (on the spines) and not on the fore edge. 

While I still prefer the card covers for their ability to fold back on themselves and the worn in look they acquire, I see that the plastic covers have use for the more klutzy among us.

Review: Pencil of the Week Zine

Ed Kemp writes the pencil review zine Pencil of the Week (PotW) with a wry and often laugh out loud sense of humor. The premise of the zine is easy, he picks a pencil at the start of the week and uses it while at work and seemingly also outside of work. He then writes up a blurb about the pencil and his week in a composition notebook. (I could be wrong on this aspect but composition notebooks are mentioned here and there.)

If you aren’t familiar with zines, well they are self published little magaZINES. They are usually photocopied onto regular photocopy paper. Occasionally the covers will be made of colored paper or even cardstock. Sometimes the covers have additional color hand applied.

PotW is no exception, the interior is black and white photocopied as are the covers. Though Kemp often adds spots of colored pencil on the cover and more rarely inside. The covers often reflect the interior of the reviews- a composition book cover, tickets and receipts, bubble answer sheets, and drawings of pencils. The little pop of color indicating the issue number works great on the black and white background.

Inside are photocopies of handwritten pages. Each review is written in a blocky all caps sort of printing, done initially in the pencil being reviewed. The exterior and interior of the pencil is examined. He generally writes about the imprint, the lacquer, the wood, the ferrule the effectiveness of the eraser, and the graphite. He will also examine how well it sharpens.

All of the above is done in Kemp’s easy going humor. His writing includes curse words, which as you know I adore, but if you have had issues with my use of the word shit on this blog, maybe skip this zine. He does use asterisks to avoid actually writing the words themselves, which I find funny.

There are now 8 issues of this zine and it has been around for 2 years. I find Kemp’s zine relaxing and humorous to read. You can find it at the link below. https://www.etsy.com/shop/TheWordDistribution

Review: Baronfig LE Squire Adrift

Since I’ve switched over to a “use the good stuff” mindset I’ve been burning through my pencils and pen refills. I’ve also stopped buying stuff. When Baronfig approached me about reviewing another limited edition squire, I wasn’t going to, then I saw the pics.

And if you’ve been reading this blog for awhile, you know I love teal. That blue green color of the 90s and my youth is my favorite. So I said yes.

And oh man, I love this pen.

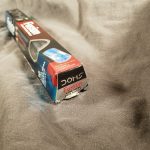
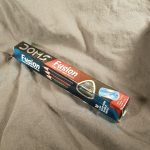
It is a squire, so if you like a basic squire you will love this design. It is balanced and has a nice weight in hand. The nock is twisty and smooth. As far as Squire pens go, it’s well made, as usual. The packaging is awesome and has a fun little game to get a little treat.* I particularly love the glossy varnish on the package to make the bottle design shiny on the matte background. Perfect.

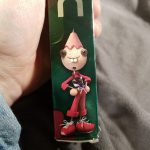
The design wraps around the pen, so when I roll the pen in my hand it captures the motion of underwater grass. The rolling patterns are great. The little fish, octopus, and turtle are lovely. I’m quite taken by the octopus.

I don’t think I can say anything bad about this pen. The color is just right for me. the wrap around pattern is great and I love looking at each of the little critters.

You can get one here.

Work from Home Resources, Sound

Getting better sound doesn’t have to cost a lot, but it can be incredibly expensive. I did a posting the RSVP Stationery Podcast group awhile back about tests I did with a bunch of stuff that I had on hand- headphone, mics, lav mics, and my phone. The results were interesting.

The biggest and most important thing for getting better sound is reduction of background noise. That means turning off fans, heaters, the washing machine, and dishwasher. If that can’t be done then there are a number of ways to reduce noise.

My favorite is building a tent out of cushions or pillows. You can also build a tent out of a blanket draped over a chair set up on a desk as my podcast co-host Lenore does. When I traveled to Maine and stayed in an apartment I had no idea how to reduce some of the noises, so I built a tiny tent out of the available pillows. When I record in my work office after hours, I use an assortment of pillows from around the offices. I’ve also read of folx making a tent out of couch cushions. After you build your tent you stick your mic in there and talk into it. Make sure your mouth is about 6 to 12 inches from the mic, and start talking.

If that’s not working for you, think about going into a closet. You know I’d never tell anyone to go into a closet but sometimes it’s a great way to reduce background noise, once you shove all the clothing into the back it’s going to absorb a LOT of noise.

When I decided I wanted to start recording Manuscripting Pod from my phone I recorded snippets of audio all over the house, office, and in the car. I tested it with a variety of mics too. I wanted to see where I had the least background noise, without alterations, so that I could start recording with as little work as possible. I walked around, recorded 10 seconds of audio and a bit of silence, listened, tweaked things and repeated.

To start I tested out a lot of the headphone mics I had on hand. I found that I got good clear audio with my Monster replacement cables for my over ear headphones. I also got great audio from my HTC ear buds that came with an old phone. My Samsung ear buds also sounded decent. Though I should point out that I tested a pair that was virtually unused and a beater pair I used a lot. The pair that had been coiled up again and again in my bag and had been abused sounded awful. The Monster mic was very sensitive and depending on where my head was turned picked up my breathing. If you want to get into recording super cheap, a pair of new earbud or a new cable will be the cheapest way into recording.

I found that minimizing contact noise- the sound that occurs when you move your head around and the cables rub against clothing- helped to improve sound quality. I used tiny binder clips to secure the cable and mic to my shirt. This worked wonderfully.

The next step up in audio is a decent lav or lapel mic. They range in price from a dirt cheap $12 up to hundreds of dollars. A $30 mic can perform really well. Make sure you get a dead cat muff or foam muff for it. I prefer the fuzzy dead cat muffs myself and use one on all my mics. I find that a foam muff seems to muffle my voice a bit and can still pick up wind.

The next step up is a dedicated podcasting mic. I can only speak to the mics that I own or have used and they range in price. I started out with a Zoom H1. This is a great mic if you want to record all the sound in a room, it’s omni directional, uses regular batteries but can be powered via USB and will record out and about on it’s own. It’s great for music and general audio but getting it set up to record a podcast is a PITA, in that it gets all the background noise, which means you pay for ease and portability with a lot of processing when you are done. Linked is the H1n, the new version of the old H1. If you search youtube there are a number of videos on splitting audio by using a lapel mic and headphone splitter. I’ve used a splitter with my H1 and it works great as a tiny recording studio.

The next step from this is something like the Samson Meteor, which is what my other podcast co-host used. (He now uses something much more expensive) Or something in the same range is the Blue Snowball or the Amazon ball mic.

The next step up from that is the Blue Yeti Nano or the Amazon Basics Yeti knockoff. I use the Amazon Basics Yeti knockoff and it’s really great for my needs. I also use an AmazonBasics knock off of a Rode mic made for cellphone video. It sounds clean and works with my video camera as well as my cellphone.

So after you decide how and with what you are going to record, how do you edit? We use Audacity for RSVP. It’s free and works great. I use this instructional Google Doc for editing and lean toward minimal processing for the podcasts. On my phone I record and edit with the paid version of AudioLab. It lets me record, edit and splice in my intro audio for Manuscripting Pod. I wouldn’t use AudioLab for hour long podcasts, but it does well enough for stuff up to 20 minutes long.

No matter what you decide to record with, if you plan to travel with the mic, get a case. Mics are sensitive and expensive. If you toss it into your bag along with your pens, pencils, and drop it or toss it around it’s going to break. My H1 has a hard case I adapted from a tool. My AmazonBasics Yeti knock off doesn’t have a case because it doesn’t travel. My mini mic has a soft sided neoprene case that I added more foam to make it even more cushioned. The lav mics are in another soft sided case- one that was originally for a small camera. take care of the equipment and it’ll last a along time.

Work from Home Resources, Lighting

As part 2 of this post series, I figured I’d link to a few of the things I use to record audio and video. Your mileage may vary and you can adapt a great deal of the things you have around you for better audio and video.

My favorite lighting tool is daylight bulbs, at least 60w equivalent LEDs, preferably 100w. They light a good amount of space with a nice clean and cool light that looks good with my skin tone and gives my art true to life coloring. You might want to look at soft white bulbs as well, because you could look different under daylight bulbs. I pick up a 4-pack every time I am at the hardware store. My local wally world does not carry day light bulbs. Weird.

I use cheap clamp on aluminum reflectors also called shop lights. They are under $7 at my local wally world, but you can get a better and larger reflector at the hardware store for about $12. The $7 version at wally world are designed for a 60w incandescent bulb, they can usually handle the heat output of 60 watt LED. Think of your budget. You will need 2 of these plus the bulbs listed above. to soften the light you can use a couple of binder clips to attach a piece of vellum paper or other frosted plastic to the reflectors. This should only be done with LED- incandescent or other styles of bulbs get too hot for this.

I also have a pair of smaller desk style clip on lamps. These have a small reflector and I use them to light up my desk with a more focused light. These are great for when I’m shooting art making.

If you don’t have the cash to buy lamps, pull lamps from around your house and remove shades to see what happens.

Set up the lights and shoot selfies with lights on and off. Move lights around, tip them and lift them. Take more selfies. Seriously, selfies are going to help you figure out if you look good, washed out, greasy, or red in the face on camera.

A tripod. This might be the most essential piece of kit. You can get a cheap tripod or an expensive one. I favor cheap tripods because I can get more than one for the price of half an expensive one. If you can’t afford one, look into borrowing one or getting a broken one and duct taping legs or whatever in place. You can clamp lights onto the tripod, you want the lights slightly ahead of the camera so the camera doesn’t cash shadows. Checkout some of the videos I posted here to figure out more about lighting.

Once you have the tripod set your camera up on it and take more selfies as you move the lights, yourself and the tripod around. Test every set up.

A cell phone mount for said tripod. There are hundreds if not thousands of options here. I’ve got a stick on mount that works well enough. You can pick up a number of mounts for cheap.

Extension cords and a surge protector. You will always want more electrical outlets and you want to protect your camera, phone and other equipment from surges. I like the squid surge protector and this cone style. Also, you are going to want a few USB charging plugs and more USB cords (or lightning) than you think you need.

A set of spring clamps will be incredibly useful for containing cords, cables, and making sure that those clamp lights don’t move around. I pick up a hand full of them everytime I go to Harbor Freight.

Consider your background when you shoot video. If there are lights and they make your face go dark, shut them off. Or swap out a lower wattage bulb, sometimes a slight light in the background can help define you from your background. Also some light keeps you from looking like you are in a cave. If there is a window, pull the shade or turn so that the window does not back light you. If your background is super busy consider taking up or hanging up a blanket, sheet or curtain to minimize background distractions. If your background is busy consider getting a garment rack and using it to hold up a blanket or sheet. I find these for free all the time. The linked version is the cheapest, but for a bit more money you can get one on locking wheels.

Clearly a lot of this stuff are things you need to purchase if you don’t already have them, but you’d be surprised at how much of this stuff you can pull together from various and assorted items you already have around the house. Especially the lamps, cords, and cables. A sheet or blanket makes a great backdrop.

So all of that addresses lighting yourself for video. Next up audio.

Work from Home Resources

One of the very difficult aspects of working from home is getting accustomed to using video conferencing tools or suddenly being thrust into making instructional videos for your students. It’s scary to do at first but with a little bit of help you can do it and do these things well. Lighting, audio, and video are all easy to do once you get past the initial learning curve. If you’ve been here awhile you know that for many years I made art instructional videos before i went back to school, and if you’re new you just learned something about me. So I’ve collected a few resources to help you shoot better video with better audio.

If you work for a larger organization- like a college, university or school, you may have access to cameras and mics. Ask your school’s technology office, IT Desk, or librarian where these are located.

Otherwise use some stuff you may have around- old cell phones make great web cams, and you can adapt cameras to work with your laptop with a few apps downloaded. This video from Tested has some great apps and programs linked. A big shocker is that the comments are unusually helpful with additional apps and resources. For the first time in my life I can say, “read the comments!”

While this next video suggests some pricey lighting options, it has a great section on lower end lav mics- those little lapel mics the folx on the news wear. As for lighting, you can pick up a few cheap reflectors from either of the evil massive companies (links to follow) with a few 60 watt LED daylight bulbs. Placing them around strategically will give you decent light for most of your needs.

You can also use an old cell phone combined with a lav mic to create a wireless solution for audio capturing. Plug the mic into the old phone and hit record. Syncing it with the video can be a pain, but it can be totally worth it for the improved audio.

If you follow me on twitter, you know I’m not a fan of Zoom, but many companies and schools use it. Do yourself a favor and look at how to lock down some of it’s more invasive qualities, then use this guide to get better sound. Yes, part of that is going to be getting a better mic. If you are creating any sort of content that you hope to use in the future, please invest in the $30 lav mic suggested above or the $12 below, or when available again, a podcasting mic. At the very least look at getting a new pair of earbuds or headphones that you aren’t going to bundle up and take everywhere. Don’t use your daily commuter beater headphones to record your audio content. I guarantee they will sound terrible.

Another dead simple and useful thing to create while you are doing online classes, is a teleprompter. There are many tutorials out there, but this one is kinda funny. You can use a piece of class or even plexi (yes it will work) and an app plus a smart phone or tablet. For android, you can look up the app Elegant Teleprompter.

This video looks at some of the settings on a camera that you can address to improve the quality of your video. It also suggests $12 lav mic that sounds great in his videos. The $100 price tag doesn’t account for the camera or lens. Combine some of his lighting and mic suggestions with the camera phone and your video and audio quality will jump.

I recently watched a Zoom training put out by an Ivy League school, the content was wonderful, but it was destroyed by poor production qualities. The presenter used old headphones and mic that didn’t pic up his voice well, his camera was terrible and the other presenters sat with their cameras pointed at windows or lamps. Not only could I barely hear the content, but the video was painful to look at. Additionally, the presenters had a great deal of difficulty using Zoom. I was glad that I had not paid for the presentation, because the production quality was that bad.

I suggest before starting video conferencing, walk around your space and take selfies, adjust lighting until you look good. Sit in the chair or in the location where you’ll be presenting and adjust the camera so that it is at least at eye level, or better yet slightly higher. I like 6 inches higher than my eye level. Remember, no one wants to look up your nose.

Look at your background, is it busy will it detract from your content? Consider moving things around, taking down art or photos. turn of the light behind you, draw the shade closed. Turn on a light in front of you to offset any background light. You do not want things so bright in your video that it hurts to look at your darkened face against a super bright background.

In terms of audio, test record. walk around with your phone, record audio and listen. How does it sound? Is there stuff in the background? echos? You can soften a lot of echoes and weird noises with the addition of curtains and hanging some soft things up. You can also place pillows behind and around the mic (if your using a larger podcasting mic that ins’t directional) to soften some echos. Turn off fans and AC units. Liberal use of mute will help qality when you aren’t talking.

Weirdo Patches

You may or may not know that I’m into fiber or fabric arts. I love quilts and fabric of all sorts. Back when I made books on a regular basis, I had the opportunity to buy loads of fabric. I went through tons of it. I still love it.

I started hand appliqueing fabric to an old chambray shirt that was in disrepair. It looks lovely. IT feels amazing. Overall I just really liked getting my hands on some fabric again.

About 9 months ago? It feels like a hundred years ago at this point, I picked up a free antique, 40s era Kenmore sewing machine in a delightful cabinet. The machine is a TANK. It has one stitch- straight. Though it does go backwards too. There are knobs and dials and it is so satisfying to use. Because it is in a lovely cabinet we put it into our office and I’ve been able to use it on the regular.

I sit down and make what I’m calling my “weirdo patches.” Which are simple little applique mini quilts. They fray and get fuzzy as they get washed but they are lovely to feel.

I’ve been known to track down patches of the perfect size to cover an old logo on an old hoodie. Now I’ve been measuring and creating these little applique quilts to cover up logos. Then I started to make them because being at my machine brings a sense of calm and peace. Plus I love clipping little pieces of fabric and arranging them. They are puzzles waiting to be discovered.

If you’d like to buy one head over to this page. They range from $5 to $10 S&H included.

Here are a few of them:

Reflection as I Prepare for 2020

This, 2019 has been a rough year. I changed jobs, a family member had cancer and went through chemo and radiation, another family member has been ill, and then we have the whole government thing here in the US. This has been a year of transition and change, and rough patches.

Transitioning from one job to the next is always rough, especially as I moved from one with a top-down leadership style to one that focuses on teamwork. After nearly 20 years of working in top-down styled workplaces, moving into a teamwork environment has been a more difficult transition than I expected. In the past I planned for the first 6 months of any job transition to mean that I would work much less on my outside pursuits of writing, blogging, reading, art, crafting, and garden. And wow, was all of that impacted and for longer than 6 months. Hell, I’m going on a year and I’m just settling in. Add to all that I screwed up my shoulder and had a carpal tunnel flare up and whoa a recipe for not wanting to sit in front of the computer.

When I transitioned I had quite a few blog posts partially written and images shot so this blog didn’t see much of an impact until June. At that point, the combination of all the things in my life hit the fan and I simply was not able to focus on the blog much at all. My plan for 2020 is to get back into writing more posts, focusing on a few art materials, getting back into my professional ink series, and my cheap pens from China.

Another thing I might focus on is the use of the materials. Some of you may (or not) know that I started another blog, FermentStuff.com a place to focus and document my fermentation and gardening efforts.  I use pens and pencils heavily in my documentation of my garden and ferments. Recipes must be documented and seed purchases recorded.

After I wrote the above I was informed that my Grandmother passed away. Despite her advanced age and frailty, it was unexpected. As with any death, it has put me into an introspective mood. 

If there is one thing that 2019 going into 2020 taught me it is that we’re all human and life is short. Despite all my best intentions of writing and exploring art and writing materials, sometimes, life just gets in the way and things, like blogging, must be set aside for the moment. For now, I’m looking closely at how I use my stationery in my other hobbies- podcasting, writing fiction, and gardening; and let’s not forget the DayJob. It is always surprising to see how the stationery I love gets used in the pursuit of all my other interests. Stationery is a support and a tool. And with that thinking, I’ll be exploring a bit of that in this blog. I’m not sure how those posts will look, but they’ll be there. Despite taking a bit of time off from this blog, I’ll be back, with hopefully more reviews, weird little writings, some art, and an assortment of other written things. 

If you aren’t already following my instagram, my facebook, and twitter you should. Though I’ll warn you Twitter is where I get salty and rant a bit and my Instagram is a lot of food and cooking pictures, and if you don’t like plants you won’t like my instagram. You can also follow my other blog, FermentStuff.com for more cooking, growing, and queered urban homesteading activities.