2 Videos of a recent painting. I plan on either listing the painting on eBay or Etsy. I haven’t decided yet. The image started out in my journal, a heart with a medical diagram heart inside. Red heart, blue heart, antique so it wasn’t so bright and cheery. I had a lot of fun making the painting as well as making the videos.
Inspiration Saturday
I found this via one of my subscribers (NotaMax) on YouTube. Love it love it love it. Scraps of everyday life gathered together and bound into a sweet little book. SHort but totally sweet.
Filled Hedgehog
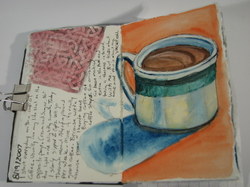
I just filled a hedgehog. It feels good to finally snap the elastic shut on it for the last time. No more blank pages no more thoughts to recourd. It took about 6 months to fill from start to finish. It had 140lb Stonehenge pages, quite a few too. It started out about ½ inch thick and now sits at an inch. I’ve abused it to the point of stress on the spine but the Irish linen thread has held up well as has the sewing style (smythe style). It still opens flats and takes abuse. The paper stayed flat too. No cockling or other unpleasantness.
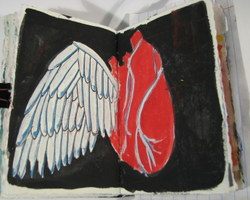
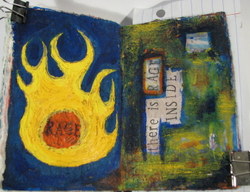
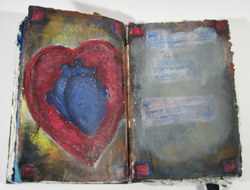
This last week or so I’ve been really focused on making art. Art for me art for the sake of art. The hedgehog is the perfect medium for that expression. Personal, small private (except, well, I plan on putting up a vid and all the pics are up on Flickr…) and portable. Good stuff all around.
Most of the images use watercolor, gouache, or acrylic with some sort of paper bits glued in. The last few pages are all acrylic in heavy impasto. I’m not sure why but the angry dark subject matter needed impasto effects.
Enough chit chat art pR0n:
JOurnal Video-Willowing
YouTube user Willowing posted this video of her journal to YouTube:
“So It Goes”
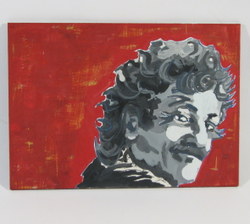
I’ve been a big fan of Kurt Vonnegut for years, since I first read Breakfast of Champions when I was a freshman. I was very sad when I heard that he had died this past year. I commemorated him with a portrait. I’ve listed it on etsy. Here are a few pictures, but you can see it on etsy here.

Wrap and Roll Pencil or Art Supply Case
My mom kicks butt. She’s who I get a lot of my crafting ability from. Growing up she was always crocheting, knitting, cross stitching, or quilting. When she and my Dad came to visit this past holiday season, I suggested she use her crafting abilities to create a colored pencil wrap with 12 pockets for pencils and a pocket for up to a 5×7 inch notebook. She picked some awesome fabrics and made the pockets extra roomy. Here are some pictures:
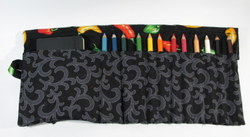
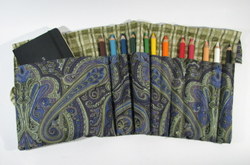
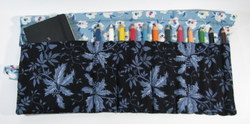
Heres a little video of one:
Part 2 Calder Circus
More Calder inspiration:
Ellen Van Engelen
This is the most interesting artist website I’ve looked at. The set up is great, the drawing are fantastic. Excellant all around. Take a look at her sketchbook pages here. She uses ink in a moleskine notebook.

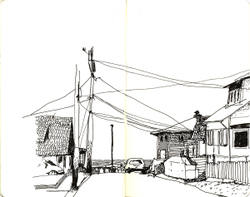
All art is property of the artist.
Maine Vacation Journal August 2001
This video took several takes, until I realized that I had saved the ortiginal raw video on my exteranl harddrive, neverm ind I shot it 3 times. Ah the follies of learning new equipment. I should really read the manual, I did go over it I just didn’t read it indepth, then I did and a lot made more sense. So by take 2 I had a decent video. You’ll notice an increased quality in this video, it’s clear, much more sharp and if you were to view these at about quarter screen you might be able to really read the words. Yay! Original here:
old video here
18% Gray Card
One of the things I wish I had taken in college was a basic
photography course. My understanding is that the basics of photography
translate well to digital. My only purpose with a camera is to take nice shots
of my work. I’ve learned a lot about shooting pictures from various friends,
one of whom is a photographer. 3 years ago Eric taught me how to set up my
camera in “custom” mode, evaluate my white balance and to use mostly manual
settings and to use my timer settings. I’d been using a tripod for years and
had been getting decent shots but Eric’s help really took my product shots to
the next level.
Then I changed cameras and it all came crashing down. I
stepped up; my new Canon had about 12 different settings. I did everything that
Eric taught me with my old camera to the new but forgot about evaluating my
white balance. Not a huge deal. My photos were never the right color, except
for when we were in our old place- that place, you couldn’t get a bad shot, the
light was so perfect. (Seriously the studio had north facing windows, 2 of them
and was filled until sundown with gloriously bright light.) So moving into our
new place pretty much put out the death bell on my photos. I was editing,
highlighting, fill lighting etc. Each photo that had once taken me 2 seconds to
shoot and 2 seconds to crop now took 3 or 4 steps to get ready for the
internet.
Until I did some reading, I rediscovered the “evaluate white
balance” setting on my camera and everything popped into place. I found some
info online about an 18% gray Card. This is essentially a flat gray piece of
card or cloth that is 18% red, 18% green and 18% blue. What you do is set this
in front of where your subject will be, use the evaluate white balance setting
while focus in on only the card and like magic the camera sees the colors
pretty much right. It’s seriously amazing the difference this makes, in both
video and still shots. I bought a 8×10 card from a local photography store, but
these things are all over eBay and the internet. Mine cost $3.50. I cut an end
off and have one in my video camera and regular camera bag, the large piece
sits next to my photo set up. There are some videos on YouTube showing how to
use one. I’ll track one down and post a link. I also found numerous websites
discussing the gray card and it’s virtues as well as a few debunking it.*
Before getting the 18% card using the manual setting on my
camera for evaluate white balance also produced pretty good results. I used a
white index card, focused in on it and then used the EWB setting on the video
camera and colors popped and looked more true. I also tried it out with my
camera and same deal. The 18% gray card though, the results were startling and
pretty amazing.
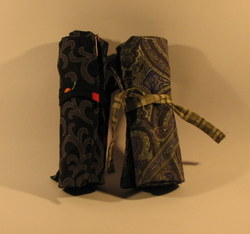
This photo was taken with my camera AWB or auto white balance. This is the Devil.
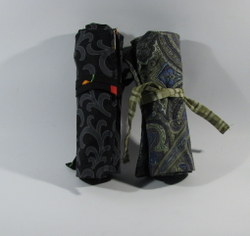
This photo was taken after focusing in on the white card and using the Manual White Balance setting. Markedly better. You can see in the fore ground how it’s a touch dark, but it’s nothing that that fill light in Picasa can’t fix.
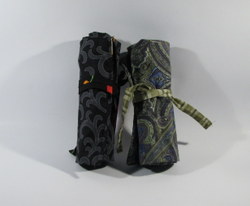
This is after using the set white balance setting while focusing in on the 18% gray card. Remarkably better and even significantly so over the white card. Still the white in the fore ground is a touch dark but the colors are all true.
I checked out the histograms of all the images in picasa and the difference on the graph is what you see in the pictures. Picture one is a mess, picture 2 is a ton better and picture 3 is very good indeed. I guess that the next step for me is to get another light and clip it to my tripod as well as a few filters for the lamps so that the light is slightly defused rather than direct.
*I’m not going to go into much about the debunking it
theories, most of the articles that I found with a negative view of the 18%
card dealt with specific brands of camera and what specific amounts of RGB
their sensors could read. In my application a different between 18% and 14%
isn’t going to make a huge difference. Not to mention that most of the articles
dealt with Nikon cameras and since I shoot with a Cannon and a JVC it doesn’t
matter too much. I suggest that you google 18% gray card and see the hits you
get and read a few of the articles.