Today was an interesting day for me. Some of my extended in-law family came to visit and they all have this really great philosophy on life that is hard to explain but it's empowering to listen to them explain. Its something of a Jungian collective consciousness, quasi-religious, new age spiritual kind of thing. One of the core tenets of their belief is that life is what you make it and that with hard work and positive belief in yourself anything is possible. They also believe in the power of prayer and meditation and clearing the mind of all thought and allowing your heart to guide you in some of your most difficult decisions. They refer to somethings that I don't believe in but other things that they talk about I find myself shaking my head yes.
Then I went to SuziBlu's blog and read this entry. It's sort of like the world is telling me that anything is possible and that if there is something that I want I need to stop making excuses and go ahead and dot it.
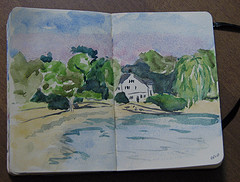
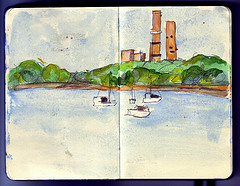
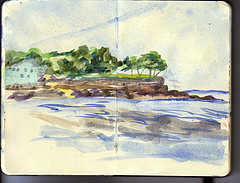
So after leaving the beach with the inlaws I insisted on going back to the beach to do a sketch. It reminded me of why I go into making books in the first place and that is to create great sketchbooks. The fact is my first book was made because I needed a sketchbook with good paper and I couldn't' find that commercially, so I learned to do it myself. It happened to be something I was good at and came to easily. So I started to do it regularly. It makes me think of the things I'd also like to do more of. Sitting at the beach making the sketch, I realized my handling of the water and tress was getting better and better and that my regular painting of these beach scenes has made my handling of them that much better. It made me realize that I want to do that more.
So I'm going to do it. I"m going to go to the beach more often and paint more often. Maybe I'll even do a few larger watercolors. Who knows what can happen if I set my mind to it.
I think that in addition to making the books that I have been making I want to get back to making the sketchbooks- great books for artists to use and write in. I need to think of my designs and decide what I'm going to make.
Some times I read and think about things and talk to people and it sparks my mind in new and interesting ways.