Tag Archives: art

Thinking: 100 Days Projects

There are a lot, and I do mean a lot of projects that people sign up to do online, from 30 Days of something to NaNoWriMo to 100 Days Projects. I have trouble completing any month-long projects that I sign up for let alone 100 Days projects. Yet here I am at 33 days into a 100 days project. I’ll surely have more pointers at the end of the project but let me share what I’ve learned so far.

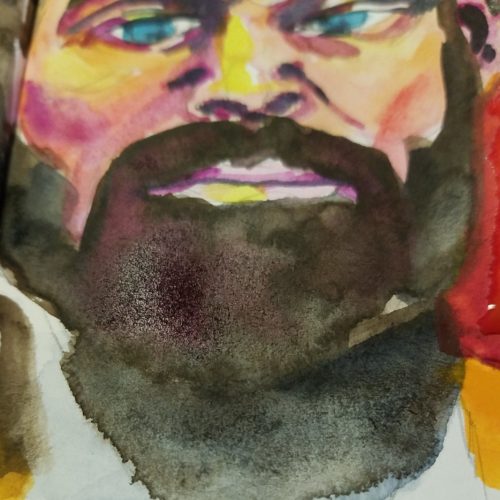
Break the rules– The rules of 100 Day project state that you work on something every day for 100 days. I can’t do that and know I can’t. It’s not possible for me to work my DayJob and then come home and do something every night. I work late on Wednesdays and I know that I cannot work on my project on that day. So I double up on a day when I work late.

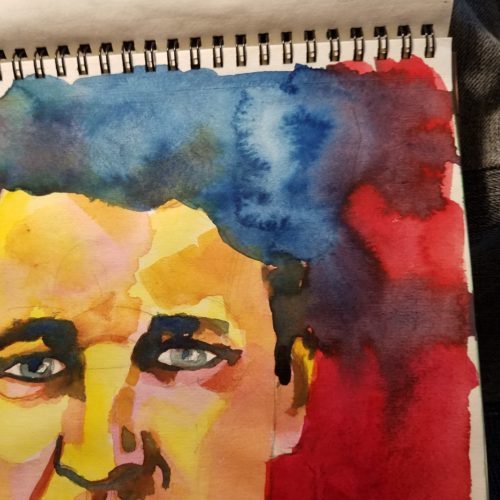
Don’t beat myself up. Because I know that I’m not going to be able to work on the 100 Days stuff on Wednesday night, I also allow myself to not work on 100 Days stuff when I’m stressed out or very tired. Because I’ve built in some flexibility I don’t beat myself up for taking off a needed night.

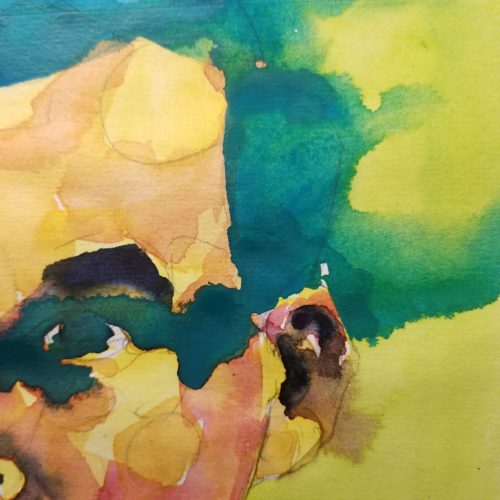
Accountability– Despite building flexibility in, I need to hold myself accountable for catching up on days when I can. This means that often times I’m doing double duty on Saturday and Sunday. I do 2 items on those days. Or try to. Go back to not beating myself up.

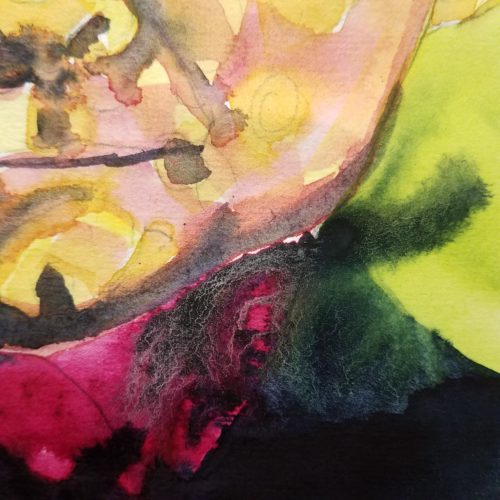
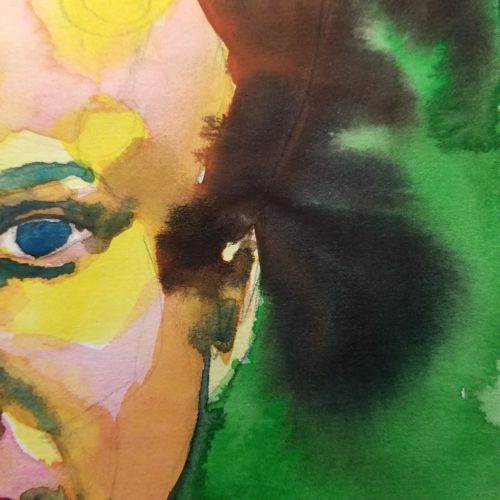
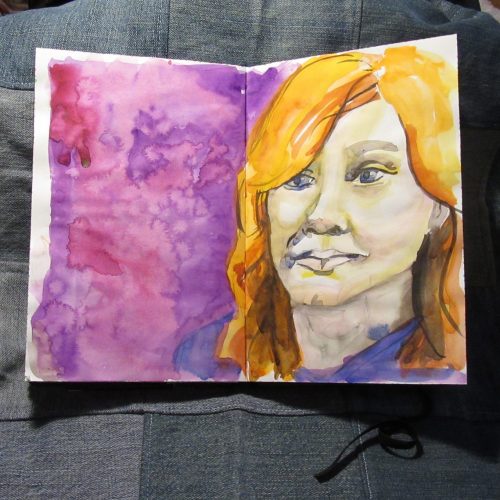
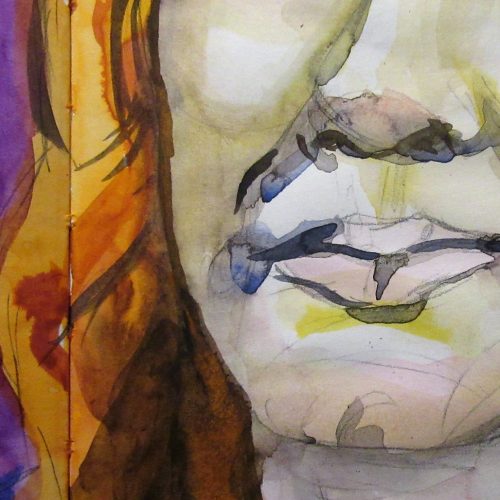
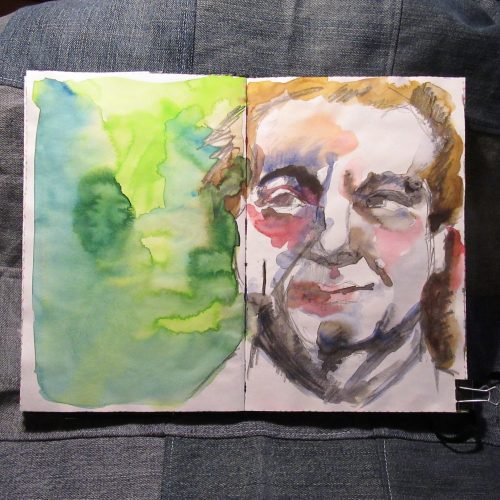
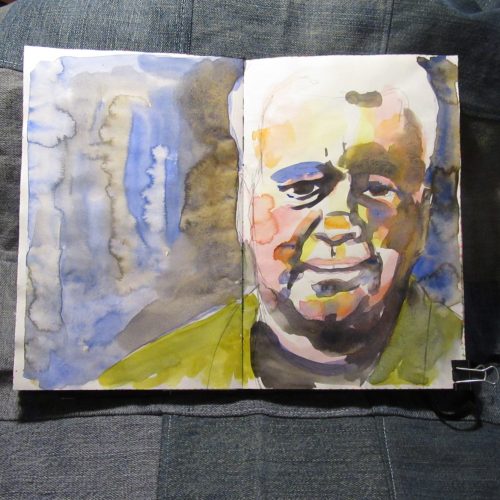
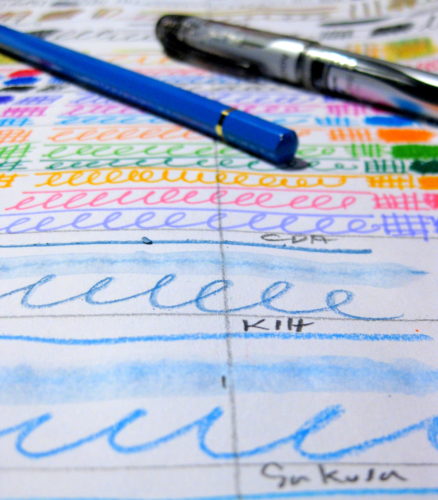
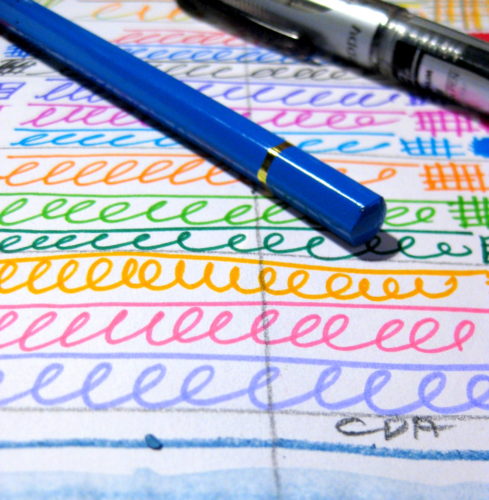
Thus far I’m very much enjoying the 100 Days Project. I’m learning a lot about watercolors- how the various colors respond in use and with one another on a variety of papers. I’m learning which of the colors granulates, how they merge with one another on the page as well as when mixed in a pan. Anyway, the 100 Days projects are a great way to learn about a material in depth, and it’s worth the effort. Just remember to be flexible and not to beat yourself up when you need to skip days, then catch up when you have time.

Review: Canson Art Book Universal

Back in 2012 I offered a semi-review or a first look at the Canson Art Book One as a budget friendly offering for art journalers. The Canson Art Book Universal (CABU) is in the same series of sketchbooks but with a few differences. I won’t focus on the differences but what makes the CABU so great. I have the A5 or 5.5×8.5 inch size. The basic rundown of the CABU is that it has 224 pages of 96gsm (65lb) white paper. It is acid free, has no brighteners, and states it won’t yellow with age. The paper is smooth to the touch but has a nice tooth for pencils. The sketchbook has a classic pebbled faux leather grain coating over sturdy heavy boards. The corners of the cover are rounded but the book block is squared. The binding is a traditional Smythe stitch with heavyweight neutral grey end sheets. The back of the book has a nice roomy pocket and sports an elastic that was loose when I opened the package and has only gotten worse as the book has gotten older. I finally ripped the elastic off. Useless.Let’s talk about this paper, it’s lovely. The tooth is just right for sketching with pencils. The graphite glides over the surface. Though it is toothy it doesn’t grind the points down to a stump in moments rather, just the right amount is deposited no the paper and the points last well. Pencil feels amazing on this paper. It looks awesome too. The graphite seems to pop off the page, but shades well.

Fountain pens also fair well. Though there is a nice tooth to the page, it is very smooth when using a fountain pen. All mine felt great on the surface. My EF Eco was a tad bit scratchy but that pen is always a tad bit scratchy. All the inks that should exhibit sheen or glitter did, and whoa did they! Not one bled through either. Brush pens fair in much the same way- the ink looks great, the ink doesn’t bleed through.

One of my favorite ways of using the CABU is for mixed media and watercolors. The paper is great for collage  and though it cockles a bit it is great for watercolor washes. IN fact I really have slopped some watercolor in this book and it never soaks through. The colors sits on top of the paper similar to the way they react on hot press. Lifting colors, so long as you aren’t using a color that stains, actually works. Softening hard edges works nicely. This has become my go to for portraiture practice. The paper is really just lovely.As it is a sketchbook it is only available in blanks pages. If you want to use this for writing, you can download one of Ana’s writing guides, over here.

In short if you are looking for a sketchbook that pretty much does it all reasonably well, the CABU will fit that bill. True it isn’t available in lined or dot grid, but the paper is so good you won’t really care once you get a writing guide. Continue reading

Lightfast Testing

Every now and again I go through my various art supplies and test them to see if they are lightfast. Here in the US, it is now unusual to find ink or stationery supplies that are highly acidic, but lightfast? Well that is a whole other ballgame. I conduct tests of the majority of my fountain pen inks, colored pencils, watercolors, and other art tools. Why? Just because it’s archival doesn’t mean it’s lightfast. Whaaaat? It’s true archival has nothing to do with lightfastness or lack of it. Archival is a museum term that used to mean that the item in question is reversible to museum archivists and that it does less to no damage to the substrate. Typically, this has nothing to do with the item in question being lightfast. Though, archival is bandied about with marketing as if it means lightfast as well as acid free.lightfast

I’ve ranted and raved about acid free and to a point, archival, now being little more than a ridiculous marketing term, when the more important item to focus on is lightfastness.

What does lightfast mean? That when exposed to sunlight the color and shade of the item in question, be it paper, ink, or other pigmented item, doesn’t shift or change. That is to say, exposure to sunlight, or light, does not change the color of whatever has been used to make the artwork.

Does lightfastness mater? Only if you decide to make art for sale, or for yourself, that you plan to hang on the wall. If you don’t plan on making art for anyone but you and you intend for it to stay within the confines of your art journal, then no, lightfast matters little.

How does one test for lightfast? I have a sketchbook in which I divide a page into 2 columns with a number of rows that span both columns. The number of rows depends on what I’m testing. Generally, I make each row about 1 inch high. I use graphite pencil, as graphite is lightfast.lightfast

I label the top of the page with the date. I then fill in each row, across columns with various scribbles, hatches and line weights of the item I’m testing. With watercolors and markers I use a variety of amounts of pigment in water. After I’ve filled in a page, I cut off the right half of the page and hang it in a south facing window. I’ll notice shifts in color as quickly as in a week. The Kuretake Clean color brush markers? Oh so pretty, colors shifted in a week. Copic sketch markers? Same. Sharpies? Gone in 2, massive alterations in shade in a week.

Basically, I look at the sheet in a week, then again in 2 weeks. Sometimes it will take longer to notice changes if it has been cloudy or raining. Testing can also be done with a bulb that emits a full spectrum of light. Using sunlight is cheaper.

Why do I test? Not all of my art is made for sale, a great deal of what I create will never see the wall or sunlight other than when the pages of my journal are opened. But when I do create art that is for sale, it is important (to me) that if someone has paid me for my art that it is still there for them a year from now. I’ve sold work in the past only to find out that the pen I thought was lightfast, was indeed not.lightfast

Oh before anyone asks, pencils made of graphite or carbon are lightfast. There is rarely any need to test them.

Opinion: Adult Coloring Books and Art Therapy

By now I suppose everyone has read about the “adult coloring revolution!!!”, from one of those click-bait shares on the book of face. Some of these articles suggest that the use of these coloring books is as effective as art therapy or IS art therapy. To make either of these two suggestions is incorrect and innocently ignorant of what art therapy is and isn’t.

I will start this out by stating that coloring is an effective tool in reducing agitation, easing anxiety, and helping someone to contain their emotions in the short term. It is often a tool used in hospitals and by art therapists to assist clients in the short term. It is not a long term solution and can be something someone uses to simply shut off their feelings, which as I previous wrote, can be useful when containing emotions. But art therapy (and regular old talk therapy)  teaches us how to understand our emotions and how to cope with them. Rather than just shut off the emotions, we use skills and tools to understand. That’s therapy- the teaching of skills, tools, and understanding. While coloring is but one tool to assist in containing emotions.

I have personally witnessed  and worked with a client who used coloring to contain agitation and anxiety. The client had early stage dementia and would often be confused as to time(as in what year/date/month) in the morning. This would cause a great deal of anxiety and the client be quite agitated and angry. Using crayons and a selection of coloring sheets gave a moment to calmly color. It decreased anxiety, focused attention, distracted from confusion, and in a short period of time the client was calmer, and in a significantly better mood. The coloring allowed the client to focus attention away from anxiety of being aware of disorientation. This didn’t help to orientate to time or place but allowed the client to be calmly distracted and contain emotions. The elevation in mood didn’t last either. The client would be calmer for about an hour. The coloring was a tool to assist in the moment of agitation.

The main difference in the coloring and art therapy was that the coloring allowed the client to become calmed while art therapy allowed for exploring anxiety, understanding it, and normalizing emotions. Through coloring she became comfortable with color, making color choices, and knowing that art felt better.

In my mind coloring books are a tool to helping people to explore art as therapy, but art therapy is a powerful tool for healing. There is potential for coloring books to be a gateway for art therapy. Perhaps if someone begins to color as a way to relax, they will look up a registered art therapist in their area. I certainly won’t slam coloring books as ineffective, but instead look at them as a tool that has been a staple in the art therapist’s toolbox for ages. Instead of hissing and booing at the new boom in popularity, art therapists should capitalize on this popularity, and attempt to garner more positive attention on ourselves. I encourage people to look up some of these adult coloring books but to also understand that they are a tool, but to further understand themselves they should seek out an art therapist. If one is not near them, seek out a therapist who is open to you using art in your sessions.

So go ahead, color away, but be aware that there are art therapists out there who can help. (Links go to amazon affiliate links of coloring books I think look interesting.) Continue reading

Review: Sargent Watercolor Crayons

I'm a huge fan of watercolor crayons I've tried a number of brands but keep coming back to Caran D'Ache. Why? They are creamy, loaded with pigment, and move with water excellently. They are however pretty pricey at just over $1 a crayon that can add up. When I saw the Sargent Watercolor Crayons I wanted a pack immediately. I couldn't decide between the 8 or the 12 pack. Eventually I went with the 8 pack. They were reasonably priced at $6.67* at Artist & Craftsman.
IMAG1211
IMAG1211They are in a cardboard matchbox sliding box. No fancy tin here. You'll haveto excuse the paint that I got on the box, I had to use them to review them, and that included doing some of my usual watercolor crayon techniques.

The crayons themselves at first are a little stiff, I think the outer layer of crayon has dried out a tad. Once I used them for a few minutes and wore off the outer layer these crayons perform really well. I was really really surprised at how well they performed for inexpensive watercolor crayons. After the initial dried layer the crayons goes onto the page smoothly and looks like any crayon. The color is nice and deep so long as you put enough crayon on the page. The darkness of color can be controlled by how much crayon you lay down on the page. Color lightly- get light color; color heavily and get dark color.
IMAG1214These really surprised me in how well they lifted and moved around with water and a brush. They really needed very little water and brushing to move around well and blend with one another. Really really impressed with their ability to move once wet. Unlike the Staedtler watercolor crayons these moved while wet like Caran D'Ache.
IMAG1210I'm very impressed with this realtive newcomer to the watercolor crayon market. They perform really well for any art journaling need and are signifcantly less expensive than  the Caran D'Ache. Are these archival and lightfast? Probably not. I've not yet tested them. But like any student watercolor it's not likely. They do match the Sargent Watercolor magic liquid watercolors. So color-wise they match, allowing easy mixing across materials.

While I didn't purchase the 12-pack with a "free" brush I did look at the brush, flopping around loose in the cardboard box… It didn't look like it was a very high quality brush, but it would be useful for washes. It certainly looked like whatever point may have been on the brush was long gone. I don't know why manufacturers that include a "free" brush in a box of something haven't learned to put a small dab of rubbery glue to hold the brush in place to prevent damage. Common sense might cost the manufacturer some money.

A new addition to my review will be looking at the material's potential for use in my future art therapy practice, I'll keep it at the bottom of my reviews so people who aren't interested can ignore it, and those who are can find it easily. These watercolor crayons could be used with children or adults with success. They work as well as the "big" brand but at a much lower cost. Meaning, they can be purchased in a plentiful quantity that the client will never feel they are running out of materials and lending a sense of freedom to their use. If giving a client a new box is important, that can be done because the cost of these crayons is low. The crayons are non-toxic. There is, of course, the typical concern that one might have when giving "children's" supplies to adults.

Continue reading

Review: Sharpie Brush Markers

I purchased a few Sharpie brush tip markers to play around with after trying the prismacolor brush markers a few weeks back at the Sketchbook Project. For $1.50 each they were a great way to get my Jetpens order over the $25 mark for free shipping. YAY!

Out of the envelope they look a lot like any other Sharpie, a little chunkier and with some grooves on the cap. The end is hollowed out and there is a ring around the end of the marker. This lets the cap click onto the marker when you post it. Smart. Without posting the marker I found it a tad short to use. Posted it was just right. The markers are light weight.
P8104693
The marker tip is short, relatively stiff, yet pretty responsive at the tip. It’s not as springy as a Prismacolor or Copic brush tip but it does the job. I did a few quick sketches with the markers in my Stillman and Birn Beta sketchbook. The paper is a slight cold press finish. The Copic and Prismacolor handle this paper without complaint, the Sharpie is already looking fuzzy. I will admit to being less gentle with my brush tip markers, but in my opinion that’s exactly what these cry out for. Instead of drawing with brush tip markers I try to paint with them.
P8104698
P8104698
So that brings me to my next round of inspection, layering. Copic and Prismacolor markers are designed to layer over one another to build up color, so it’s much like working with watercolors. Sharpies tend to stand on their own. Each layer of color turns the tone darker and darker, without subtle shading. Sharpie brush markers are best for bold expressive shouts of color. Finding a Sharpie brush marker in yellow proved to be an impossible task, unless one buys the set of 12. *sigh* So I bought a Copic sketch in yellow.
P8104694
These will write on just about anything, just  like a regular Sharpie. They do seem a tad juicier than regular Sharpies, so might be a good choice for acrylic paint. Just be aware that if you write over gesso with these you’re pretty much going to scrub that brush tip. I found these really fun for fast observations and sketches. The 2 sketches I’ve shown here took all of 10 minutes each. These brush tips really allowed me to lay down a lot of color fast. You’ll notice there isn’t a lot of subtlety though. Sharpies lay down bright bold lines and lots of ink.
P8104695
P8104695
These are a great choice for someone who doesn’t want to invest in Copics or Prismacolors but wants that brush tip marker experience, they just need to be away it’s not going to be quite as good. Keep in mind they are probably not lightfast and are certainly not archival. Get them online at Jetpens.

Another Midori Traveller Notebook Knock Off Idea

I wanted to add 2 more journals to my MTNKO. I saw a blog post somewhere, I cna't remember the blog that added a additional pockets to the notebook through the use of a rubber band. I decided to use that idea to add 2 more notebooks. I wanted to have my general idea notebook, a notebook for PioP and another sketchbook. To do this hack you'll need the following:

A medium length thin rubber band or a loop of the elastic you used to make you MTNKO

2 Notebooks

Slide the rubber band through the center of one notebook then the other,so they are attached spine to spine. Slide one notebook under the notebook already in your MTNKO.

Here's a helpful video of the process.


State of the Weekend: An Everything Journal

I was given another glimpse into just how powerful art journaling can be last night. I had an idea for Put it on Paper, something that I had rolled around in my brain once before and pushed off as not possible and not a very good idea at the time, but I’d made note of it in my art journals, made some doodles and wrote it down.

I quickly flipped through the last 2 journals where I knew the info to be, tabbed those pages with a little Post it flag, and then used my iPoo Touch to snap some pics, shelved the books and took the info with me, in my pocket. I sketched out a quick idea in my art journal of what I thought this idea could look like and emailed it to Jane. As I relaxed into bed, I reviewed the pages on my iPoo and made some fresh notes and doodles about the content of the proposal.

How amazing is it that I can carry 4 journal’s worth of info in my pocket? I read somewhere that someone scanned their notebook pages into their computer and used a specific program to make them searchable. How cool is that?

If you have an art only journal consider carrying an everything art journal with you everywhere, it will prove itself to be indispensible in short order. (Check out a variety of pockete sized notebooks for this, or make your own pockeet noteboook using my tutorial here.)

Make Your Own Pocket Sized Notebook

Making your own pocket sized notebooks is ridiculously easy. Once your materials are gathered it really takes about 15 minutes to sew up 3 or 4 of these. If you've been buying Field Notes or Moleskine Cahiers you will save $9.99.

Here are the materials you'll need:

Awl/push pin
blunt needle with a large eye
thread- you can use Linen or Embrodery floss, or any thin sturdy thread made of a natural material
bee's wax, a block or candle
ruler
paper that you'd like inside cut to the size you'll need
cardstock for the cover


To figure out how wide to  cut the width of your pages and cover use this simple formula final (folded) width multiplied by 2 plus 1/4 inch So if I want my page to be 3.5 inches the formula works out as follows: 3.5×2+.25=7.25inches. You trim off the last .25 inch when the notebook is finished.