Category Archives: Review

State of the Art: Necessary Tools

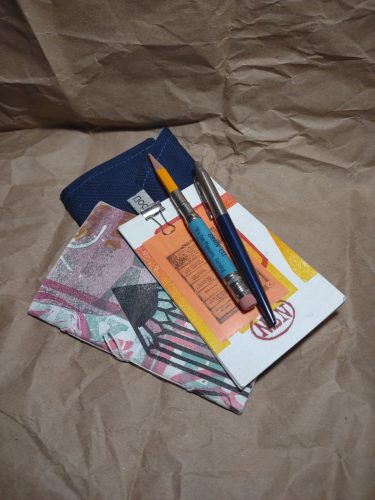
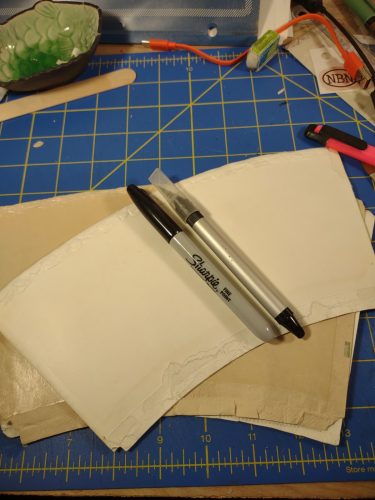
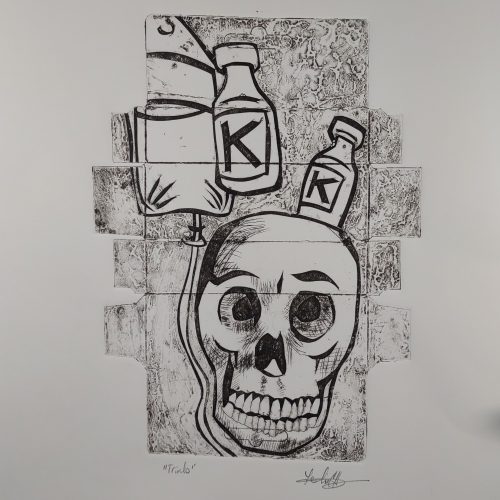
I wrote about the idea of paring down my necessary tools for holiday travel on my Ko-fi page. I took with me a sketchbook (always), a selection of recycled trash printmaking plates, a pencil, a sharpie, an etching needle and a craft knife. With this selection of tools I created a few plates to work on when I got back to my studio, and I started to carve them while I was away.

I have written before about how I find limiting the choices of my tools liberating and invigorating.* What I took with me was the barest of supplies, and frankly I could have limited myself further- just the recycled plates and a sharpie, and left the carving and etching for home. The limited choice felt liberating. I wasn’t focusing on capturing the fine details of each image, instead I marked the areas of the plate- add glue here, scratch with sandpaper here, try glue resist here. I focused only on capturing the idea of the image, not the details, knowing I could add details later.

It was invigorating and sparked my creativity in a whole new way.

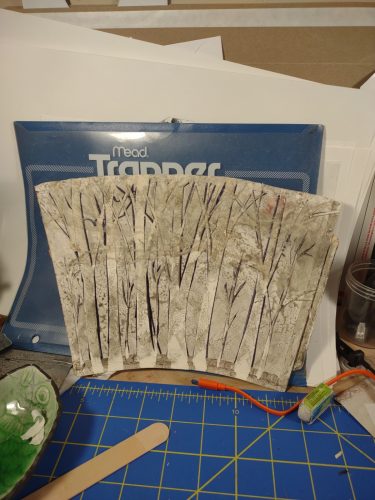
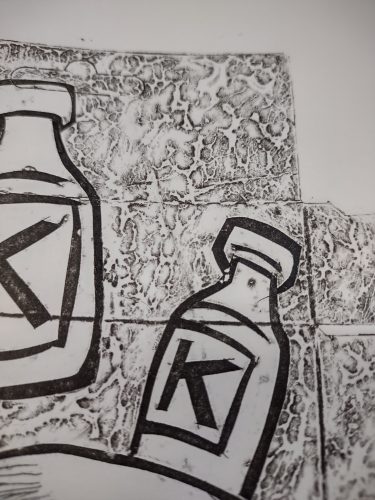
When I arrived home I continued to etch and carve the plates, adding in glue, and glue resist, and also some tissue. I scratched and sanded other areas. In the end i ended up working on 4 plates on and off in the evening and gathering more mental info for more plates.

I have to wonder about limiting choices for increased creativity, whether one is traveling or not. I am often inclined toward gathering new materials and tools rather than limiting. 99% of the time I’d rather add a tool than eliminate a tool. But, limiting my choices for tools led me to thinking about the tools I would use. When I throw my entire toolbox at a project or a plate sometimes it looks muddy and less the image I imagined. I like to think of these images as motivated by the tools and not my creativity.

Trash printmaking is already a limited technique- one must remove the plate from the trash for it to be a trash printmaking plate. The plate itself is limited when compared to say a sheet of copper or even collagraph plates like museum board. Sure you can glue it to another sheet of card, or add more layers to it with glue or acrylic paint, but there is always an unknown quantity to the trash plate.

I think if you reach a block or hiccup in your creativity that limiting your supplies to the bare basics for a few days might unlock something. Alternatively, add a new supply or technique to your tool box to see if it unlocks your brain. Continue reading

State of the Art: Discoveries in Viscosity and Resistance

The last few weeks have been packed full of the good stuff, including some trash printmaking discoveries concerning viscosity and resistance in different packaging.

Let’s start with the viscosity and resistance discovery. I started working on a small series of images using coffee bags and packaging. The packaging had ideas of mental health and substances used to treat mental health conditions which also have a history as recreational and medical tools. This stuff fascinates me.

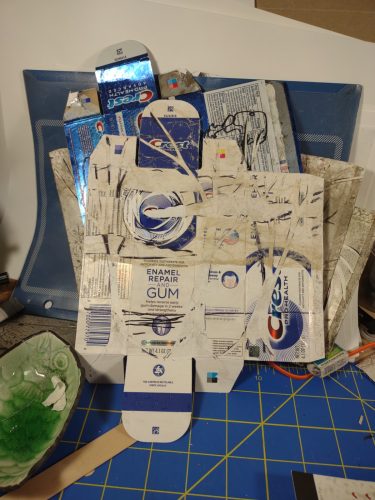
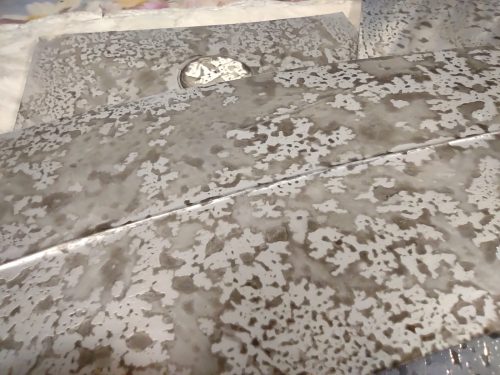
IN these images I wanted to create additional plate tone in the form of brush strokes. I intended to capture these with waterproof outdoor Gorilla glue. What happened was a surprise. The packages from both Neosporin and Band-Aids resisted the Gorilla glue and prevented it from sticking everywhere- in stead it started to bead up. It held better in areas where I brushed more thoroughly.  Once I discovered this effect, I went to great pains to only lay a single brush stroke over areas and let the package and glue do it’s own thing. The effect is magical. It has the look of water beading up on a windshield or water on the beach as it recedes. It’s random and magnificent.*

Testing with other materials has lead to similar results. Coffee bags and foil all respond similarly, though the glue has difficulty with full adhesion with the plastic and will pull away in big sheets of rubbery dried glue if cut into. It does not survive dry point efforts once dried. I’ve got several plates that I hope to print soon to test the effect on these other materials.

Sadly one of my favorite plate types does not produce the effect at all- coffee cups. Though I have not tried all of the coffee cups in my pile.

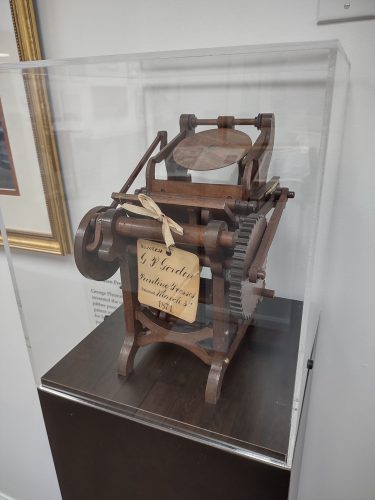
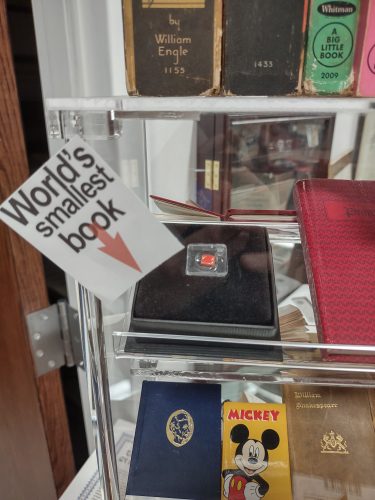
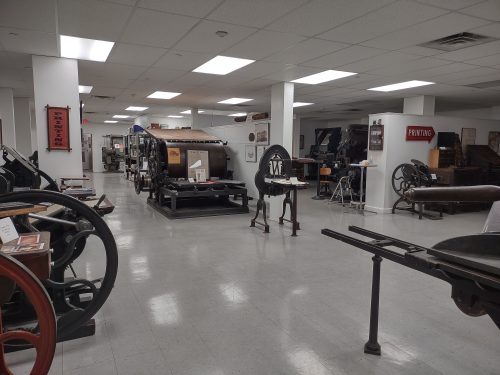
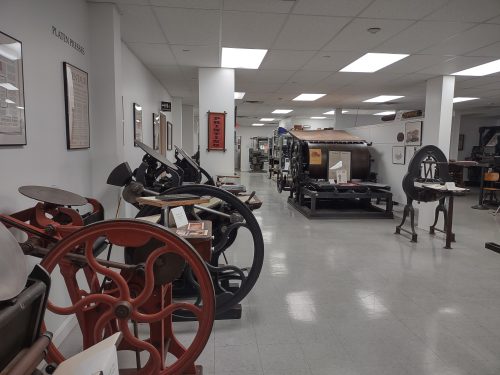
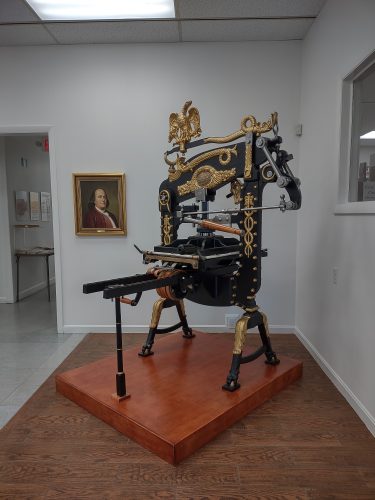
Other interesting business- I was finally able to take a trip to the Museum of Printing in Haverhill, MA. I was able to do this for work and have a spectacular tour. The MoP is spectacular with many specimens of presses and all sorts of lovely machines. I had a great time touring the place.

Continue reading

Reflection: Organizing Chaos

Organizing chaos might be my new band name. I’ve spent a great deal of time over the last 2 weeks in a print shops that was “put to sleep” at the very start of the pandemic. You really can’t do letterpress via zoom.

Then over the pandemic the space was unused, and like all basement rooms, things filtered in “for now” but ended up staying forever. There there are supplies that I just don’t know what they are exactly. I’m sure if I searched I’d find an answer, but some stuff is unlabeled. If there is one thing I’ve learned, I will label everything I open. I’m thinking about purchasing a massive box of zipper bags just for that purpose, or hell paper bags. I have no idea what the soft rubber sheets* with glue on one side are, but they are cool, and we’ll try to print it!

I found excess project pieces in odd sizes and an entire package of untouched Baltic birch from Mclean’s. If you know, you KNOW that made me SO happy. I also found an assortment of monoprint plates and plastic drypoint plates. Plus loads of inks for monoprinting.

I keep writing “I found,” as if I discovered these supplies on a wild adventure, and in a way I suppose it has been. In part it is a discovery of all the history of all the folx who have run this print shop. While I’m not officially running the shop I am turning it into a space of therapy. Continue reading

State of the Art: Gel Window Clings

You might be wondering why I have a post about gel window clings. Well if you’ve read my blog or visited my instagram, you know I’m interested in printing with trash and weird stuff. I had a moment of genius where I realized that gel window clings are made of similar if not the same stuff as gelli plates.package of gel window clings

You know the things I’m talking about- those dollar store holiday themed window decorations that pop up in offices and classrooms every holiday season. Those gummy decorations that for halloween are shaped like skulls, stars, cats, jack-o-lanterns and other Halloween themed icons. I believe I’ve also seen them for other holidays in offices and other places. It took some searching- they were no longer carried by my local dollar stores or even the pop up Spirit of Halloween near me. Instead I found a set in CVS. Mine cost $4. They have gone up in price. They are also available on Amazon.

Once you have your gel window clings you’ll notice a few things- they are MUCH thinner than even mini and small gelli plates and they are MUCH softer and squishier. This is fine, you’ll need a gentle touch when printing.

I attached mine to an acrylic stamping block, but they can easily adhere to any smooth non-porous surface like plexiglass.gel cling on an acrylic block

Once attached I rolled them up like any gelli plate- dab a bit of paint on, then roll the paint out. I also rolled into onto a slab then rolled it onto the gel cling. Both worked equally as well. star shaped clings on a block

A thin even coat is key to getting a good print. I found that placing the block and gel cling then flipping the paper over and using my hand worked best. After I determined they would print well. I cut my sticker paper to sized and dropped the paper onto the plate, in the usual gelli printing manner. printed stars

I printed white skully images onto sticker paper to make skully stickers. I also did some black cats and loads of stars.

Overall this process was a lot of fun, and really interesting. The prints came out great and makes me wonder about other themed gel clings- I founds summer, ocean, letter, dinosaur, fall, thanksgiving, and christmas sets. The letters pose an interesting option for hiding additional meaning in a print or for creating a printing poetry.

Continue reading

State of the Art: More Gelatin Printmaking

Fall is upon us, the days are shorter and mornings crisp, which means it’s time for pumpkin spice and more gelatin or gelli printmaking! For ease of writing I’m going to refer to this printing method as gelatin printing throughout this post. I’ve put the supplies I need for a printing session into a small (ish tote) so I can set it up to print away while watching TV. Though often I find myself not watching the TV and just focusing on making prints.

I set a goal to get 10 or so good base prints to work on in additional sessions or methods. 

So this brings up the idea of what IS a GOOD gelatin print, or base print? And are they the same thing?

The short answer is that no they aren’t always the same thing and the long answer is, it varies depending on what you want to use the prints for. So gelatin printing is a form of monoprinting and can absolutely be used to create wonderful images on its own, but if you want to do that, you’ll likely need to use Akua inks for their longer open time or amend acrylic paints for a longer open time with airbrush medium or something to extend their open time. Though I’ve seen a few YouTube videos of artists using layers of acrylic paint to create amazing landscapes with a gelatin/gelli plate.

For me, I have 2 types of gelatin prints- those I want to make more art on with other tools and those that I want as a finished piece on its own.

In both I look for layers of color through stencils and paint manipulation to create texture. YOu can see that in the images below. Each has several layers of stencils built up through the gelatin plate that creates depth and interest.

For sheets that I plan to turn into their own individual pieces of art, I look for specific colors I can use as the background. Colors that pop with texture and layered meaning. In most cases I look for specific colors that I can use to make the final image pop.

For sheets that I plan on using as a backdrop with other media, I look for the same things- layers of color that create interest. I really like to have color opposites over analogous colors. I’m particularly fond of yellow, magenta and orange together with teals and blues over the top. I like these layers behind deeply black and opaque white ink.

I think a GOOD gelatin print session is one where I am able to get a bunch of different colors on a bunch of sheets that create visual interest. A good print is as individual as the printer.

Continue reading

Review: U.S.A. Gold Pencil

The U.S.A. Gold pencil has changed ownership so much I’ve lost track of ownership, luckily for me RoseArt has their name discreetly slapped on the back of the packages. For awhile I couldn’t find them on shelves at my various big box stores. This year I found this pack of 20 pencils at Staples for $3.99. Pretty pricey if you ask me.

The packaging is as maximalist as they come. A plastic (UGH) bubble glued to a piece of card with some die cutting. The front of this hanger package features a red, white, blue, gold, AND green design. The package is hard to read and the U.S.A. Gold logo is lost in the mishmash of crap on the packaging. There’s a bit of a flag motif, except one stripe is red and the other is blue. Oh, yes, don’t forget the handful of stars.

Jeebus crisco, why not just add a crying eagle, RoseArt?

The flip side of the package? Moar flags and stars.

There are some changes to the 2021 version of this pencil, and frankly… Most kinda are crap.

The pencils look pretty similar to the older version- possibly cedar, gold ferrule with a blue band, jaunty little pink eraser and a slim feeling in the hand.

The changes are a glossier coating, gotta get in that no name microban antimicrobial nonsense to capitalize on covid fears. Never mind the antibacterial properties of wood are well documented, and cedar itself is rot and fungal resistant (though it absolutely will rot.) The claims emblazoned on the USA Gold packaging doesn’t say or even suggest that the pencils will kill covid viruses, but one must assume that harried parents rushing through Some Box Store with a passel of cranky kinds might just toss a package of these into the cart, without investigating the claims, or believing the product will help little Johnny in the fight against covid. Do you really want little Johnny sampling some of that sweet no name microban knockoff as he chews his pencil?So Glossy
Enough on that.

The true crime here is that RoseArt dropped the stellar blue foil imprint, thus further ruining the look of the pencils. We now have a glossy pencil with a GOLD FOIL imprint. GAH.

Hideous.

The cores are dark and smoother than the original Write Dudes pencil. Still I cannot recommend this pencil to you. For so many reasons. The awful maximalist packaging, the glossy “antimicrobial” finish, the GOLD foil imprint, it’s all just so wrong. They ruined a really decent pencil.

In a hilarious twist, RoseArt forgot to update the website for this product… So the website mentioned on their own packaging leads to a dead page. LOL.

Continue reading

Composition Book Round Up: Part 3 Walmart

I didn’t think I was going to make it into Walmart this year, and frankly I wish I hadn’t. That’s a whole other story. When I did finally make it to Wally World, well, it was nearly empty of school supplies. Generally this Walmart has a lot of stuff left over and has clearance shopping carts full of pencils and other items for 10 cents. Not this year. The school supplies looked as though they had done minimal ordering and what was left the week before school was not a lot.

Mostly they had a great deal of Norwood poly covered composition books. Which I didn’t purchase due to their paper being ideal for pencils, ballpoint, and okay with gel, but abysmal for fountain pen. Plus, that poly cover was against the rules for this year’s round up. I did some searching, and digging and walking into the regular office and stationery section of the store to find the only box of card covered college ruled composition notebooks.

This is less a round up and merely a single review.

Pen + Gear Marbled Composition Notebook

At a mere 50 cents these are on par with the cheapest pricing I found this year. At 100 sheets they are among the fatter composition notebooks. The marbling has a good visual balance of dark to light and the spine tape is perfectly proportioned. The branding is a tad large and not well integrated into the front label area, but not awful. The barcode area on the back is okay as well.

The cover is abysmally thin. The whole book is floppy. This is the first time I’ve wondered if a cover will actually hold up to regular use in a bag. I like a thick card cover but I’m okay with a thin cover IF I think it will hold up. I question this one. It’s that floppy and thin. If it catches on anything in a bag it will fold and crease. This might be a good excuse to get a nice cover for your comp books. Etsy is filled with them.

Inside the 100 sheets are smooth but toothy to the touch, letting me know without even testing this paper will be killer with pencil. And it was. I tested with a few pencils and they all performed really well. This paper feels as good with pencil as the Yoobi paper, if a touch smoother. It takes little effort to get a dark even line, pencil glides over the surface. Ballpoint does great as does gel ink.

Please note the spot of bleed through on the facing page. No good.

Things started to go downhill when I pulled out the fountain pens. Every nib showed some ink spread and the barest hint of feathering. The pens felt good on the page. Flipping the page showed a great deal of bleed on every nib except EF with well behaved inks. This is a composition notebook for pencils, ballpoint, and gel pens. While a fountain pen can be used, you’d be stuck using one side of the page only. Which, admittedly, is how I use a comp book, but I like to be able to use the verso of each page for notes on the facing page. I wish I were able to suggest this as a good comp book, but it just isn’t.

You are much better off looking for other brands at Target or other places. Wally World’s composition notebooks are a bust this year.

Continue reading

Composition Book Round Up: Part 2 Staples

Staples has often had composition notebooks that were stellar for fountain pens at 50 cents each. In years past you looked for those marked “Made in Brasil.” This year I looked through the stacks and stacks of books and found only “Made in Egypt.” In keeping with my usual purchases I only bought college ruled. This year I also stuck to card covers only. No poly covers. Though the Staples closest to me had many poly covers, they were $1 each. 

Staples has also changed up their branding on their store brand items. Nothing is marked “Staples;” it is now TruRed. Why? Who knows. Personally, I liked Staples branding with the single partially bent staple as an icon. The True Red branding leaves me a bit flat…Though I do like the dual open staples on each side.

Both comp books purchased at Staples are TruRed Brand and feature the same flimsy thin cardstock cover printed with wide blotchy marbling. The covers are too thin for writing out of hand. The taped spine is spot on and perfectly proportioned to the notebook. The covers were available in blue, purple, red, and black. All spine tapes were black.

TruRed Graph Ruled

These cost $1.29 and have 80 sheets of graph paper.

The stitching is wide but tightly done and feels secure. All the paper inside is tight and even in the center is perfectly folded.

The ruling is pale blue and 1/4inch, relatively wide for graph paper and my least favorite graph ruling. It is good for writing and bullet journaling. The paper is what I call “composition book thin” and is probably 15lb. It is smooth to the touch but has decent tooth for pencils. Fountain pens feel good on the surface but you won’t be confusing this with Tomoe River paper. Even wide wet pens don’t quite glide over the surface. They feel good, but not great.

The same, good but not great, goes for the performance of the paper as well. Because the paper is so thin there is plenty of show through, but no bleed through. Even a wide wet brush pen didn’t exhibit much in the way of bleed through. Further, there’s no feathering to be seen and just a bare hint of sheen.

These do not perform as well as a Unison graph from Target and at $1.29 they are a lesser value. But in a pinch you can get them at Staples at $1.29 year round. Well that is if you can find them on the shelf.

TruRed College Ruled

These are regularly $0.99 each and currently on sale for 50 cents. There is a purchase limit of 30 at 50 cents.

These feature the same tight well done binding as the graph paper. A little too widely stitched but satisfactorily done. I’ve purchased Staples branded comps in the past with terrible binding. This year’s offerings seemed to be all very well done. 

These books sport 100 sheets or 200 pages. The pages are roughly 15 pound, which is standard for composition notebooks. The paper feels smooth but not slick and fountain pens feel good on the page. Again they don’t glide but feel pretty nice. The paper doesn’t exhibit any feathering even with the wettest of my pens and brush pens. Though with the brush pen there is a tiny amount of bleed through at the wettest points. The ink shows a tiny amount of sheen.

Pencils feel pretty good on this paper too. It’s toothy but not sandpaper toothy. Points hold up pretty well but the line even from an HB is decently dark.

Overall if you are looking to stock up on a composition notebook this isn’t a bad choice. The paper feels very nice with most of my pens and pencils. It’s got 100 sheets and is stitched well. The major downside is the flimsy cover. Which will stand up relatively well in a bag, it just won’t allow for out of hand writing. I’m not sure you can get much better than this for 50 cents.

Staples seemed to have far fewer offerings than in the past. I wasn’t able to find other brands of comp books on the shelves or in their more decorative sections of back to school supplies. Overall the BTSS section was pretty disappointing and lacked the vigor found in previous years. Though, can anyone be surprised given last year and the questions many might have about this upcoming school year? After all, is BTS back to school or back to school at home? What does back to school even mean this year?

Continue reading

Review: Yoobi X Marvel HB Pencils

Yoobi HB pencil packs have been a solid Back to School Sale purchase for the last few years. They also have the distinction to have fun designs on them. This year’s batch of Yoobi goods have the usual fun patterns but also a fun Marvel lineup of child friendly Marvel Character imagery. I decided to get the Marvel patterned pencils so that after the review I can pass them to my Spider-Man obsessed nephew.

The 24 pack of triangular pencils has Yoobi x Marvel emblazoned on one side. You get 8 of each color or pattern of pencil. The white and gray pattern of child friendly Avengers icons is super cute. Fortunately they are printed and not plastic wrapped.

Like all the Yoobi pencils I’ve previously reviewed, they feature a smooth and moderately dark HB core. They hold a point for a while and don’t require frequent sharpening. The core responds well to most sharpeners, and I admit I usually subject them to a hacked Apsara long point or a KUM Masterpiece. I did not test them with the more finicky sharpeners and won’t.

The wood is likely linden or basswood. It is definitely not cedar. It sharpens well, especially in a crank style. I find them to be fairly narrow especially when compared to premium pencils. They feel to be a pretty standard 8mm but since I’ve been using mostly premium pencils lately, they feel narrow in my paws.

The lacquer, like most kid’s pencils, is thin, but evenly applied. It is satin with the Yoobi x Marvel logo in the same satin finish. The ferrule is nice and shiny silver aluminum wrapped around a nice black eraser that works really well.

The pencils are shipped in a sturdy card box printed in classic sedate Yoobi white that let’s the pencils stand out through the die cut window. I like this packaging. It’s 100% recyclable and keeps the cores from shattering.

In terms of quality control, it has fewer chips at the ferrule than most Blackwings shipped lately. There are a few cracks here and there in the lacquer and yes, around the ferrule. But at $3.99 for 24, I can forgive these issues.

Overall I like these pencils. I’m not a huge comics fan, but I appreciate them and I know my nephew will appreciate them more. I can feel good about giving him fun pencils knowing that they have a solid working core.

Continue reading

Review: Dabble Writing App

There’s a lot to like about Dabble. And very little to dislike. Let me start with what I like.
Dabble has an app that works offline and stores copies of your project locally, which automatically saves to the Dabble servers/cloud. It works pretty well too. I noticed very little functionality drop off when I wrote during my lunch breaks at my old DayJob. The wifi there was a joke and bumped me off repeatedly and often. It would save locally and once I was back in distraction mode, it would let me know that the project was saved locally, it would also let me know when it would update to the cloud. I have to admit that this feature really made me feel secure about the safety of my project. Though I admit that I’m someone who doesn’t trust software to be right all the time and I saved Word copies of my project to my machine pretty frequently.

Exporting a document to Word or Text file is as easy as clicking the right button. Once you click the button it gives you the option to change the file name and where to save it. Easy. From there it can be easily moved to another cloud service like Dropbox or Docs.

I also find the distraction free mode to work very well, especially when I’m out and about on my laptop and don’t have a second screen going. In full screen mode the Dabble interface obscures everything and then grays out. Though if you move your cursor via touchpad or mouse the window enters active mode again. This wasn’t much of an issue for me in my use.

A thing that I have found especially useful is the “Scene Notes” feature. At the start of each chapter and scene you are given a spot to write a short line about the scene. This shows up on the right hand side of the screen as you work and gives a good idea of what the current chapter and scene you are working on. I’ve found this a great way to keep myself focused on that particular scene. Adding a new scene is obscenely easy. You can add a new scene in the plot section by clicking the note card or by clicking on any chapter and selection “add new scene.”

Adding a new chapter is accomplished in much the same manner, though one must click the top most file- the project name and select add a chapter.


Let’s imaging that you have 12 chapters in a current project and while you are in Chapter 8 you realize that you will need a scene added back in chapter 2 to make your current scene make sense. So on the fly you add in a new scene, for chapter 2 but it lands in Chapter 8. Because you know what needs to be written, you write it right there, in Chapter 8. Yikes! Nope, not at all, simply click and drag that new scene into place. Then it will seamlessly drop into place.
Project settings are set by clicking the cleverly names “project settings” icon at the top left of the screen. This lets you decide the set up of your project as you work on it. I tend to just use the presets. Dabble let’s you customize your experience a bit, but this is set in the personal tab on the upper right. I prefer dark mode as it seems to work better for my eyes and working style over the default.

Dabble has dark mode as an offering for standard and premium subscribers and not their basic and I’ve complained before about other companies not adding it in as part of their basic package. I’ll make my standard complaint here- dark mode should be offered as standard on all platforms offering it. Why? from a user design standpoint it is friendly to offer a design feature as standard if it assists people with different abilities.

I use plot and story notes a bit differently than most people. I rarely touch the story notes section as much of my writing lacks characters or world building. But I do use Plot Notes. As you’ve seen in previous screen shots these work much like notecards. Though you can only move the cards around in their own line.

Getting rid of scenes and unused cards is easy, just click on the 3 dots at the end of each scene or card and “move to trash.” You can then click on trash to see them there. You can then change your mind and move them back.

Goals & Stats is easy to set up and use. With just a few spots to fill in the resulting bar graph on the right of the Dabble window allows you to mouse over that day’s bar and get a word count for that day. Also when in active mode, you can see the word count at the bottom of the text window. This number reflects what you’ve written in THAT scene that day and over all. It also give you a page count.

The only issues that I’ve stumbled upon is that on my former employer’s broken Wi-Fi sometimes spellcheck didn’t work properly, but for the most part Dabble just works. The other issue is that if you decide to move a 50K novel from say Google docs through cut an pasting into Dabble, well, expect there to be some issues. Even downloading from google to a word doc and then uploading produced a few errors. I suspect that using the local app on your computer for an upload of that size would cause fewer issues. But I had a heck of a time getting my NaNo novel into Dabble.

Pricing for Dabble isn’t bad at all, especially if you purchase a full year at once. If you win NaNoWriMo you can get an additional discount for a year’s subscription. This is pretty standard for any company that supports NaNoWriMo, though the discount changes from company to company.

Overall I find Dabble to be an incredibly useful tool for writing. It had fewer features than a few others out there, but it works smoothly and flawlessly most of the time. Learning it was easy since the structure mimics standard files structures and will look familiar to most people. If you plan to do NaNoWriMo this year consider their NaNo trial. It’s well worth the effort.

Continue reading