Tag Archives: journal

Spray Ink How to

Initially I got this idea from a youtube, I can't remember the name, her video was about alternatives to Tattered Angels spray inks. At $9 for a bottle the inks are expensive. I found some walnut spray ink for a 4 or 5 oz bottle for the same price. That's pretty pricey to me. She used an assortment of alternatives, Kool-Aid, ink etc.. What caught my eye was her use of stamp pad refills.

You'll need the following:

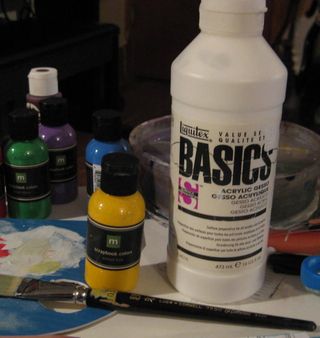
  • 1 bottle isopropyl alcohol, I got 91% but you could go 70% ($1)
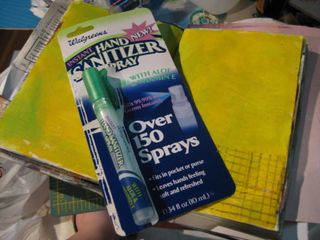
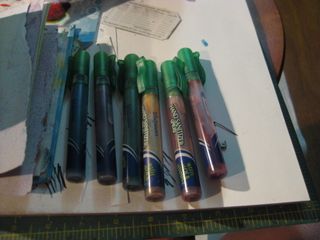
  • 6 Hand Sanitizer Pocket Spray bottles. Mine are Walgreens brand but any with a removable top will work ($1.50 each) Each container holds .75 ounces of liquid
  • 1 package Posh Impressions Inkabilities 6 pack refill inks ($15) I got the Earthtones set. Adirondack Sells 3 packs for $10 with larger bottles in a greater range, either brand will work. I liked the selection for the price of the Inkabilities
  • PLEASE keep in mind that isopropyl alcohol is FLAMMABLE. It would not be a good idea to have an open flame while using these as the spray will light up. THIS IS A FIRE HAZARD. I Do not take any responsibility if you do something foolish and burn down your house or apartment.

What to do:
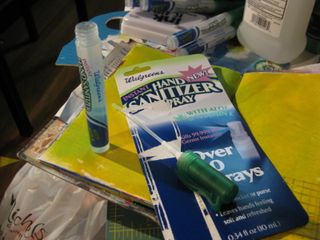
First empty out the hand sanitizer spray bottles. I saved mine in an almost empty bottle. I don't use the stuff, but Christie does. Wash the bottle in warm water. I rinsed until I could no longer smell the stink of the sanitizer.
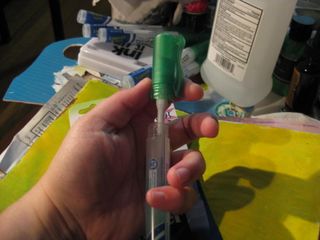
Then I cleaned the sprayer out. To do this I filled one of the bottle with alcohol, and squirted 3 pumps through the spray head. Then I pulled the spray head out and sprayed until it ran dry. Good enough.
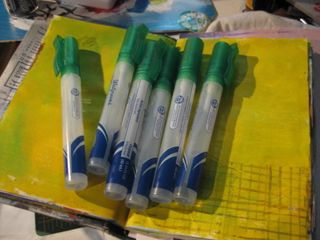
Then I filled each container half full of alcohol.
To this I added about 20 to 30 drops of ink to the alcohol*. twist the cap on tightly. Really tight. Shake.
Spray. Check intensity after the ink dries. Add more ink 5 drops at a time to get the desired intensity.
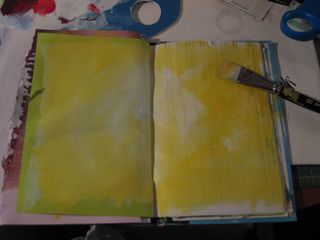
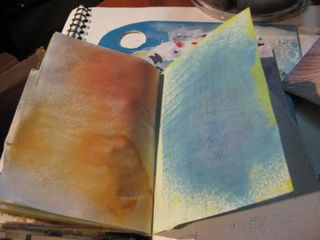
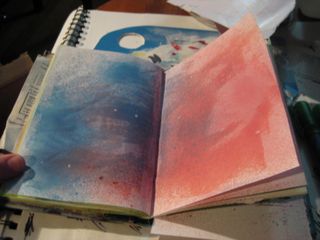
Now spray to your hearts delight.
My intent is to get some spray paint effects and increase my love of hand cut stencils…Tell me in the comments what you think and link to pages where you use it!
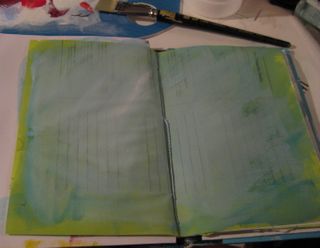
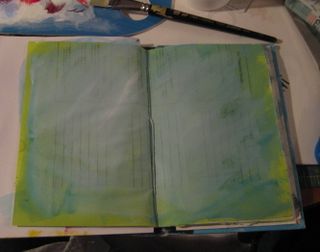
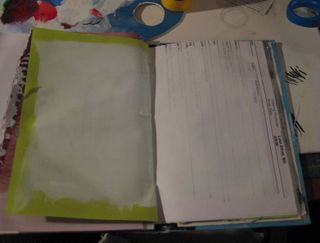
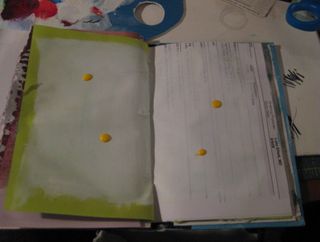
Some pics:

IMG_1443

IMG_1444

IMG_1445

IMG_1446

IMG_1448

You might be wondering why I'd choose to use a hand sanitizer bottle instead of the Ranger little spray bottles. The hand sanitizer bottles are 2 for $3 regular price. I've seen them on sale at CVS for $1. The Ranger spray bottles are 3 for $5. It's a 16 cent difference to the regular Walgreens price, whcih isn't much. But I also know that the hand sanitizer spray bottles are pretty robust, designed to spray a gel in a very fine mist. That fine mist is what I'm looking for. The Stampington spray bottle I've used spatters, I think it's supposed to but I find the effect annoying. I also wanted to find a new use for something a lot of people might already have around. I know a lot of people use these spray bottles. They are designed to be tossed around in a purse so I know they are sturdy and don't leak as long as the cap is on it. Also as something that is designed to hold something that is alcohol based I know it will stand up to the abuse well. Not everything will tolerate the abuse of alcohol. Also these little hand sanitizer bottles only hold .75 ounces of fluid.

IMG_1447

IMG_1450

IMG_1452

Also, thought not pictured I mixed a 50/50 mix of alcohol and india ink in a Stampington spray bottle and holy shite it's awesome. Anyway, everyone should try this. the total cost for me was about $25 for 6 colors not including the india ink.

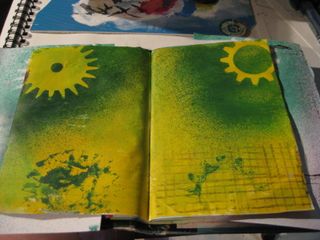
Somethign else that is great that you could get extra spray bottles and mix colors- 10 drops yellow, 20 drops green for yellow green or 10 drops glue and 20 drops green for blue greens. You could create a completely individualized line of colors for your journal. ALSO you can remix fast and easy. It would take a long time to go through those refill.

*Do this step in a place where your floors are an easy clean up, becuase if you are like me and knock over your RED sprayer before you get the cap on it, it makes  a god awful mess. I can't image what it would do to grout. This stuff stains. However as it is alcohol based alcohol and the saved hand sanitizer does a great job of lifting it off hardwood. Trust me I know, it came off my oak floor very well. I'm really glad I have down a vinyl sign as a safety mat for my slobbery.

Backgrounds: A Way to get past that Blank Page Part 1

Gesso.

It's a basic thing. I don't see it as a necessary start to all pages. Becuase it's just not. If you work with a heavier page you don't need it. It's nice, it stiffens the page and adds some texture. You can get gesso in a lot of colors now- black, clear, white various other colors. You can also mix regular white or clear gesso with colored acrylics to get any shade you want, and I'm going to tell you how to mix it with watercolor crayons later in this post.

I'm working in a great notebook my friend Jen made me for a Facebook craft exchange. It's a salvaged hardy boys mystery cover filled with recycled pages. the paper is a variety of weights- I assume around 18# and 20# bond paper, computer paper and the like Its cot some printed stuff on one side. This paper needs the love of gesso to stand up the the abuse I'm going to put it through.

So the first thing I do is get out my gesso. I use liquitex, its not too heavy and isn't too wet. It works for me. I put it on with a rather soft brush so I get a nice thin coat. The brush I'm using is a soft old watercolor wash brush, a cheap one that I've previously abused the hell out of.

IMG_1407

IMG_1408

IMG_1409

thin coat done. Easy. I like to work on a bunch of pages at a time. I hate washing brushes. So I separate my pages with freezer paper or waxed if I have it, sheets of plastic, whatever I have on hand. I look at gesso'd and painted pages at this stage as part of the process, something to gain inspiration from.

Moving onto coloring the gesso. I grab my water color crayons and add a thin layer of crayon on, scribble it, no real pattern.

IMG_1410

IMG_1411

Here you wet your brush and thin the gesso just slightly, so it will wet the crayon and mix it. Spread it around and add more gesso until you get the color you like and the texture you want.

IMG_1413

IMG_1415

Coat a page with gesso, while still wet randomly drop a few drops of liquid latex paint (ore regular), just a few drops. And start brushing wildly around the page. Blend it in until you like it. I like to leave the areas of color unmixed. (I'm using making memories liquid acrylic. I snagged it on clearance with a set of sweet foam stamps. BUT it's not a bad liquid acrylic. and on clearance who can beat that price?)

IMG_1416

IMG_1417

IMG_1418

IMG_1419

All of these pages were done in about a 45 minute stretch of time. Sometimes I force myself to sit down with my jo
urnal and just color pages. It's relaxing and after a tough day at work, I need to unwind but I'm not in the frame of mine to draw, sketch or journal. Something that doesn't require thought like this, it allows me to meditate on relaxation, listen to some good music and really just enjoy a few moments in my own head with out a worry. Because really, how can I f*ck up gesso? (that's a rhetorical question and I had several art professors who were really neurotic about how gesso is applied.)

Next installment: Paint on a page, sandpaper, and watercolor crayons

One of a Kinds and not for Sales

So I've been working on some one of a kind books and not for sales. The stitched covers I've been doing are inspired by a journal I purchased. I don't feel right selling them as they have been 100% inspired by Bastiano. Which if you haven't seen his work you should follow that there link and go to his flickr stream and check it out. It's not often I find a book artist whose works stops me dead. I follow most other book artists on flickr through a group. Bastiano and very few other I added to my flickr stream. Yes. I have obsessively followed him since I first saw his work and when I saw Sverige I had to have it. Currently. Sverige (I love that my new note book/ journal has it's own name squeee!) sits on my desk right now, where I just look at it. Yes seriously, right now I'm not ready to use him (it's a he) and I just look. I've got 2 other journals in the works before I even crack the cover.

I am inspired by the cover and the interior. But I don't want to riff on it too much, which is why I'm sticking to making anything similar as gifts, I WILL NOT be the a-hole who buys and reproduces and sells. that isn't cool. What I will do is pimp his stuff here. And I as a general rule don't do that.

The last journal that I was working on- the one made of magazine pages that was pissing me off (shall be named PO for PIssed off) and I had to rebind it? I finished it. The last few pages are like those in every journal I want to finish to rush to my next- rushed and hurried but… Done, completely. Filled to full, brimming with stupid hipster art and color, and shit glued to it's pages. Thanks to the rebinding the spine isn't straining too much and the newly waxed thread sits on the slippery tyvek spine much more easily than before.

Okay so for this weekend:

  • Crappy Pics of the gift journal- they will be here and facebook
  • More pics of the finished journal- most will be here only and NOT all on my flickr stream (video?)
  • Some pics of the Bastiano book
  • Some background photo tutorials 

I may take the evening off though. My allergies have been kicking my head around and I need a good long sleep, I may get home take my friday afternoon, after work nap and then go to bed, depending on how I feel. This weekend is supposed to be cooler and nicer here.

Working on it…

Last night while toning some pages (that's what I call it after an art teacher who used to call coloring a canvas toning it) I decided to shoot some pictures of my process.

I did a few set ups:

  • plain gesso
  • gesso with watercolor crayons
  • gesso and acrylic
  • acrylic
  • acrylic and watercolor crayon
  • Gesso background with sharpie on top and gesso on sharpie

I'll put up a few posts with the pictures here, the pictures will only be here and NOT on my flickr stream. I"m going to shoot for Saturday to have those posts done and will post them starting then. I"ll do themm split up because they will be so image heavy.

Technique Video- Backgrounds

I hate working on a plain white page, even when I'm drawing I tend to go through my sketchbooks and tone my pages with watercolor or gouache. I like how it changes the texture of he page and leaves me with something more interesting than plain white or cream. Youtuber ricefz uses ink pads and brushes to create a soft toned background for journaling.

A toned background can also help get you past that scary "white background"syndrome so many of us have. I hate working on a plain page. The white page can be so intimidating, especially if you buy a really nice handmade journal. Last night I was starting on a journal that my friend Jen made for me. (Hardy Boys Salvaged book cover!!!) I was exhausted so I went through the first half of the journal and gesso'd the pages. Gesso is not a must do step for me. I like it but it limits the pens I cna use on the page- I find it's very rough on nibs and ruins them fast. So I stick to sharpies on gesso. I then went through the book with some colored acrylic (making memories brand- purchased on clearance) and added a touch of color to some pages, planned out an entry on one page but really randomly added color to the pages. After taht I added a touch more color to the page with my watercolor crayons. Mostly I added those becuase the acrylic tends to stick if I don't add something a little waxy to the top of them. So now I have a super cool journal about half filled with simply colored pages, ready for me to write and glue and pain in.


unique teacher’s gifts are in order as school approaches

I used to be a teacher, believe it or not. I taught high
school art for a year and when that fizzled for me I went into working in an
Elementary Special Ed program grades 2 and 4. Both experiences led to many
memorable moments. The teenage girl who drew the penis disguised as a
lighthouse and didn't think I'd notice, the boy with whom I had to have a
discussion "IN MY OFFICE NOW" about respect, the runny noses and hugs
from 2nd graders for whom I was the strange lady who would talk to them like they
were human and doodled in the back of the classroom.

On of the sweetest things about the younger kids was that their parents would
send them in with some unique gifts for the teachers. I used to take these as
offerings to the merciful teachers who would take their hyperactive kids off
the parental hands for 9 months of the year and instill rules, boundaries and
limitations on their otherwise unruly kids. I have a feeling that if the
parents could have sacrificed a goat, sheep or virgin to get the kids out of
their hair they may have done it, but many of the gifts simply said,
"Thank you thank you thank you. I was one step from homicide and the front
page of our small local paper." Their faces told us that they were one
step away from insanity and a trip to the nut farm. As the kids walked into the
door, offering in hand parents looked on, hoping the teachers would be appeased.
The relief on their faces as the doors shut was visible.

Most of the gifts were pretty neat-o: flowers, homemade treats, various
school supplies among other things.(some of which we will not discuss here.)

Now there is no need to figure out a unique gift, a
parent just has to head to artfire.com and pick something and the artisan will
pack it and ship it right to their door. Check out the jewelry section for some
neat stuff. Also check out my shop for some really unique gifts- one-of-a-kind
handmade journals, perfect for note taking or journaling. I know for a fact
that most teachers are office supply junkies and would appreciate a journal
covered in soft leather, or an eco friendly jotter or a larger sized notebook
covered in recycled
/ upcycled sign vinyl.

IMG_0768 

The sweetest gift I ever got was a dusty candle holder in the shape of a  watering can,iInside a dusty candle with faded scent. I spent a lot of time working one on one with that kid, helping him with math and reading as well as his speech therapy. At the end of the year he came in with a well wrapped gift for the lead teacher of the classroom and shyly sat at his desk laboring over a gift tag for the candle holder. He then waited until my back was turned and left the candle holder on my desk. Later that day I was talking to his speech therapist who had been talking to his mother that monring. According to the mother the kid had thrown a temper tantrum that morning because she'd gotten an end of yeaer gift for the lead teach but not for me. He woudln't leave the house that AM. He grabbed the candle holder and asked his Mom if he could give it to me. Hearing that story had been one of those moment wher I felt like I'd reached a kid. It also made it incredibly hard when I got the pink slip a few days later.

Totem Doodle

I found this website via the Doodler's Anonymous twitter. It's epically cool and makes you think of what you can draw in a small square. My high school art teacerh (Mrs. Friedman) had an exercise where you were asked to grid off a page in 1 inch squares, it had tobe precise, she checked it, then in each square you had to make marks, had to come up with as many different marks as possible. You scored better if your marks were all diddferent or you came up with ideas to make the grid work with itself. You could cross your lines (no crosshatching and no scribbles). It's a great exercise for a lot of different work. I feel li ke the totem project is a rift on that.

Whe I'm partilarly blocked I go back to this or a riff on it. Sometimes I draw equal sized circles on a page in my journal and fill them in with marks or faces. I"ve also folded a sheet of paper into equal sized yet small sections and done the grid exercise. I'm not as militant about no scribbles or cross hatching, after all rules were made to be broken and the idea is to free myself to get out of the rut.

try making a few 2 inch squares in your journal, go ahead now fill them in…

Jotter Notebooks on Artfire Great Shades of Green with Unlined Paper


More New Jotter Notebooks
Originally uploaded by lessherger

These jotters almost didn't make it to Artfire. I'm so in love with the shades of green on the covers of these notebooks these almost remained mine.IF I didn't already have a box full of jotters these would have been mine. My loss is everyone's gain 'cause they are on ArtFire here.

You can also follow the link to the images of these on Flickr and see more pictures of jotters and other notebooks.

Single Signature Books, 1 month of Journaling

The first book most binders are ever
shown is the simple pamphlet binding. Its fast easy and can be made
pretty. There are 2 variations that I'm fond of, the 3 hole and the
figure 8. Each is exactly what it sounds like, the name does not
deceive.

Here are some links to good references
on these bindings:

The stuffy Stanford treatise:

http://aic.stanford.edu/sg/bpg/annual/v06/bp06-13.html

Hey Lucy's version of the traditional 3
hole Pamphlet stitch:

http://heylucy.typepad.com/heylucy/2007/06/tools-for-bookb.html

This a link to a hand out using the
hole stitch and a single sheet of paper folded.

http://www.scribd.com/doc/10497493/Pamphlet-Binding-Stitch

TJBookArts has a great list of
tutorials, many are single signature, perfect for a months
journaling:

http://www.tjbookarts.com/otherlinks.html

Hey Lucy's instructions are the easiest and could be adapted to anything you want, but I like the Stanford, though stuffy,  it's shear amount of information and 2 signature options a the best for the art journaler.