Tag Archives: journaling

nanojoumo #3- inspire


nanojoumo- inspire
Originally uploaded by lessherger

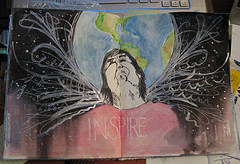
I had to think to myself what inspires me, then I had to think what doesn't? This is my way of thinking about that.

I sketched out the globe behind the figure first and then sketched in the image of the face, uplifted and with a smile. The next time I decide I want to draw a face on the fold punch me in the throat.

I used my ink brush (fine koi water brush filled with india ink) and inked in the face, body and around the world. I used watercolors to add color to the world and deliberately left the face black and white. I colored in the "shirt area" with watercolor pencil. Using a brush I filled in the black background with india ink and a brush. I spritzed the shirt area with water to allow the ink to run down it.

I hit all that with my drier and dried it out. I then used my gelly roll pen to add some fine line doodles and swirls. I used a brush with liquatex silver ink to add more depth and then added some white acrylic to add more swirls and doodles.

You can't see how awesome and neato the silver ink is in the pictures. Also the curve in the face distorts the face more than it is in reality and makes the whole thing look kinda weird in the photo. I'm not overly happy with it as a finished piece, but I tried to make this a little less complex than the last few images I did.

nanojoumo- purity


nanojoumo- purity
Originally uploaded by lessherger

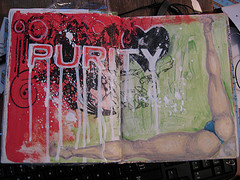
I get a kick out of all the online "purity" groups. SO when the word purity came up for nanojoumo day 2 I had to lampoon it. The purity "logo" was put online as a purity card for a church group. It looks far cooler here than it did on the card. I pulled the card in to MS Publisher, reversed it and resized it to be about 8×10, i then printed it off onto a sheet of transparency film. I put it on the right side of the film this time and used a great deal of matte medium to transfer it to the pages.I had to cut it into 2 pieces to get it on, and I'll tell you the fold was a beast. the original logo was clearly going for a "urban and graph" feel. So the tendency of the transfer was a perfect medium to really take it there. I then outlined the letters with my pentouch pen, pressed down to get dribbles and runs. While that dried I looked at hundreds of images of scantily clad women bent over various objects, and quite frankly there are things that can't be unseen. Just the very act of attempting to find the image for the right corner has left my brain irreparably damaged. The things I do for art. I found the perfect picture, of a woman, scantily clad washing a car. I wanted the legs to frame the corner, so I first drew the leg for the right most side in soft pencil, added the crotch area and then the left leg. Next was to mix up some white person flesh tone and layer it over the drawing. I added her thong and it's all set. I blocked in some green coloring to set off the legs. Then I mixed up some gesso really thin and used a liner brush to spatter it on the page…

Maybe not the most pure purity page, but it's exactly what popped into my head when I first saw the word as the prompt.

Art Journaling Technique: Grunge Backgrounds

This video is about how to make a cool grunge textured background. I looks like peeling billboards and paper. Easy to do. You need the following to create this back ground:

  • gesso
  • acrylic paint
  • Glue (PVA)
  • Watercolor crayons, pencils or paints
  • Spray inks (optional)
  • Sanding Sponge or sandpaper
  • Magazine with glossy pages.


Technique Videos

 Below you’ll find a list of art jouranling technique videos available for FREE on youtube, Vimeo and Blip.

This is a list of peeps I’ think make videos without too much bull
shit. You won’t need to fast forward through half the video to get to
the techniques being shown, listen to minutes of inane babbling before
you get to the real thing your there for. IN no particular order and
with commentary:

  • MIllande.
    Her videos kick serious butt. She focuses straight away on technique.
    It’s all how to and what to do with a serious focus on real techniques
    and not expecting you to create in her exact style. Information without
    BS. She does do classes but she does a ton on youtube.
  • Willowing.
    Some BS* but a lot of video of her making art. A lot of videos of her
    making art in journals. She shows her techniques. She also does online
    classes.
  • SamanthaKira.
    She’s occasionally a little long winded and occasionally she gets into
    scrapbook mode but her videos are filled with technique and little to
    no BS.
  • TheOneMinuteMUse The one minute muse has videos that are all about 1 minute in length to give you some ideas to start creating.
  • GaryReef gary
    reef is not technically an art journaler but he has hundreds of videos
    up on youtube all about art and making art, and he makes some of them
    in his underwear. 
  • ArtCentrix Not cute art. Love that. No BS either. The techniques are pretty clearly detailed and shot.
  • TheArtJournal. No BS here either, just video of the artist working
  • Mystele All art technique and watching her paint. No BS. Some talking but it’s about ART.
  • Rhomany’sRealm Some BS* but good videos of her making art, and generally positive videos about art journal keeping. She does do some classes through Willowing’s Ning site.

If you have any links to a youtuber without the bull shit leave a
comment and I can add it to the list. I”m going to make this a “page”
that will be links on the left of my blog all the time.

*On this page I mean BS to mean that there is talk, not the style of BS that got me started in making this page which is negativity and a general LACK of art discussion or technique or simple pimping of one’s art classes.

Art Journals, Finished Books, Artfire Update

My fingers aren't working well so I'll probably edit this in the afternoon, so bear with me for the day…

First off head over to my online buddy's site The Artistic Biker. He's started his first art journal this weekend and he's off to a fantastic start. He's got his daughter started too. Way to go on starting kids off with a lifetime habit that is both educational and very good for emotional well being. I'm sure she'll look at her journals when an adult with fond memories of her father. I htink I was around 10 or so when I was given my first journal. I was one of those orange red locking 5&10 (five and dime) 5 year Diaries. I wasn't artistic in it at all, just wrote my pre-teen angst. Infact I didn't start to journal on a daily basis until I was 12. Which is when I filled the little journals and bought a 6×9 college ruled spiral bound notebook. I decorated the cover with a collage and over the next year filled it with dreadful teen angst. I have all the journals I've ever written. I'm missing 1 from my college years but over all they are all here, somewhere in my home. I digress.

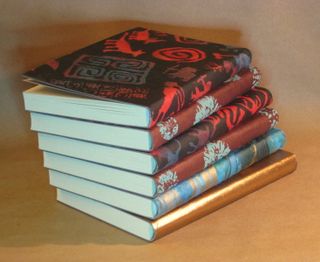
This weekend I created what I'm calling a basic journal. 128 pages of great cardstock, smythe sewn, and a simple cover made of board and decorative papers. they measure 5×8 inches and 1 fat inch thick. The cover is soft and flexible but not too too soft. the cost of them is low, but they are great quality. I've priced them at $12. Find them here on my artfire shop.

IMG_1801

Some Artfire news. I'm stoked that they are offering a holiday season free-for-all. All members can list unlimited items for the holiday season. They stay up until January1st, 2010. No fees, no gimmicks no catches. Sell stuff for free and hold onto all that cash you'd be spending on fees. Your saving $36 on the verified subscription price. As a way to pass on all the savings I'm offing a $2 coupon code for all  the reader's of my blog, enter PASSITON at checkout.

Blank Books for Journaling

I've been watching more videos on youtube, looking for stuff to post here and also for inspiration. I've also been looking at photos of art on flickr. One of the things that I've noticed is the overwhelming amount of unique journals people are using. Of course there is the ubiquitous moleskine, one of my former faves. but there are also large quantities of other books being used. There is the reclaimed or re-purposed hardback book in which the artist gessoes the pages and works on a printed page. There are spiral bound books, which I've never been a fan of for art journaling but was for sketching- they lay flat, come in a variety of papers and are easily found. The are also great if you focus on writing in your journal. There are the coptic and long stitch handmade books, I've also noticed  and interesting phenomenon in which people are working on a plain flat page and then punching 3 ring binder holes and binding the pages in big giant 3 ring binders or into scrapbook covers. Whichever style of book you choose there are lots of options out there.

Take for instance, you can get a unique decorated moleskine on artfire for not too much more than you would pay for one at B&N or Borders. These are pre-decorated by an artist in many styles.

To find a reclaimed hardback book one needs only go to the local library and look for a book in the sales pile, ask your librarian for help. Also the Salvation Army and Goodwill have book section which you can go through. My local Saver's store has a section of some cool and wacky books, many of which would make great altered books. Also don't look past some of those "employer schwag books" these are the books that employers give out at interviews and job fairs to try and get people interested in coming to work for them. Some larger companies have some really nice schwag books, perfect for manipulation and editing.

Coptic books are a favorite of mine, They are great for sketching outside becuase the binding easily folds over on itself, they are often hardback, which makes for great sketching support, the binding looks really cool, the thread binding is sturdy. The bast part of all, you can stuff the pages full of extra glued in bits and goodies and the won't stress the spine too badly. A search in artfire brings up pages of great and well made one of a kind unique coptic bound journals

The long stitch books are one of my favorites. they come in a variety of leather cover, recycled covers and interesting stitches. They fold over on themselves, can be hardcover or a limp cover, the stitches are visible on the spines and can be very decorative. Best of all they are tough. I've been making and using almost exclusively long stitch bound books for the last 10 years or so and they survive abuse like you wouldn't believe. You  can toss them in the bottom of a bag, stomp on them, spill coffee on them, drop them in a lake and they come out looking pretty good and the binding survives. 

While I'm not a fan of 3 ring binders you might be interested in trying the binder method out. There are some very fun and unique 3 ring binder covers on artfire. I found them by searching for 3ring binder. Very cool. I also found some neat rubber stamps that way.

Whatever you chose try something handmade and unique to get you through this holiday season. By careful Artfire shopping you might find that you make it through spending less than if you bought mass produces crap made overseas.

Rule #1 Process NOT results

An art journal should be a safe place to explore feelings, ideas, art techniques, educations, your belly button and everything else in your life. In your art journal you should be free and feel free to do that. If you are focusing on the end product you lose the point of keeping an art journal and that is to explore all thatI listed above. What the page looks like at the end doesn't matter as much as getting it to that point and HOW you got to that point. Don't approach the page thinking of how it's going to look at the end. Start working on the page without thought.

Write.
Draw.
Paint.
Scribble.
Scrub.
Glue.
Do What feels right.
Do what feels wrong.

Try new things in your art journal. No one else needs to see it, unless you want them to. Be happy. Be sad. Angry. Melancholic. drunk. Introspective. Think about yourself. Your family. The world. Politics. Mass Media. Hysteria. Your friends. People you don't know. Think it out. Write it down. Draw it. Paint it. Doodle. Scribble. Wax. INk Stamp Charcoal. Scrub. Brush. Sand Emboss.

Try things.

What I’ve done with the Spray Ink

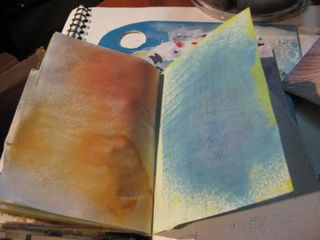
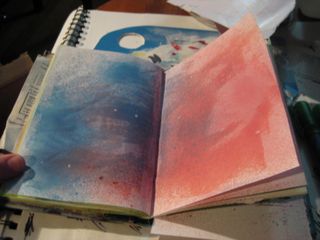
Holy crap balls. I love the spray ink.I love the spattered effect you can get when you press the sprayer down partially, I love the fine mist I get when I press hard, and the layered effect and mixing when wet. It's all very very cool. Experimentation is key to learning how to use these. I learned that the ink reacts differently on raw paper versus gesso'ed pages or pages with acrylic on them. The colors are transparent (except the black) so whatever is under them shows through. this can make for some very cool effects.

On thing I learned through trial and error is that alcohol based inks ALWAYs lift through my gesso (Liquitex basic brand) so I always get a ghost. So how to fix that? It would lift through progressive layers of gesso or acrylics too. I have a solution which I'll share at the end of this post. First I'm going to share some recent pages from my journal.
IMG_1454 

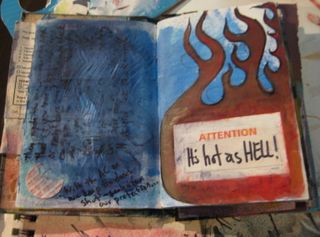
IN this image I had gesso'ed and painted the left page, the written on it in sharpie. The black was really sitting on the surface and less of the image than I wanted. So I sprayed it with purple and blue ink and a squirt of plain alcohol, Then moved the inks around. Here I learned that even fully dried acrylic and gesso will soften a touch when these inks are applied heavily. (the right side is the completion of my gesso over sharpie post)
IMG_1453 

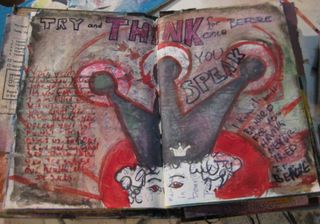
This page doesn't use any spray inks but an over lay of watercolor crayons wet down and wiped off and sand papering. I was going for a  dirty look on this page- dirty to express my rage…
IMG_1455 

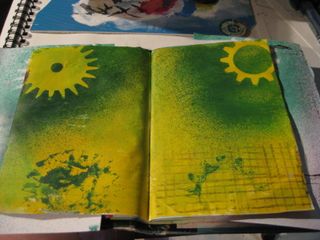
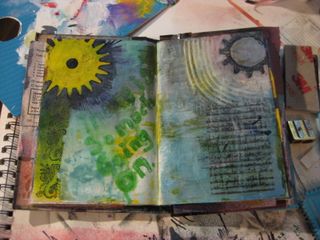
This page started out yellow-green. I used some Tim Holtz masks, I'll write more about these at the end of this post. I sprayed over them with green, blue and a touch of black spray ink. I also used some rubber stamps with embossing powder. On the right I took on of the masked out shapes and used liquid embossing paint and heated it until it bubbled, burst and dried. I then added some spray ink, watercolor crayons  and colored pencil to give the gear shape a distressed rusted up piece of metal look. The blue black background was too dark to write on, so I hit it with a thin fast application of gesso. No blending and applied with a bristle brush. I used a texture tool to make some marks and stamped on lines for writing and wrote on the gesso with bright green sharpie. I sprayed the sharpie with plain ink, a lot to soften the color and blend it with the background. Then I wrote my entry and sprayed that as well. I then overlay some green and blue spray ink and let it completely blend on the top layer.
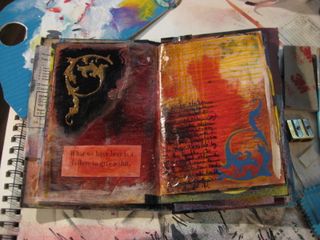
IMG_1456 

This page started out with a burgundy acrylic base that had been coated with black and brown watercolor crayons and wiped down for a distressed look. I then hit some areas with sand paper to further weather the page. I've used Tim Holtz masks on this page as well. There are several collaged elements and lots of spray ink and gesso. You'll notice it's shiney… I'll get to that in a minute.
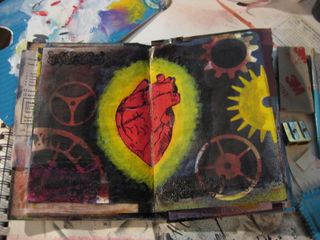
IMG_1457 

This page started out with a background that was bright red in the center and burgundy around that. I drew on an anatomic heart with sharpie. I used rubber stamps and embossing power around the perimeter. I masked the heart out with post it notes and then put down some Tim Holtz masks. I sprayed the background with purple, blue and black spray inks. I sealed around the heart ( more on this later) and then brushed some gesso and yellow to give it that mandala/ mary look. 
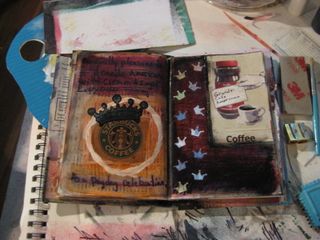
IMG_1459 

This page started out gessoed and with acrylic. The colors I can't remember but I think burgundy. I glued on my collage elements, added gesso and sealed the elements I didn't want to get colored with the spray. I sprayed  a variety of colors and then manipulated then with water, alcohol and a rag. I wrote with a sharpie. I used some sand paper, added some little punch outs and then sealed the whole thing.

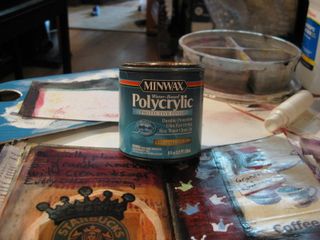
Okay so the sealant I'm using is something I had around the house, is pretty cheap, and is easy to use: Minwax Polycrylic. Yup. I had a can left over from a project I'd done a year ago and thought I"d give it a try. It looks like the acrylic varnish I have in a small squeeze bottle (that was a lot of money $4 for 2 oz), goes on milky but dries clear. I have semi gloss and it adds a nice shine to the page, the alcohol inks don't lift through it and can be scrubbed off of it with a little work and alcohol. Gesso sticks to it well, as to acrylic paints. Sharpie glides over it. The alochol inks if applied heavy lift while the polycrylic is wet but not once dry so you can see the kind of dragging muddy effect you can get in the next series of pictures.

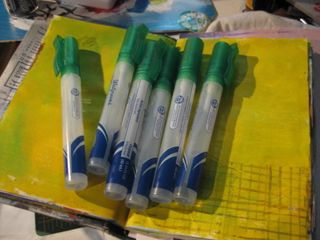
Here's a pic with can, you can get it at Home Depot for about $5 for this half pint can (8oz).
IMG_1461 

Oh and the best thing about this stuff, is that as of yet, once it's dry, it doesn't seem to stick to itself. SO you CAN get gloss in your art journal without sticking pages!!!
IMG_1458 

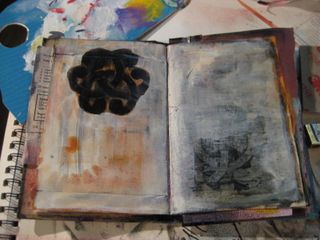
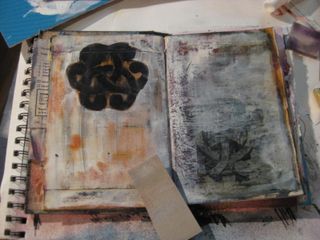
This is the page after using a stencil with black spray ink, orange and yellow. I sealed some of the page and then brushed gesso over the whole thing. After it was dry I used my fine sand paper block to distress it and move through the layers a little. It will also give me a super smooth page to write on. While not glass smooth I could write on this page with a fountain pen with ease.
IMG_1460 

Okay a quick note about Tim Holtz masks. They come in super cool
shapes-cobwebs, music, nice french curves, flourishes and gears, didn't I just tweet about wanting rubber stamps with
gears? These masks will have to be close enough. I really like them.
But the glue holds really well to raw paper but not to paper with
acrylic paint on it or gesso. Also while made to work with alcohol inks
they really don't like to sit in it or swim in it. I ruined the glue on
one by dousing it in a heavy coat of spray ink when it was on a gessoed
page. 🙁 No worries I have spray mount and will fix it. But if you do
get some of these be aware that the glue doesn't like a lot of alcohol
AND doesn't stick well to gesso or acrylic. But the effects you can get are so cool. They aren't too expensive and are infinitely reusable, just pic up a can of spray mount when you buy them and save some heart ache.
Spray Ink How to

Initially I got this idea from a youtube, I can't remember the name, her video was about alternatives to Tattered Angels spray inks. At $9 for a bottle the inks are expensive. I found some walnut spray ink for a 4 or 5 oz bottle for the same price. That's pretty pricey to me. She used an assortment of alternatives, Kool-Aid, ink etc.. What caught my eye was her use of stamp pad refills.

You'll need the following:

  • 1 bottle isopropyl alcohol, I got 91% but you could go 70% ($1)
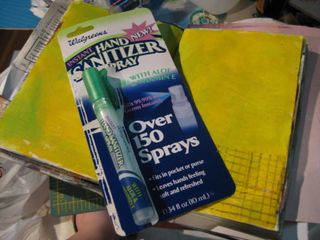
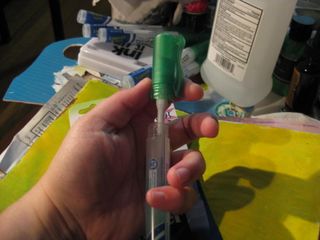
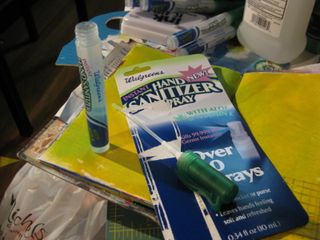
  • 6 Hand Sanitizer Pocket Spray bottles. Mine are Walgreens brand but any with a removable top will work ($1.50 each) Each container holds .75 ounces of liquid
  • 1 package Posh Impressions Inkabilities 6 pack refill inks ($15) I got the Earthtones set. Adirondack Sells 3 packs for $10 with larger bottles in a greater range, either brand will work. I liked the selection for the price of the Inkabilities
  • PLEASE keep in mind that isopropyl alcohol is FLAMMABLE. It would not be a good idea to have an open flame while using these as the spray will light up. THIS IS A FIRE HAZARD. I Do not take any responsibility if you do something foolish and burn down your house or apartment.

What to do:
First empty out the hand sanitizer spray bottles. I saved mine in an almost empty bottle. I don't use the stuff, but Christie does. Wash the bottle in warm water. I rinsed until I could no longer smell the stink of the sanitizer.
Then I cleaned the sprayer out. To do this I filled one of the bottle with alcohol, and squirted 3 pumps through the spray head. Then I pulled the spray head out and sprayed until it ran dry. Good enough.
Then I filled each container half full of alcohol.
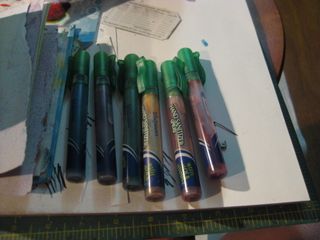
To this I added about 20 to 30 drops of ink to the alcohol*. twist the cap on tightly. Really tight. Shake.
Spray. Check intensity after the ink dries. Add more ink 5 drops at a time to get the desired intensity.
Now spray to your hearts delight.
My intent is to get some spray paint effects and increase my love of hand cut stencils…Tell me in the comments what you think and link to pages where you use it!

Some pics:

IMG_1443

IMG_1444

IMG_1445

IMG_1446

IMG_1448

You might be wondering why I'd choose to use a hand sanitizer bottle instead of the Ranger little spray bottles. The hand sanitizer bottles are 2 for $3 regular price. I've seen them on sale at CVS for $1. The Ranger spray bottles are 3 for $5. It's a 16 cent difference to the regular Walgreens price, whcih isn't much. But I also know that the hand sanitizer spray bottles are pretty robust, designed to spray a gel in a very fine mist. That fine mist is what I'm looking for. The Stampington spray bottle I've used spatters, I think it's supposed to but I find the effect annoying. I also wanted to find a new use for something a lot of people might already have around. I know a lot of people use these spray bottles. They are designed to be tossed around in a purse so I know they are sturdy and don't leak as long as the cap is on it. Also as something that is designed to hold something that is alcohol based I know it will stand up to the abuse well. Not everything will tolerate the abuse of alcohol. Also these little hand sanitizer bottles only hold .75 ounces of fluid.

IMG_1447

IMG_1450

IMG_1452

Also, thought not pictured I mixed a 50/50 mix of alcohol and india ink in a Stampington spray bottle and holy shite it's awesome. Anyway, everyone should try this. the total cost for me was about $25 for 6 colors not including the india ink.

Somethign else that is great that you could get extra spray bottles and mix colors- 10 drops yellow, 20 drops green for yellow green or 10 drops glue and 20 drops green for blue greens. You could create a completely individualized line of colors for your journal. ALSO you can remix fast and easy. It would take a long time to go through those refill.

*Do this step in a place where your floors are an easy clean up, becuase if you are like me and knock over your RED sprayer before you get the cap on it, it makes  a god awful mess. I can't image what it would do to grout. This stuff stains. However as it is alcohol based alcohol and the saved hand sanitizer does a great job of lifting it off hardwood. Trust me I know, it came off my oak floor very well. I'm really glad I have down a vinyl sign as a safety mat for my slobbery.

Totem Doodle

I found this website via the Doodler's Anonymous twitter. It's epically cool and makes you think of what you can draw in a small square. My high school art teacerh (Mrs. Friedman) had an exercise where you were asked to grid off a page in 1 inch squares, it had tobe precise, she checked it, then in each square you had to make marks, had to come up with as many different marks as possible. You scored better if your marks were all diddferent or you came up with ideas to make the grid work with itself. You could cross your lines (no crosshatching and no scribbles). It's a great exercise for a lot of different work. I feel li ke the totem project is a rift on that.

Whe I'm partilarly blocked I go back to this or a riff on it. Sometimes I draw equal sized circles on a page in my journal and fill them in with marks or faces. I"ve also folded a sheet of paper into equal sized yet small sections and done the grid exercise. I'm not as militant about no scribbles or cross hatching, after all rules were made to be broken and the idea is to free myself to get out of the rut.

try making a few 2 inch squares in your journal, go ahead now fill them in…