Tag Archives: handmade

Hump Day Prompt #3- Reversable Water Based Media

Hdprompt

The prompt is open ended and deals only with the
material, subject and content are up to you, but the
material is dictated.

The next item to add color is watercolor or gouache. Both
are a type of water based paint. I love both for different reasons. Watercolor
allows you to create beautiful rich layers of color that are vibrant and pop of
the page. It’s hard to use and difficult to master. But they can be found cheap
and allow you to add color over inky lines. Gouache on the other hand is
thicker opaque and works more like a water based oil color than watercolor,
though it can be thinned to use like watercolors. It’s great for putting in
thick layers of color, toning pages and creating flat designs. It can also be
used to beautifully render subjects.

Prompt #3 Use a water based reversible media, pick one
watercolor or gouache. Subject is up to you.

Leave a comment with a link to your blog with pictures of what you’ve done!

New Hedgehog Moleskin

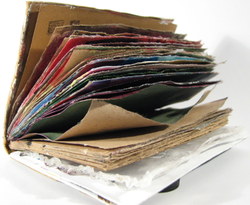
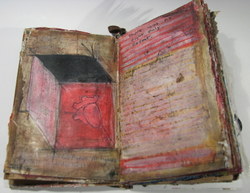
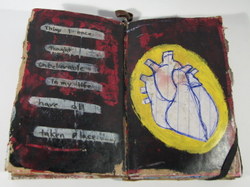
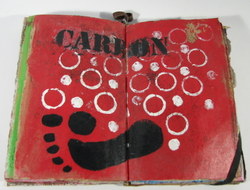
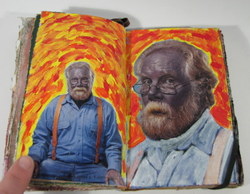
Immediately after finishing my last hedgehog/ moleskin I started a new one. This one has distressed brown and black sheep hide covers, is 3.5×5.5 in size and was entirely hand made by me. It got kraft paper pages which is something new for me to work on. I used rough wrapping paper kraft paper for the pages too so it has a great texture for drawing and such.

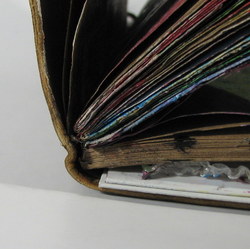
So far it has been taking every sort of abuse I can hand to it, thus far in this book, I’ve gesso’d pages in clear and white, tinted pages with acrylic, glued in magazine pages with matte medium, sanded gesso off the pages, added layers of magazine, acrylic and ink. I’ve scraped with a pallet knife and credit cards. I’ve wiped on and off with a rag. All in all this paper is tough as nails. Unlike the 140lb printmaking paper it does cockle a bit but after drying it smooths out quite a bit. I’m very pleased with the amount of abuse that this book has taken, and to think that this books was one I deemed unsalable because I screwed up and trimmed the cover short. (Note how far the fore edge pokes out from the cover. Looks good with this but not so good when first made.)

After you get done looking at these pictures head on over to my Flickr account and see more pictures. I didn’t load them all here because it takes longer but at flicker you can see all the spreads thus far that are in the book.

Img_5411

Img_5410

Img_5413

Img_5415

Img_5422

Img_5434

Wrap and Roll Pencil or Art Supply Case

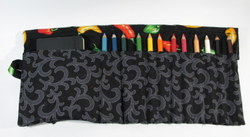
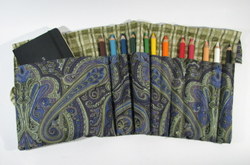
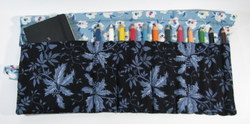
My mom kicks butt. She’s who I get a lot of my crafting ability from. Growing up she was always crocheting, knitting, cross stitching, or quilting. When she and my Dad came to visit this past holiday season, I suggested she use her crafting abilities to create a colored pencil wrap with 12 pockets for pencils and a pocket for up to a 5×7 inch notebook. She picked some awesome fabrics and made the pockets extra roomy. Here are some pictures:

Img_5359

Img_5368

Img_5380

Heres a little video of one:

Chapbook from 1999

I made this book in collaboration with a friend of mine. It is pretty much the only book I’ve made in collaboration with anyone. It’s a pretty simple Japanese stab style binding. Done with black cotton crocheting thread. The stations were bored with a dremel. The fore edge of each page is the folded edge of the sheet of paper. at the time of printing I had a ancient bubble jet. I was working some place where once a week I had unfettered access to the photocopy machine… I made zines then too. I printed the text, took it to work, copied the pages onto my really nice paper took them home and printed by hand all the little block prints then collated and folded every book, clamped and drilled holes then stitched it all up. The whole process took a long long time. My friend and I were mailing back and forth a notebook with the images and text, until we had everything agreed upon, then I typed it all up and emailed it to my friend, she tweaked the text, then I made it fit onto the page.

I’ve got to say that this was a great project, I love how the final product came out. I think we made a total of 100 books. The cost was a lot though. I was really poor at the time of us making this as was my friend, I want to say that we spent about $50 getting this thing going and never made any money on it. I still have a stack of the books. I sold a few on eBay and my friend had the other half of them and I’ve still got a stack of them.

I still thing that they are really cool.


coptic bindings a bunch of styles and a cautionary tale of DayQuill and Movie Marathons

On Tuesday I found a few old posters at work, I asked the
representatives about them, if they were to be used again all said no and that
I could have them. I knew that at least one of the posters was at least 3 years
old, the other at least 3 seasons old. I knew in advance that they wouldn’t be
used again. Bringing them home I tried to figure out what I was going to do
with them. I knew that I wouldn’t be able to glue to them- one was a thin sheet
of plastic and the other typical vinyl coated ad glued to thin foam core.
Neither of which would take glue well, I knew it was going to have to have
Coptic stitching to use these posters.

SO I cut them all up, somewhat randomly to 3.5×5.5 inches
and then punched a series of 4 holes in each cover. I also matched up the
covers with some recycled backer board (very much like book board) that I had
saved from packages of tags also from work.

I expected that I wouldn’t have a chance to work on any of
these books until Friday, when I was to have my 2 days off. Instead I caught my
significant other’s cold and I have been sick and I’m still ill. It’s one of
those head colds where concentration is difficult and “stuff” comes from
sinuses. Let us not talk about that. Let’s talk of pleasant things like Coptic
stitching.

It’s been awhile since I’ve done any style of Coptic stitch,
other than long stitch. I’ve been quite caught up in this recycled thing. So
I’m out of practice and on the first 2 books I made, it shows. The first one I
made was a standard 2-needle sewing done twice. The first set of stitching went
well and looked great. I started the second set and it went well until the last
signature. Where I forgot myself (James Bond Double OH Days of Christmas on
Spike- my favorite cold weather TV marathon) and pulled in the wrong directions
with too much tension. The combination of DayQuill and James Bond made me want
to find a bad guy to toss it at to distract while I got away… (Only partially
kidding, DayQuill does make me a little loopy.) I patched it up and cursed the
fact that I had tied off the other set of stitches already, because if I hadn’t
I would have been able to simply remove the bad signature and attach the cover.
Ah well. See some pictures of my mistakes below.
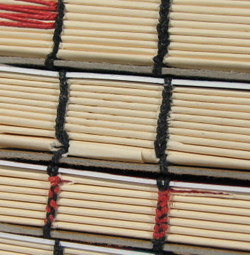
Img_5243

The next mistake I made was when I decided to attempt a
particularly difficult Keith Smith stitching where you attach the covers to
each other first and then stitch on as if you are sewing onto cords. Instead of
attempting this sewing with a single cord I attempted it with a double cord and
a pack. Here again I blame the DayQuill for giving me a sense of ability far
beyond my 2 year lay off from a stitch. It’s far better to practice a stitch a
few times before attempting it on a cover you like. It’s also better to
practice on easier stitched before attempting something so… Difficult. (Before
anyone leaves a message scoffing at the difficulty of said stitch I implore you
to go take a dose of DayQuill, fill your nose with mucus, smack your head with
a hammer and get back to me after attempting any stitching.) Again check out
the picture below. I realize now looking at the picture that though I wanted to
do a loop and pack I didn’t pack as I had intended. Go figure.
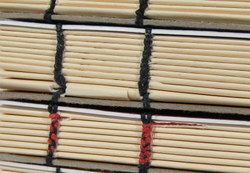
Img_5242

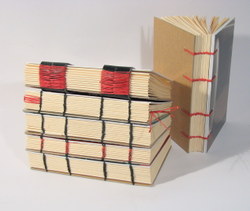
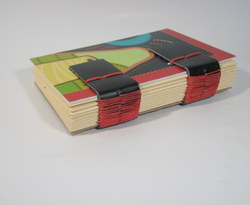
The next 4 books were very successful 2 single needle
coptics, one with a larkspur and braided linen book marker, one double needle
stitch twice on the spine and a particularly interesting spine with black
leather “split tapes” with a stitch and pack on them. The leather is then
stitched onto the cover. For all the work that book was it’s my favorite. I
love the binding and it just looks great. The red on black is a great
combination and the dense heavy stitching is fantastic as well.
Img_5241


Img_5250

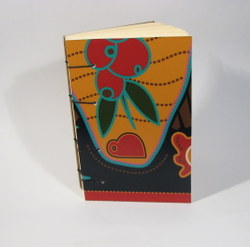
I fell in love with the book with the coffee cup and coffee
beans. I managed to punch the holes on it upside down but still I love the
cover and I’m keeping that one for me, a little feel better soon gift to
myself.
Img_5278

Each is filled with 200 pages of Wausau opaque in ivory,
unlined, acid free paper. I cannot vouch for the archival or acid free nature
of the covers. I did test the backer board and it is lightly acidic. The
stitching is all done with hand waxed Irish linen thread, unbleached but dyed.
The 3 books without imperfects will be up on etsy later today and I’m deciding
what to do with the 2 books with imperfections. I’m considering putting them up
on eBay as a set. Or maybe something fun.