Tag Archives: sketch

Technique Today: Drawing and Sketching

No joke, I love to draw in my art journal. Sketches, doodles, all sorts of neat stuff can go in there. But what to sketch, how to sketch? Hopefully, these videos will help give some guidance.

If you have an issue watching the videos here on my blog you can click the title of the video (top left of each video) and it will open up in youtube for you.


Continue reading

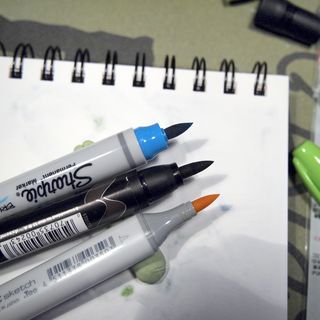
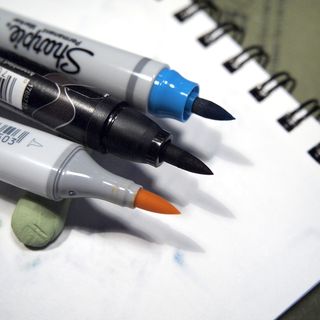
Review: Sharpie Brush Markers

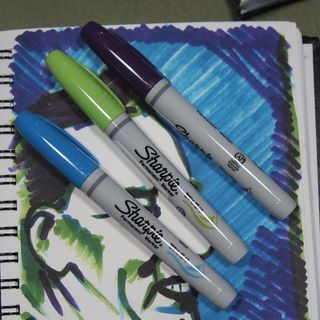
I purchased a few Sharpie brush tip markers to play around with after trying the prismacolor brush markers a few weeks back at the Sketchbook Project. For $1.50 each they were a great way to get my Jetpens order over the $25 mark for free shipping. YAY!

Out of the envelope they look a lot like any other Sharpie, a little chunkier and with some grooves on the cap. The end is hollowed out and there is a ring around the end of the marker. This lets the cap click onto the marker when you post it. Smart. Without posting the marker I found it a tad short to use. Posted it was just right. The markers are light weight.
P8104693
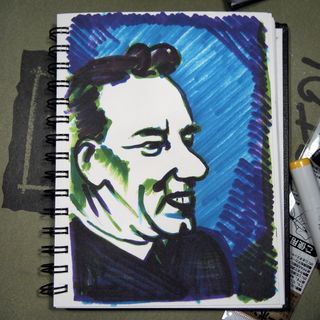
The marker tip is short, relatively stiff, yet pretty responsive at the tip. It’s not as springy as a Prismacolor or Copic brush tip but it does the job. I did a few quick sketches with the markers in my Stillman and Birn Beta sketchbook. The paper is a slight cold press finish. The Copic and Prismacolor handle this paper without complaint, the Sharpie is already looking fuzzy. I will admit to being less gentle with my brush tip markers, but in my opinion that’s exactly what these cry out for. Instead of drawing with brush tip markers I try to paint with them.
P8104698
P8104698
So that brings me to my next round of inspection, layering. Copic and Prismacolor markers are designed to layer over one another to build up color, so it’s much like working with watercolors. Sharpies tend to stand on their own. Each layer of color turns the tone darker and darker, without subtle shading. Sharpie brush markers are best for bold expressive shouts of color. Finding a Sharpie brush marker in yellow proved to be an impossible task, unless one buys the set of 12. *sigh* So I bought a Copic sketch in yellow.
P8104694
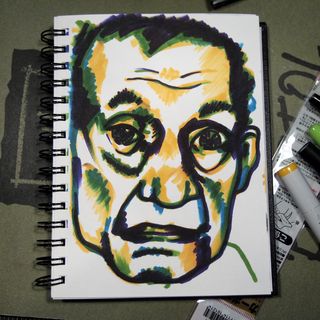
These will write on just about anything, just  like a regular Sharpie. They do seem a tad juicier than regular Sharpies, so might be a good choice for acrylic paint. Just be aware that if you write over gesso with these you’re pretty much going to scrub that brush tip. I found these really fun for fast observations and sketches. The 2 sketches I’ve shown here took all of 10 minutes each. These brush tips really allowed me to lay down a lot of color fast. You’ll notice there isn’t a lot of subtlety though. Sharpies lay down bright bold lines and lots of ink.
P8104695
P8104695
These are a great choice for someone who doesn’t want to invest in Copics or Prismacolors but wants that brush tip marker experience, they just need to be away it’s not going to be quite as good. Keep in mind they are probably not lightfast and are certainly not archival. Get them online at Jetpens.

Another Midori Traveller Notebook Knock Off Idea

I wanted to add 2 more journals to my MTNKO. I saw a blog post somewhere, I cna't remember the blog that added a additional pockets to the notebook through the use of a rubber band. I decided to use that idea to add 2 more notebooks. I wanted to have my general idea notebook, a notebook for PioP and another sketchbook. To do this hack you'll need the following:

A medium length thin rubber band or a loop of the elastic you used to make you MTNKO

2 Notebooks

Slide the rubber band through the center of one notebook then the other,so they are attached spine to spine. Slide one notebook under the notebook already in your MTNKO.

Here's a helpful video of the process.


State of the Weekend

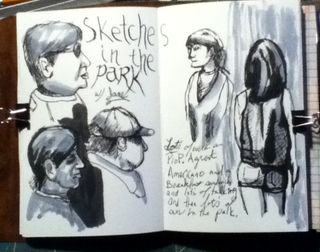
It’s been a crazy few weeks. I had to help count inventory a while back for the DayJob and it threw me for a loop. I’ve been trying to get back on track ever since I was sick and having my schedule screwed up really just put me back to spinning my wheels in the rut again. This weekend was a good one for getting me back into the flow of things. Jane and I met and had a good cuppa at one of my favorite places, Atomic and then we took a walk in the park here in town. Where I sat and sketched and we talked about PioP, which is shaping up to be really really cool. I can’t wait for the reveal of what it is. It’s going to be awesome.
Photo1
This is the first sketching I’ve done in awhile. I could make a lot of excuses but I won’t. Honestly life has been flying at a million miles an hour and I find that instead of sketching or arting I make a few notes in my journal or veg out watching Hulu* at the end of the day. Fortunately though those notes are all forward progress, important tidbits of information. I’m looking forward to sharing those with you once everything is in place.
P4154086
I picked up a copy of Kerri Smith’s new book, “Finish This Book.” I’ll have a review on it here soon.I’ve also picked up a bunch of new fountain pens, some inks, a brush and a few other odds and ends. Hopefully this week I’ll get to writing up a bunch of reviews. That means I’ve got Thursdays covered. Hopefully I’ll be back on track with my blogging as well as my journaling. I've also been attempting to practice some "ultra light weight" journaling/sketching. It's centered around my Midori Traveller knock off. I"ll get a post up about that too. Lots of good stuff is in the works.

Continue reading

Midori Traveler Style Notebook

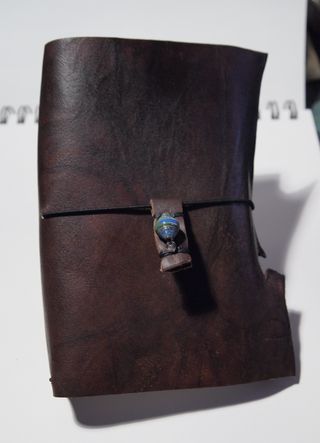
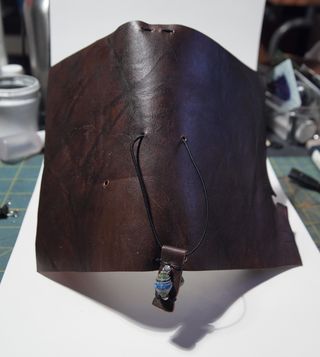
I've been using a knockoff of the Midori Traveler notebook system for about a year now. I decided to make one for a friend and while I was working on it  I tried a few things and really liked how it turned out. I then decided to make myself  a new one and a pocket sized version.

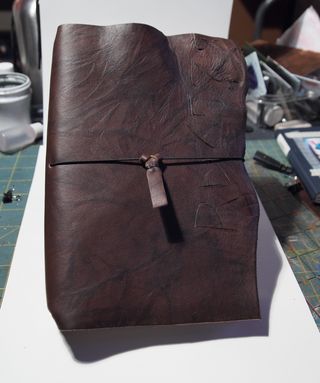
P4074033
I really like how deep and dark the leather is and how supple it's surface is while remaining stiff. I can't wait to put these through the ringer! For the large I used an edge of the hide that had numbers and letters cut into the surface. I buffed a ton of cold wax into the surface, which I used a light iron to heat into the leather, to really deeply impregnate it with the wax

P4074027
P4074027
This time instead of punching a hole directly through the center of the cover I made 2 holes, one on either side of the "spine" area. This lets me use a smaller knot and I like how it holds things together.

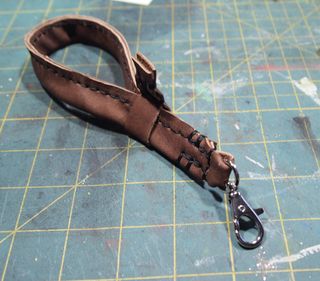
While I was at it, I figured I'd make myself a strap for my camera. I made it a touch too long but  I do like it. The hardest part was finding a heavy duty clasp to hold it to the camera.

P4074021
Some construction notes: For thelarge notebook I started with a 9×13 inch sheet of leather and then trimmed it once I had the cover constructed. For the small I started with a 6×9 inche sheet of leather, which I again trimmed down excess once I had the elastic installed. In both of mine I'm using my own notebooks but the small would hold any 3.5×5.5 inch notebook, like a Moleskine Cahier, Doane pocket notebook, Bandit Carnet, field notes etc… Any of the small pocket sized notebooks would fit in the small size, and likewise for the large, any 5.5×8.5/9 inch sized notebook would fit.

Another Cowboy

Another Cowboy

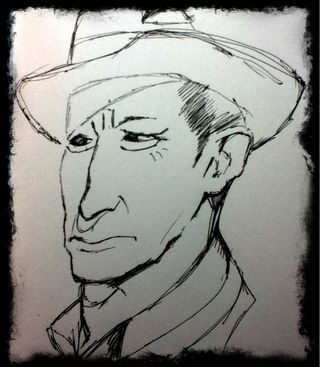
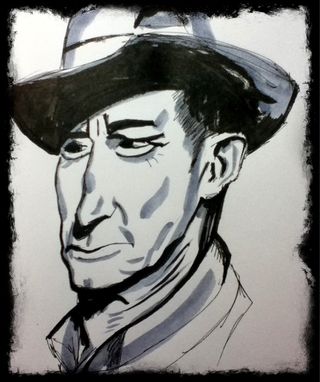
I thougth I'd show you another cowboy drawing. I started this guy the same as the last- with the Pilot Technica .04, quickly scratching out the basic lines. This image is about 5×7 inches just a little larger than the last few drawings I've loaded up.

Another Cowboy

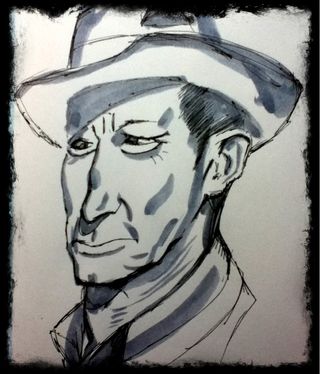
After that I added the shades of gray, using layers to get darker shades of gray.

Another Cowboy

Finally I added black with the brush pen.

Obviolsly I'm totally digging these brush pens. I've found a figure drawing class and I think i'm going to go and draw with this pen combination. Additionally, I've used the Loew Cornell pens I reviewed here with this technique and it's pretty cool when they bleed into the gray ink. Also the pens are way more comfortable when used for drawing than when writing.

Review: FlexiSketch Sketchbook

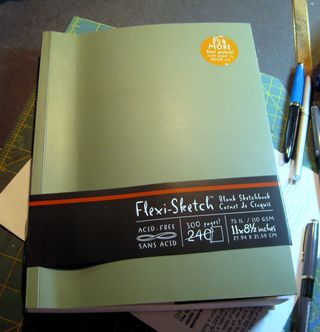
I picked up this sketchbook on sale at Artist & Craftman. It was super affordable, more so than usual. It usually runs in the $10 to $15 range. The 8.5×11 inch sketchbook feels weighty in hand and looks nice. The green color is a soothing soft mossy green they call "Fern." I’m annoyed that the 25% more FREE stick is stuck to the cover and doesn’t peel off easily. I’ll be hacking at it with a knife to get it off. After opening up the package I notice it’s Smythe Sewn like a moleskine so it will open flat and flatter the more I use it. The binding is nice and flexible but the wrap around cover on the spine is less so.

IMG_4334

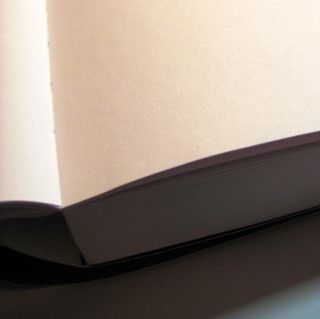
The paper is bright white, thick and sturdy feeling, 75lb/110gsm. There are 300 pages or 150 sheets. It has a soft texture and is nice with pencils. Wider nibbed pens glide over it’s surface but narrow nibs sink into it’s surface a little. The paper is absorbent with ink and watercolor. I didn’t notice any feathering with ink but most pens looked to be about a size larger than on other paper. I noticed some ink soaking through as I sketched and wrote. Nothing major since I didn’t plan on using both sides of the paper anyway. This isn’t a deal breaker if you use dry media like pencil or charcoal. The fact that the paper soaks ink up like a paper towel is annoying, and if I were using expensive ink, would annoy me.

IMG_4336


IMG_4336

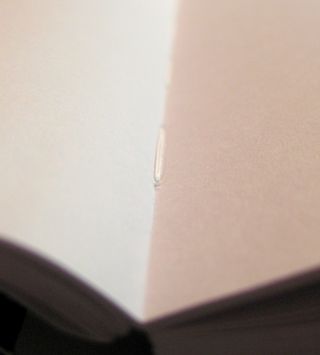
The cover is thick cardstock with a glossy finish. It scuffs easily, but I don’t mind that. If you are the sort who would like to decorate your art journal you’ll need to sand the surface to get gesso to stick. I managed to pop the glue that holds the back cover to the block off. Rather annoying but it also let me see the spine and that it’s glued sturdily and will survive a lot of abuse. This also makes me think I could cover this journal with little work

IMG_4335

Overall my verdict on this is that this sketchbook is a great value. The paper isn’t optimum for ink but it’s thick and sturdy enough to withstand pretty much anything an art journaler can throw at it. The paper has a nice surface for a variety of media. While pen does soak through in some spots it looks fantastic on this paper. I’d buy it again.


Observation: Looking Back into Old Journals

I was looking through one of my older moleskine sketchbooks specifically the one I started writing in then I first moved to Massachusetts. One of the thigns that I wrote about a lot was simplicity. I had lived in a small 3-ish room apartment in the woods of Maine. My apartment was essentially 1 large L-shaped room, a half wall divided the kitchen from the living “room” and a wall with a doorway divided the kitchen from the bedroom. There was no door on the bedroom. The only room that had a door was the bathroom, which housed a shower stall, toilet, sink and a bunch of shelves. Total square feet of the apartment was maybe 600sq ft. If the walls had not been vaulted it would have been awesome.

When I moved to Mass the apartment I moved into wasn’t much larger. Over the years we moved from about 600sq ft to about 700 sq ft and now we are in a 1200 sq ft house, we’ve got about 300 to 500 sq ft we don’t use all that often. Sometimes I feel like it’s too much space and other times I feel like it’s not enough. I am really thankful we’ve got a garage and a basement, both of which feel decadent after years of living without a space to work on bikes, engines and greasy things that don’t belong on kitchen or coffee tables.

I feel like I need to revisit this simplicity concept . It’s not like we live extravagantly, simplicity is something I strive for, but sometimes I get caught up in ridiculousness and making things more complex than they need to be. I need to cut that out.

I tend to think of simplicity as going hand-in-hand with organization. As I look around my office I think perhaps I should start here and work my way out.

On a side note anytime I think of simplicity I have to think of my art and what materials I would work in if I could only chose a few supplies to keep with me. I have to say I’d probably go with pen and ink with watercolor. It gives me color and the ability to draw.

If you could only pick 3 art materials to use for the next 6 months what would you use?
Gear Shift

Sometimes it's good to break  up the usual with something unusual. Some of you may know that I dabble with creating my own messenger bags from recycled materials. A few months back I made my own messenger bag by chopping up an piecing together tyvek mailers from fedex and the USPS. It came out fab, soft and sturdy. It's showing a few signs of wear but over all as a proof of concept it's worked brilliantly.

I learned a lot from that bag, and I'm applying that to another recycled idea- you kn ow those recycled reusable grocery bags? Those are a great sturdy fabric. We had a bunch that were chopped up to make a display and a few more that were returned for recycling (they can go into plastic bottle recycling!) and I realized they would make fantastic fabric. So I brought them home and chopped the bags into 2 inch strips aand then stitched and top stiched those into 14 inch wide by 24 inch panels. I purposefuly went with 2 inch strips rather than 4 or 6 so that all logos and words would be unrecognizable.

I'm still working out in my head how I want this bag to be, I know  I need some internal pockets, because summer is coming fast and I won't wear a jacket, so I need places to stow my phone and keys.

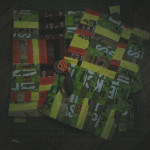
Here's a spectacularly crappy photo of the panels:

Recycled reusable shopping bags made into panels for a messen... on Twitpic

As you can see it's pretty bright, which is drastically different from my Fedex bag, which is mostly white and very understated. I htink I'm going to need to do edging on this, so I might head to Joann's this weekend with my Mom to see what kind of edging they have. I'm also going to need sturdier pins, I've bent a bunch on this stuff! It's much tougher than the tyvek.